Workshop: Introduction to programming (with Python)
(Generally, this workshop is offered at least once every week on a rotating basis. Check the DaBL calendar for up-to-date availability!)
Contents
Python
Some Beginner Questions:
- What do you know about Python?
- Do you have any previous experience with Python or other programming languages?
Python Basics:
- Python is a flexible, high-level, procedural scripting language.
- It offers support for object-oriented programming and integrating libraries.
- It's super widely adopted!
Welcome to Introduction to Programming!
Setting up your work station
- Download Python - You can download it here
- Check that your installation was successful - We will do this by checking the version of python we just downloaded. We can do this by opening up our command prompt and simply typing "python --version". If you did everything right you should see a message that looks something like this: "Python 3.7.3"
- Let's test our distribution - Let's get our first introduction into Python programming by making a hello world file.
Basic Hello World Program
A hello world program is the most basic program you can write to test that your distribution is working smoothly.
- Open a text editor - This is where we will be writing all of our code. There are many different editors you can use, so feel free to choose the one you are most comfortable with. The only requirement is that the text editor should be able to product plain text files. Windows users already have Notepad installed. Mac users have TextEdit (other text editors include TextWrangler, Atom, and much more).
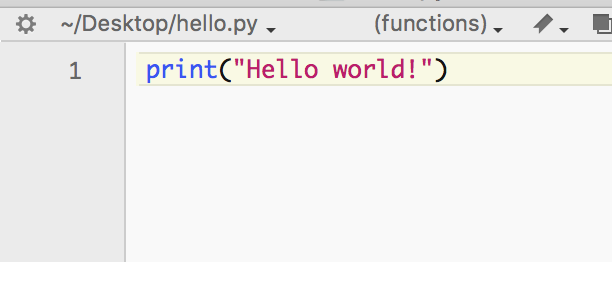
- Write your code - To make this program as straightforward as possible we will simply write a print statement. After writing your print statement save the file to your Desktop (or whatever other directory you want) as "hello.py". All python files need to have the extension .py
- Execute the code - Now is the fun part, running the code! Open up the command prompt (Terminal for Mac Users, Powershell for Windows). Navigate to the directory where you saved the file (ex: cd Desktop). Now execute your python code by typing "python [filename]"
Interactive Python
According to wikipedia, "Interactive mode is a command line shell which gives immediate feedback for each statement, while running previously fed statements in active memory. As new lines are fed into the interpreter, the fed program is evaluated both in part and in whole". Essentially what this means is Interactive Python is good for quick testing and debugging in the command line. Enter it simply by typing "python" and then hit enter.
Variables
Now that we understand the basic workflow of python (create code in text editor → execute in command prompt), we can start discussing the different functions and capabilities of Python. We can start this discussion with variables. You can think of variables as the objects that store information for our program. A variable has two basic parts; A name (which we will use to refer to the variable) and A value (the info we care about). Besides those two parts, variables can hold different types of information.
Types Of Variables
- Strings - A sequence of characters (ex: "Python is fun!")
- Integers - Whole numbers (ex: 3, 10, 999)
- Floats - Numbers w/ a decimal (ex: 1.0, 3.14, 7.77)
- Boolean - True or False
- Lists - A sequential list of other variables (floats, integers, strings, more lists, or a mix) (ex: ['cat', 'dog', 999, 3.14, variable1])
Defining Variables
One of the great features of Python is that the built in compiler can intelligently figure out what type of variable your specified variables should be and takes care of this distinction automatically. This means defining variables is easier in Python than some other languages you may be familiar with. We define a variable by writing its name, followed by an equal sign, followed by the value of the variable (ex: pi=3.14, name="Dylan", eq="3+4"). We can also define variables without setting the values immediately. To do this we need to tell the compiler what type of variable we need (since it can't figure it out automatically) (ex: int pi, str myName)
Important Note: The standard naming convention of variables follows: The first word is always all lowercase then the proceeding words begin with an uppercase letter (ex: myVariable, reallyAwesomeInteger). You don't need to follow this convention, but it is worth knowing.
Updating Variables
To update a variable (change it's value later on in the code) we simply need to redefine it's value. You can do this by:
variableName = [new value]
Casting Variables
When we get into more complex implementations our variable type will become very important. Ask yourself 'what is the difference between these two codes?'
- float sum = 1.5 + 3
- int sum = 1.5 + 3
Answer: 1.5 + 3 = 4.5 but 4.5 is a float value. So for code #1 the answer is 4.5, but the "sum" variable in code #2 is an integer so the answer will be rounded down to 4.
It because of cases like these that sometimes we implement a technique known as casting. Casting simply means converting the type of information a variable holds. With casting we can turn an int to a float, float to an int, str to an int, etc. We cast by writing the variable type we want ("float", "int", "str", etc.) followed by the variable/value we want to cast enclosed by parenthesis.
Examples:
- float(3) → 3.0
- int(2.9999) → 2
- int("1964") → 1964
Lists
In Python a list is indicated by square brackets and commas. Define a list like any other variable, except enclose all the list elements in square brackets and separate them by commas. For example: myList = [var1,var2,var3]. The elements of a given list can be recalled by typing the name of the list followed with the index of the item enclosed in square brackets. For example: myListLists[0] ⟶ var1. Lists can be modified during runtime with methods such as these:
- myList.append(x) - Adds a new element (x) to the end of the list
- myList.remove(x) - Removes the first item with the specified value (x)
- myList.index(x) - Returns the index of the first element with the specified value (x)
- myList.insert(x) - Adds an element at the specified position (x)
- myList.clear() - Removes all the elements from the list
(We will discuss what methods are in a later section.)
Basic Operators
Arithmetic Operators:
- Addition (+) - Adds values
- Subtraction (-) - Substracts values
- Division (/) - Divides values
- Modulus (%) - Divides values and returns the remainder
- Multiplication (*) - Multiplies values
- Exponent (**) - Performs an exponent
- Equal (=) - Sets a variable equal to a value
Comparison Operators:
- Is equal? (==) - Checks if two variables have an equivalent value
- Is not equal (!=) - Checks if two variables have different values
- (>, <) - Greater than and lesser than
- (>=, <=) - Greater than or equal to and lesser than and equal to
- IS - Checks if two variables are the exact same (share the same memory location)
Logical Operators:
- AND or & - If both the statements are true then condition becomes true
- OR or | - If any of the statements are true then condition becomes true
- NOT - Used to reverse the logical state
- IN - Checks if an element exists inside of a sequence (or list)
Methods
The next major thing to learn about Python is methods. Methods are functions that act upon objects and variables in your code. You can use methods to obtain information about variables/objects or update their values. And the syntax of a method goes as follows:
[name of object/variable].[method](value)
You can learn about all the different methods for your variables and objects by exploring the documentation of python (or which ever library you are using).
Here are some methods you can use on different variables in Python:
- String - capitalize(), lower(), upper(), find()
- Int/Float - abs(), long(), pow(), round()
- List - append(), count(), pop(), sort(), reverse()
If Statements
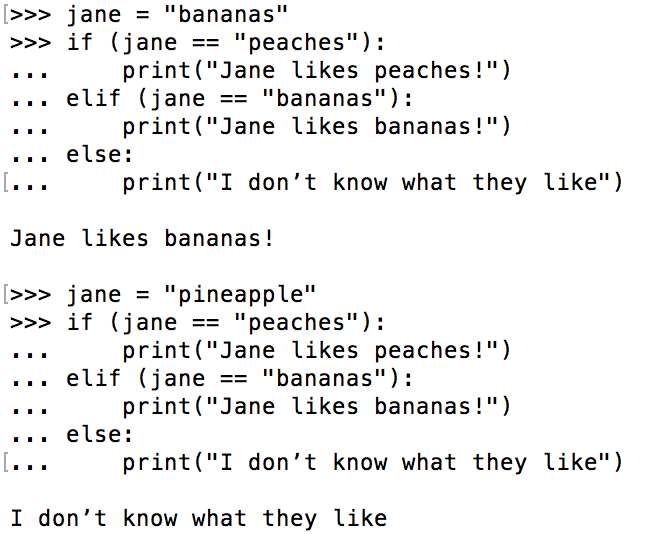
The if statement is the next key concept to learn. If statements allow our programs to make decisions at run time. This means we can run certain code if a requirement is fulfilled, and if we want, run different code if the requirement is not met. More simply we can say, "If this, then that".
Each 'requirement' is a statement that must evaluate to true or false. These statements can take many different forms and rely on the basic operators we learned earlier. So we can ask if a variable is greater than, less than, equal to, etc. a value (if (variable==0)). We can write equations (if (a**2 + b**2 == c**2)) or even use logical operators (if ((player1 OR player2) NOT IN list)).
It is important to remember the syntax of these statements. Each statement should be enclosed in parentheses and followed by a colon. The code block that you want to run should occupy the line directly below the statement and be indented.
Okay, now we know how to run code if our statement is true. Now how do we do tell the program what to do if the statement is false? What if we have multiple criteria to check? This is where else and elif statements come into play. Multiple elif statements can be placed directly under the if statement. They allow you to write additional statements that will be evaluated only if the if statement isn't fulfilled. The else statement goes at the end of your if statement (and elif statements if you have them). Simply put, the else statement will run a code block only if the elif and if statements aren't fulfilled.
Loops
One of the most important concepts in procedural programming is the loop. Like the name suggests, a loop simply iterates through some selected lines of code a certain amount of times. In Python there are a few different types of loops you can choose from, they are:
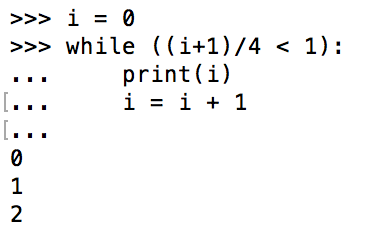
- While Loop - Like the name suggests, a while loop repeats a block of code while a certain expression is true. This kind of loop is useful when we don't know how many times a loop will actually execute at runtime. The While Loop is composed of two parts; the loop statement and the code block to repeat (indented). The syntax looks like this:
while (statement):*code to repeat*
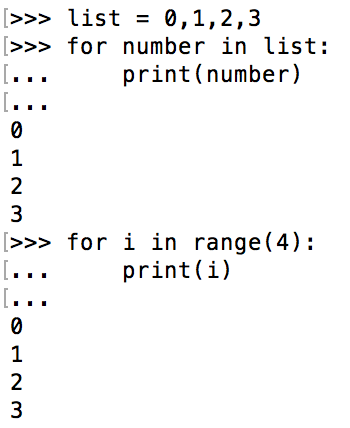
The while loop will loop over the code block until the statement in parentheses equates to false. The statement can be an algebraic equation or variable. (ex: (n+1)/4 == 1) - For Loop - This loop will run once for each element in a list. This kind of loop is useful when iterating over loops and arrays or when we know exactly how many times the code block should run. There are two main ways to use the for loop.
- To iterate over a list - Will run the code block once for each element in a list. You can reference the element data during each iteration by putting an element name after "for". Example of this syntax can be seen below: for element in list: *code to repeat*
- To iterate a certain number of times - Use Python's range function to repeat the code block a certain number of times. The syntax for range is: range (start, stop[, step]). Just like in the other type of for loop, you can reference each element of the range function but naming it. The syntax for this for loop goes: for (element in range(start, stop[, step])): *code to repeat*
- To iterate over a list - Will run the code block once for each element in a list. You can reference the element data during each iteration by putting an element name after "for". Example of this syntax can be seen below: for element in list: *code to repeat*
- Nested Loops - Loops can be nested inside of each other! For each iteration of the outer loop, the entire contents of the loop will be ran to completion (including other nested loops).
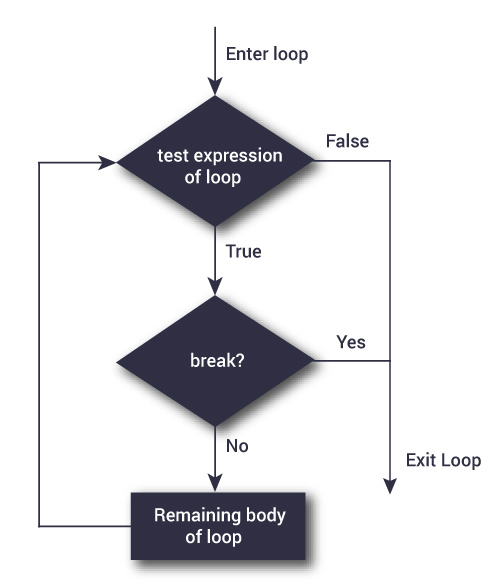
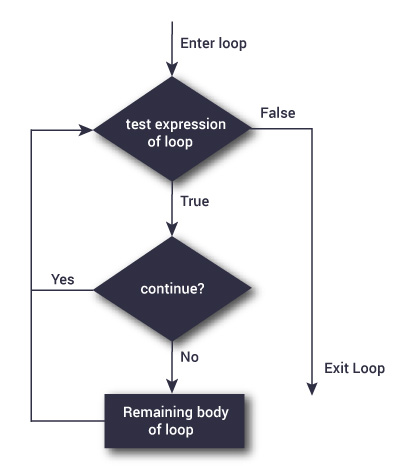
- Breaks and Continues - "Break" and "continue" are statements which can be placed inside of a loop to modify the loop for special cases. Break is used to break out of (or exit) a loop. Continue is used to stop the current iteration of the loop and start again from the beginning.
Magic Conch Demo
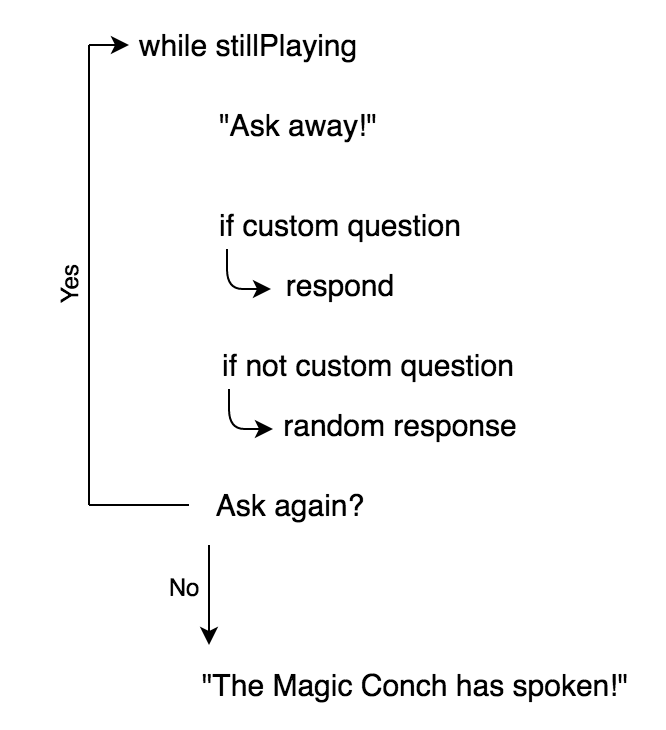
Together we will build your first real program, a magic conch shell demo (Magic 8-Ball). This project will combine all of the information we just learned.
The picture to the right outlines the basic logic of our program.
The link to the example code is here.
Other Educational Resources for Python
- The Official Python Documentation - https://docs.python.org/3/
- Tutorials - https://thepythonguru.com
- Challenging Math/Computational Problems - https://projecteuler.net
Workshop checklist
Learning Objectives
By the end of this Workshop, you should:
- be able to explain the purpose of programming languages.
- understand the difference between a script and the interactive shell.
- know the basic functionality of programming languages: sequencing, selecting, and iterating.
- have a basic understanding of computational thinking.
Measurable Outcomes
By the end of this Workshop, you should be able to:
- run Python scripts on your system
- use the interactive shell on your system.
- utilize the basic parts of a program: variables, objects, and functions.
- code and test a program which accomplishes a small task.
