Difference between revisions of "Type A Series 1 Pro 3D printer Maintenance"
(Added the words for the pictures) (Tag: Visual edit) |
(→Changing the Hotend) (Tag: Visual edit) |
||
| Line 13: | Line 13: | ||
#Adjust Z-Axis if required | #Adjust Z-Axis if required | ||
| − | + | ==Changing the Hotend== | |
*'''Remove''' all filament | *'''Remove''' all filament | ||
| Line 23: | Line 23: | ||
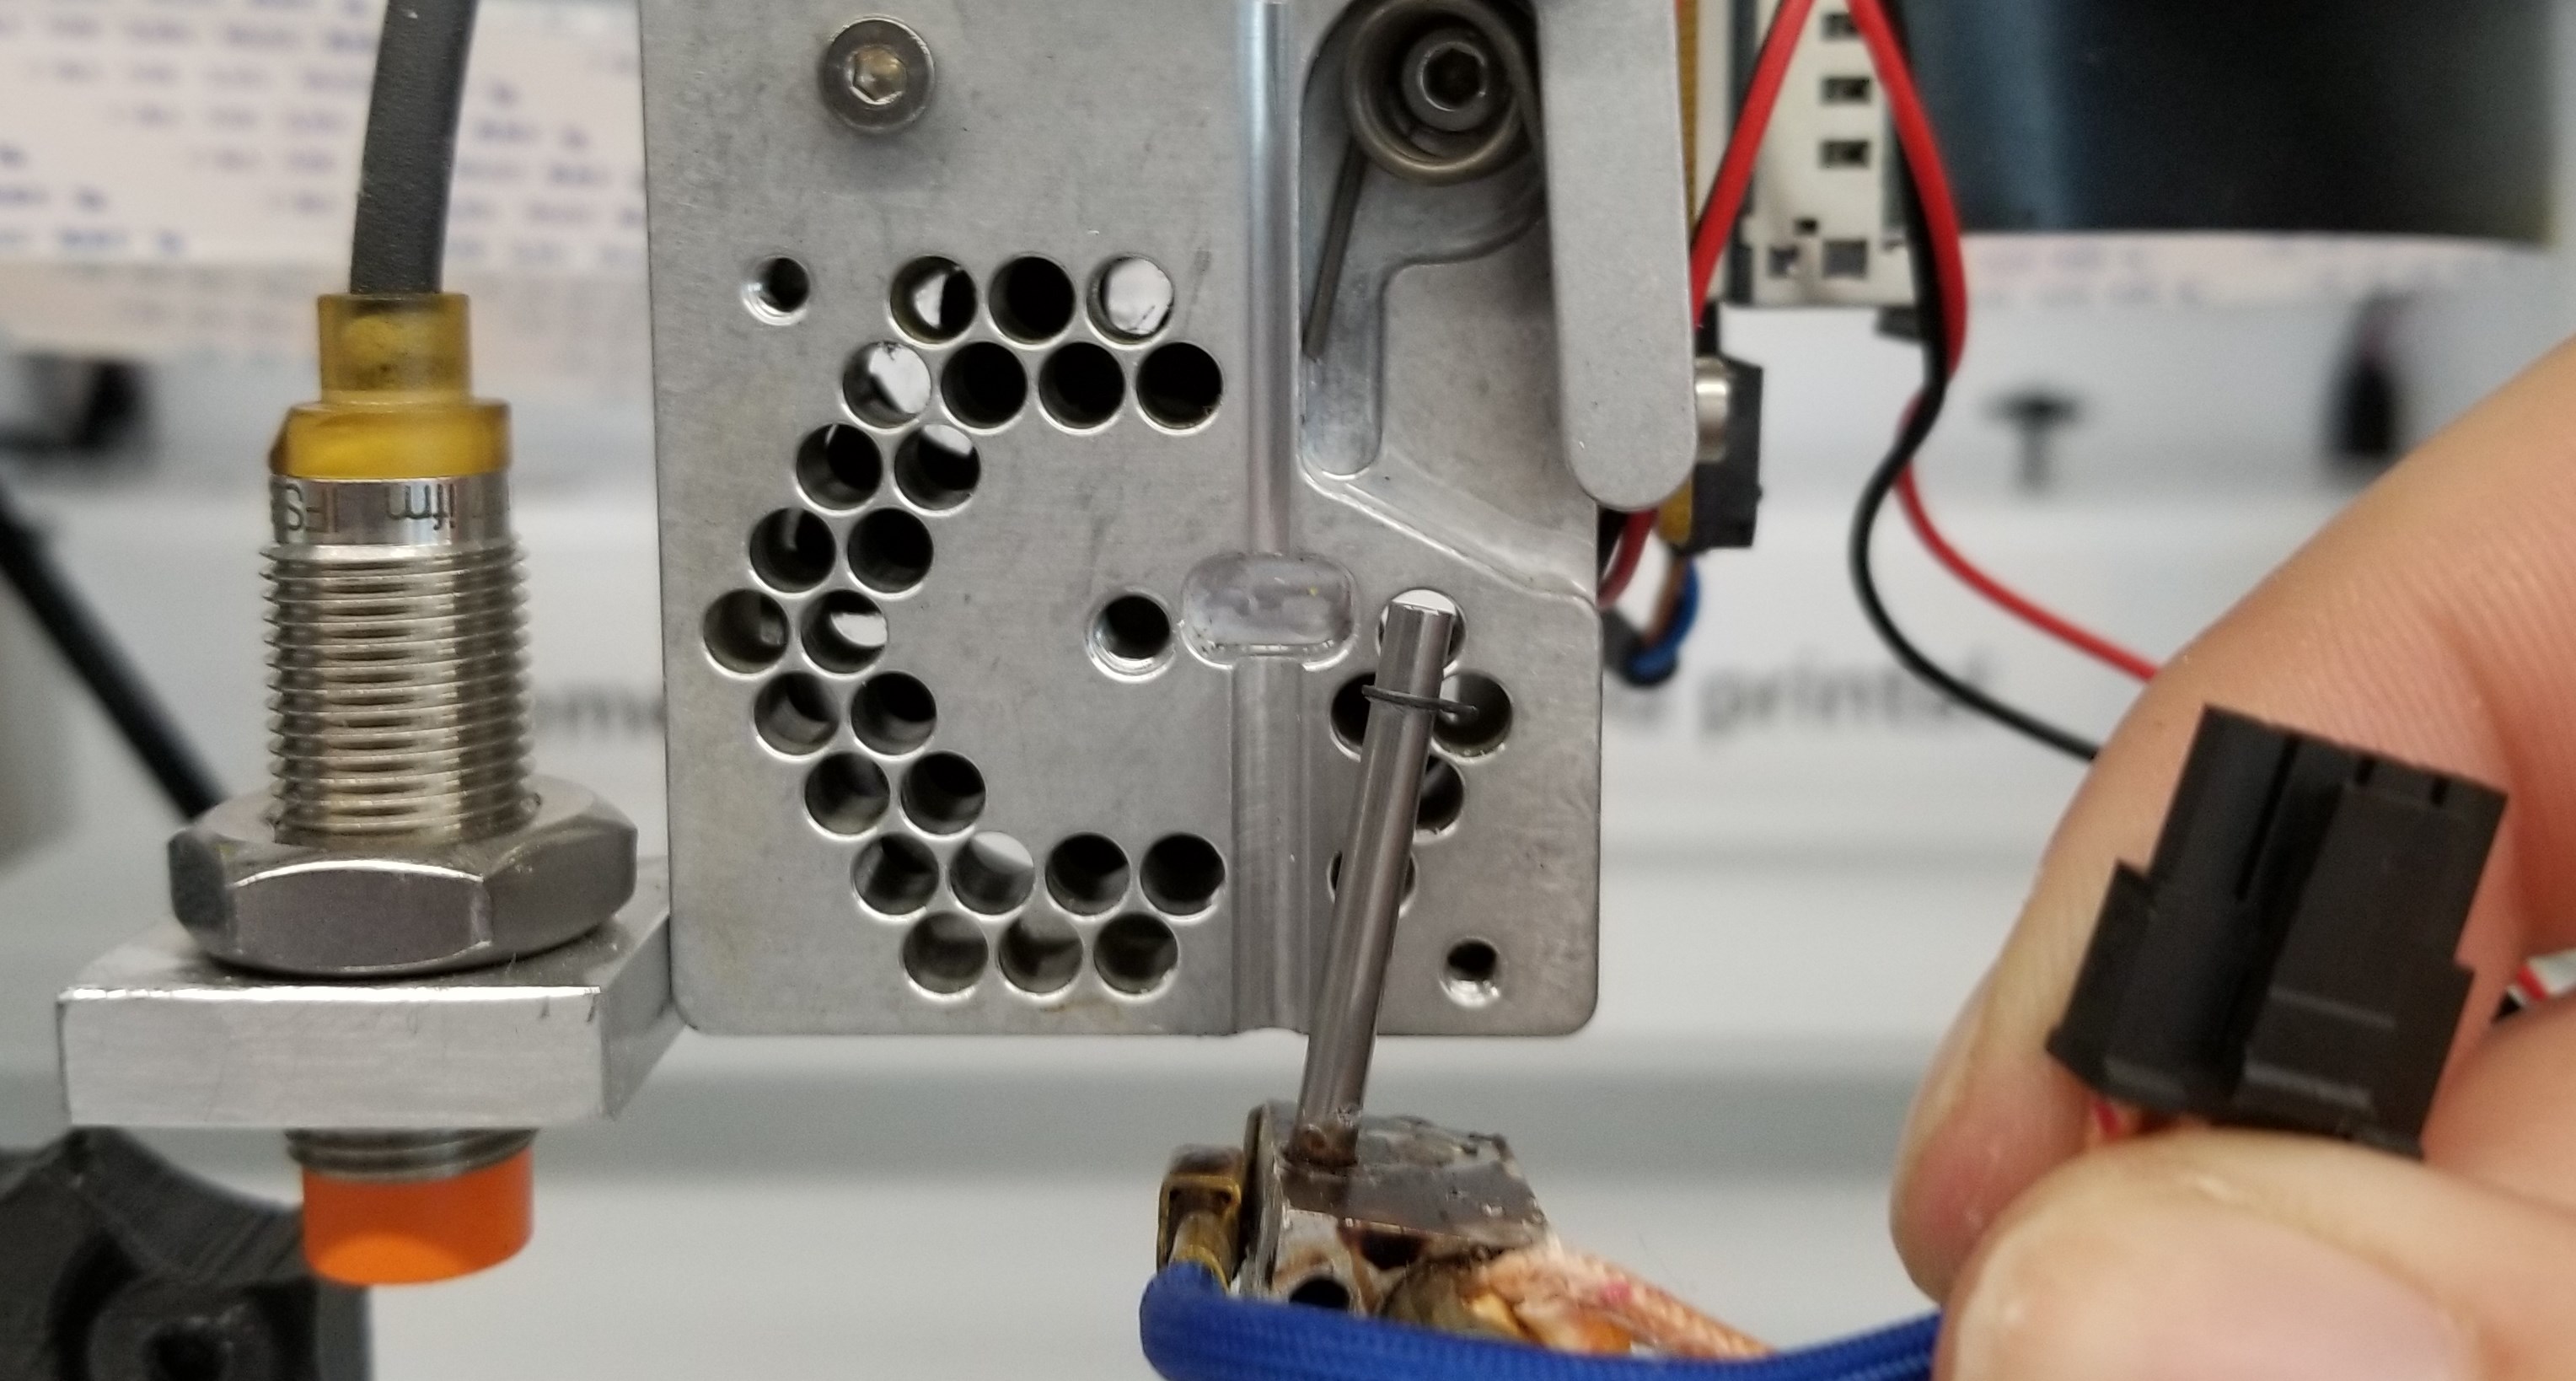
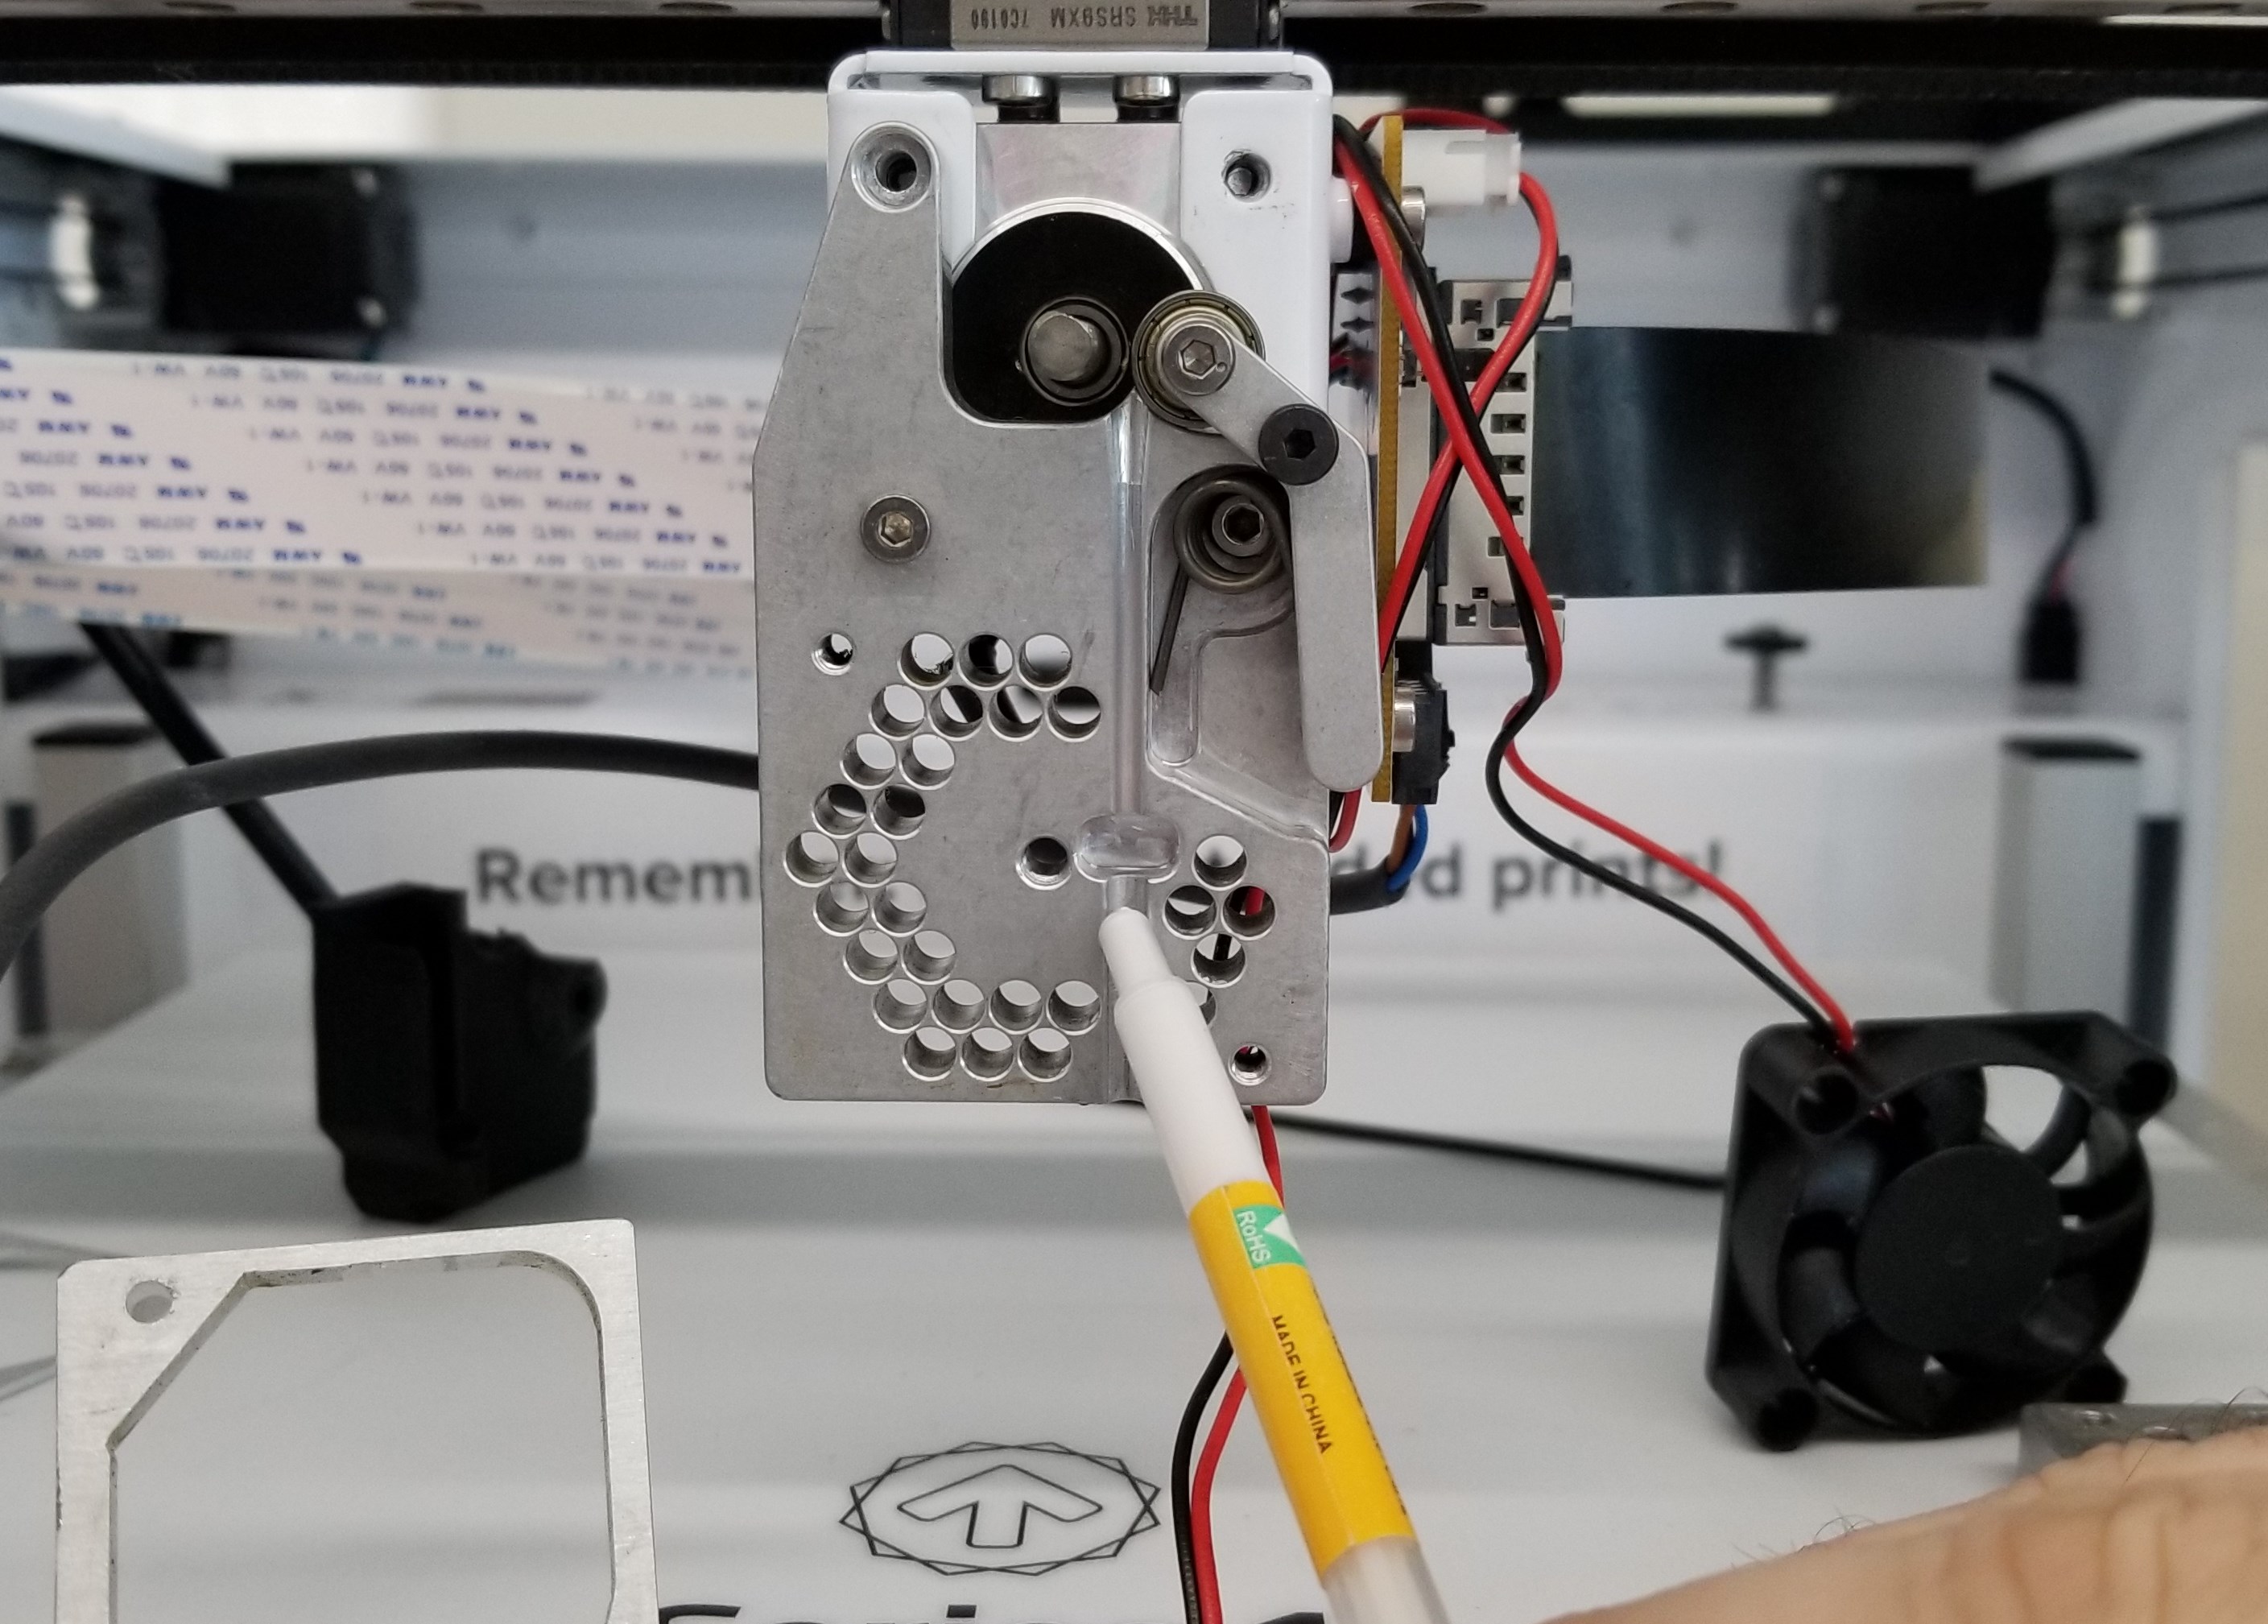
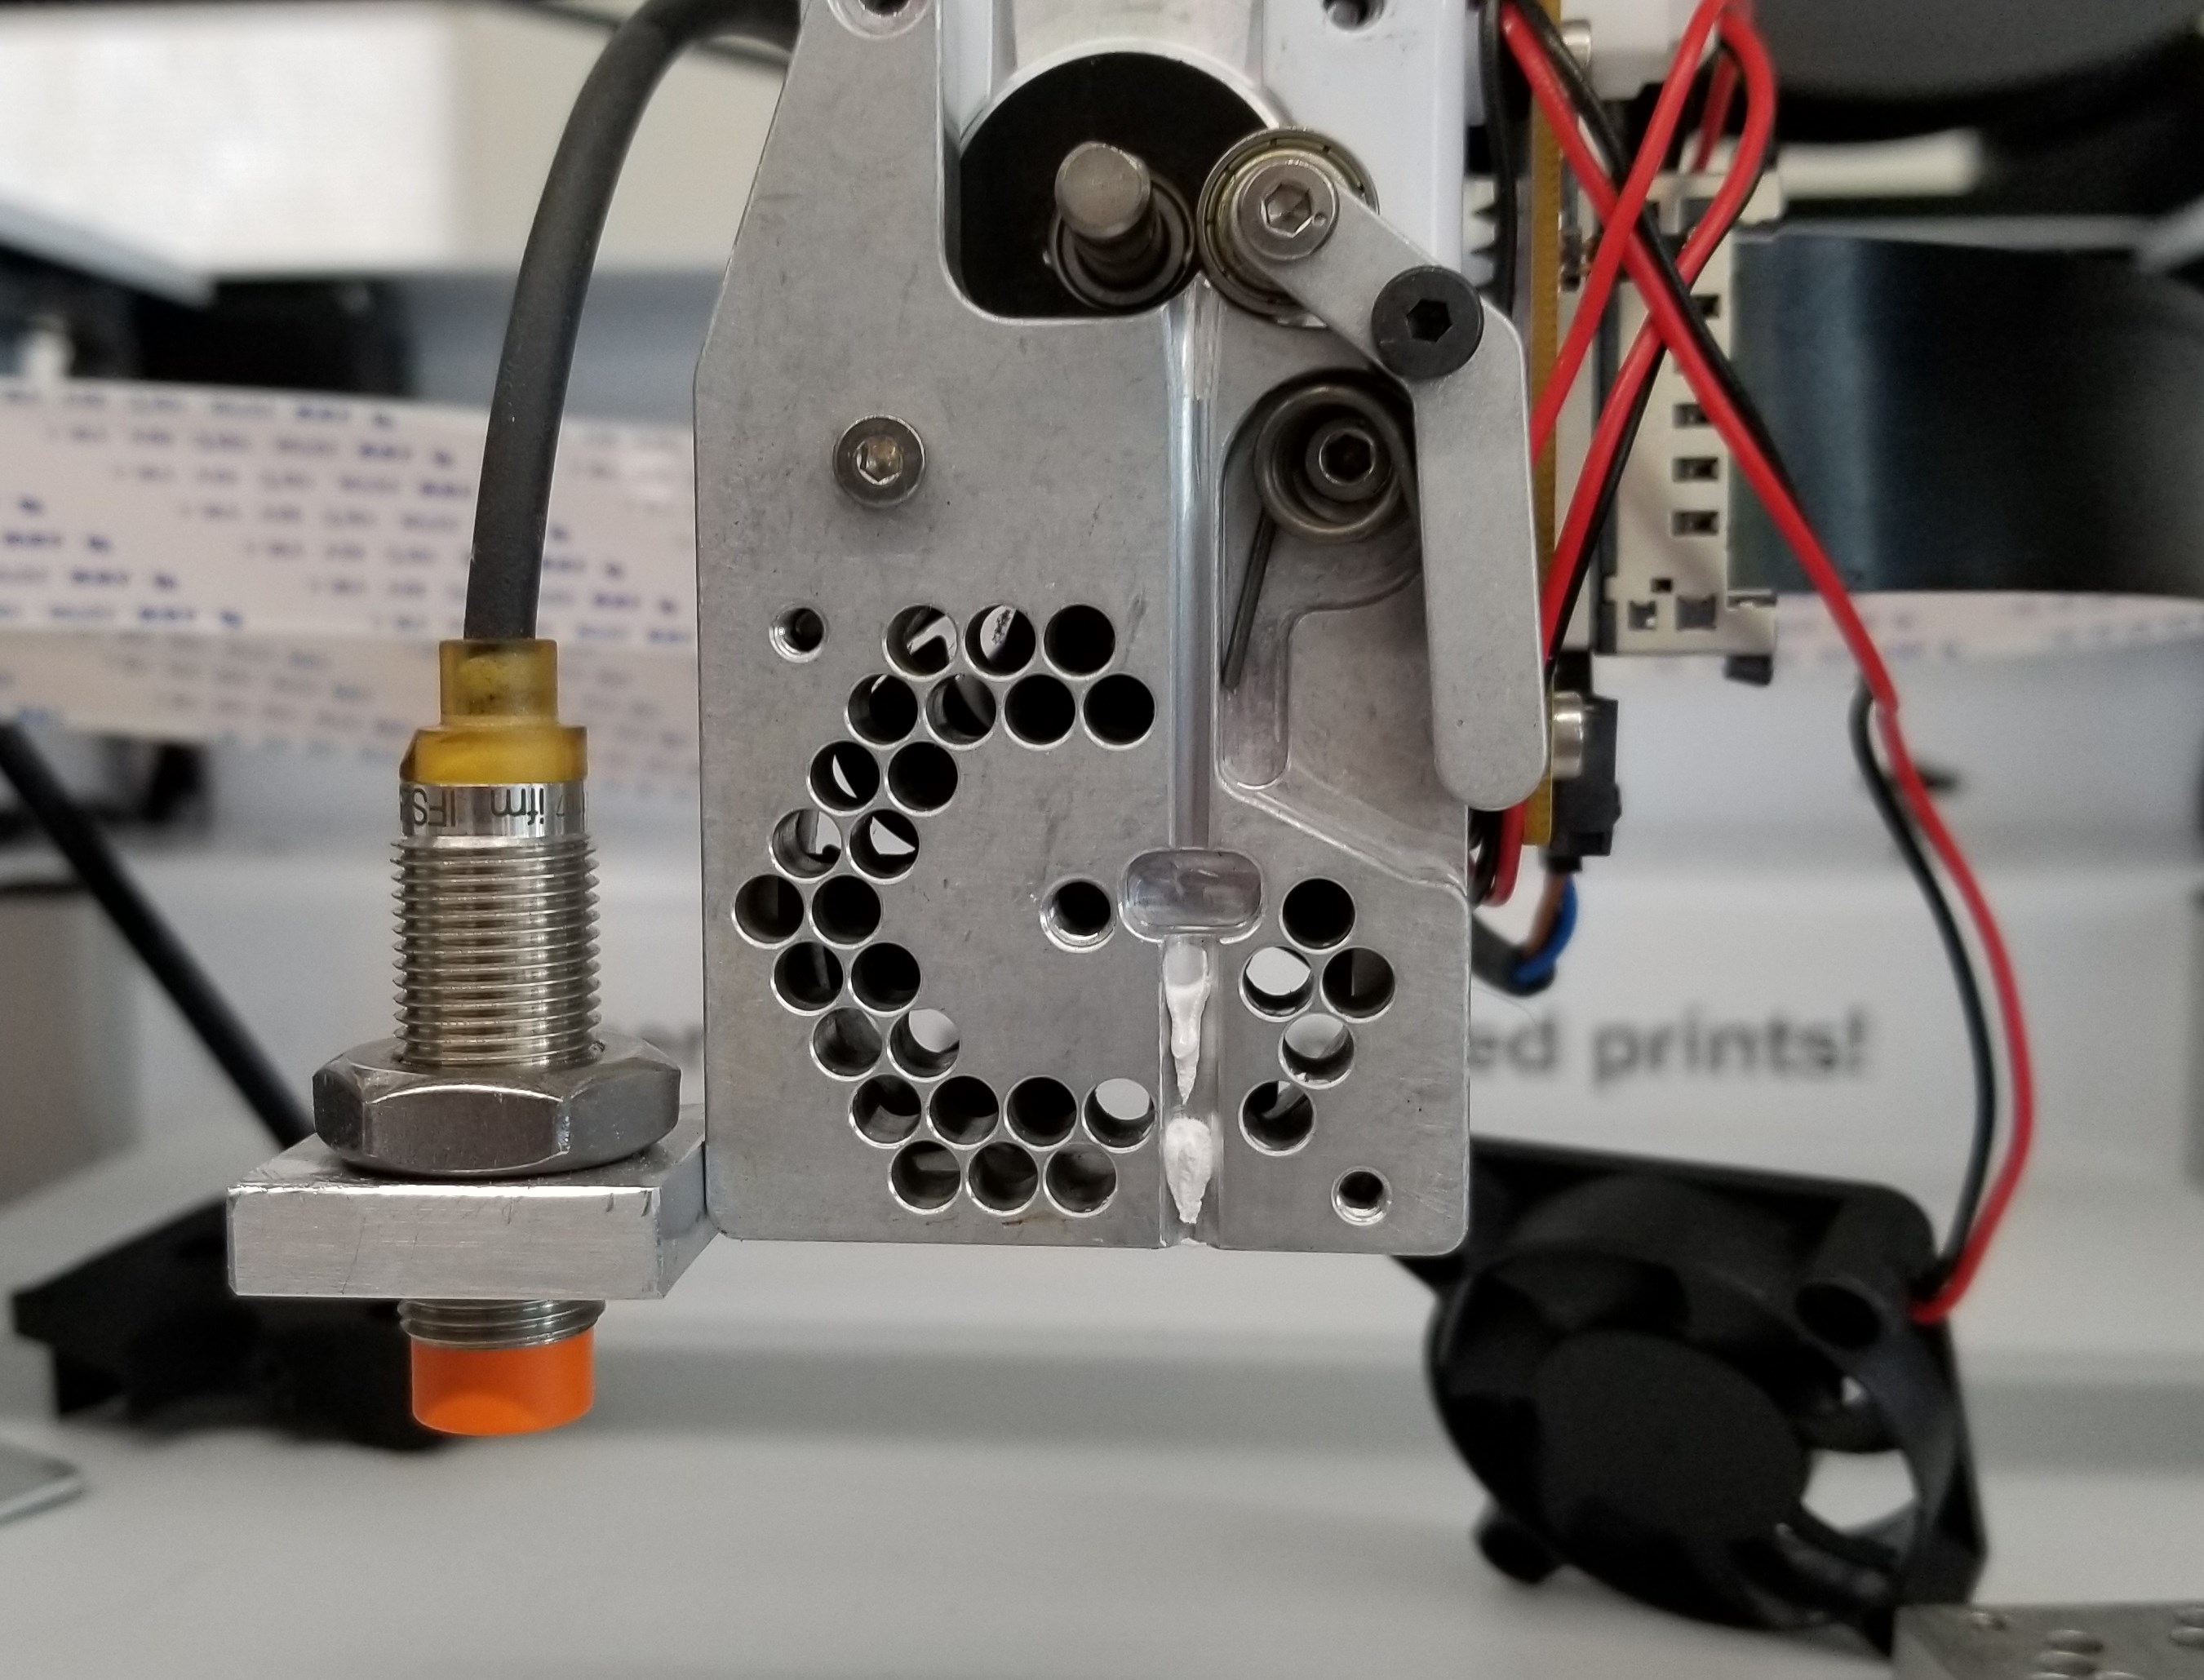
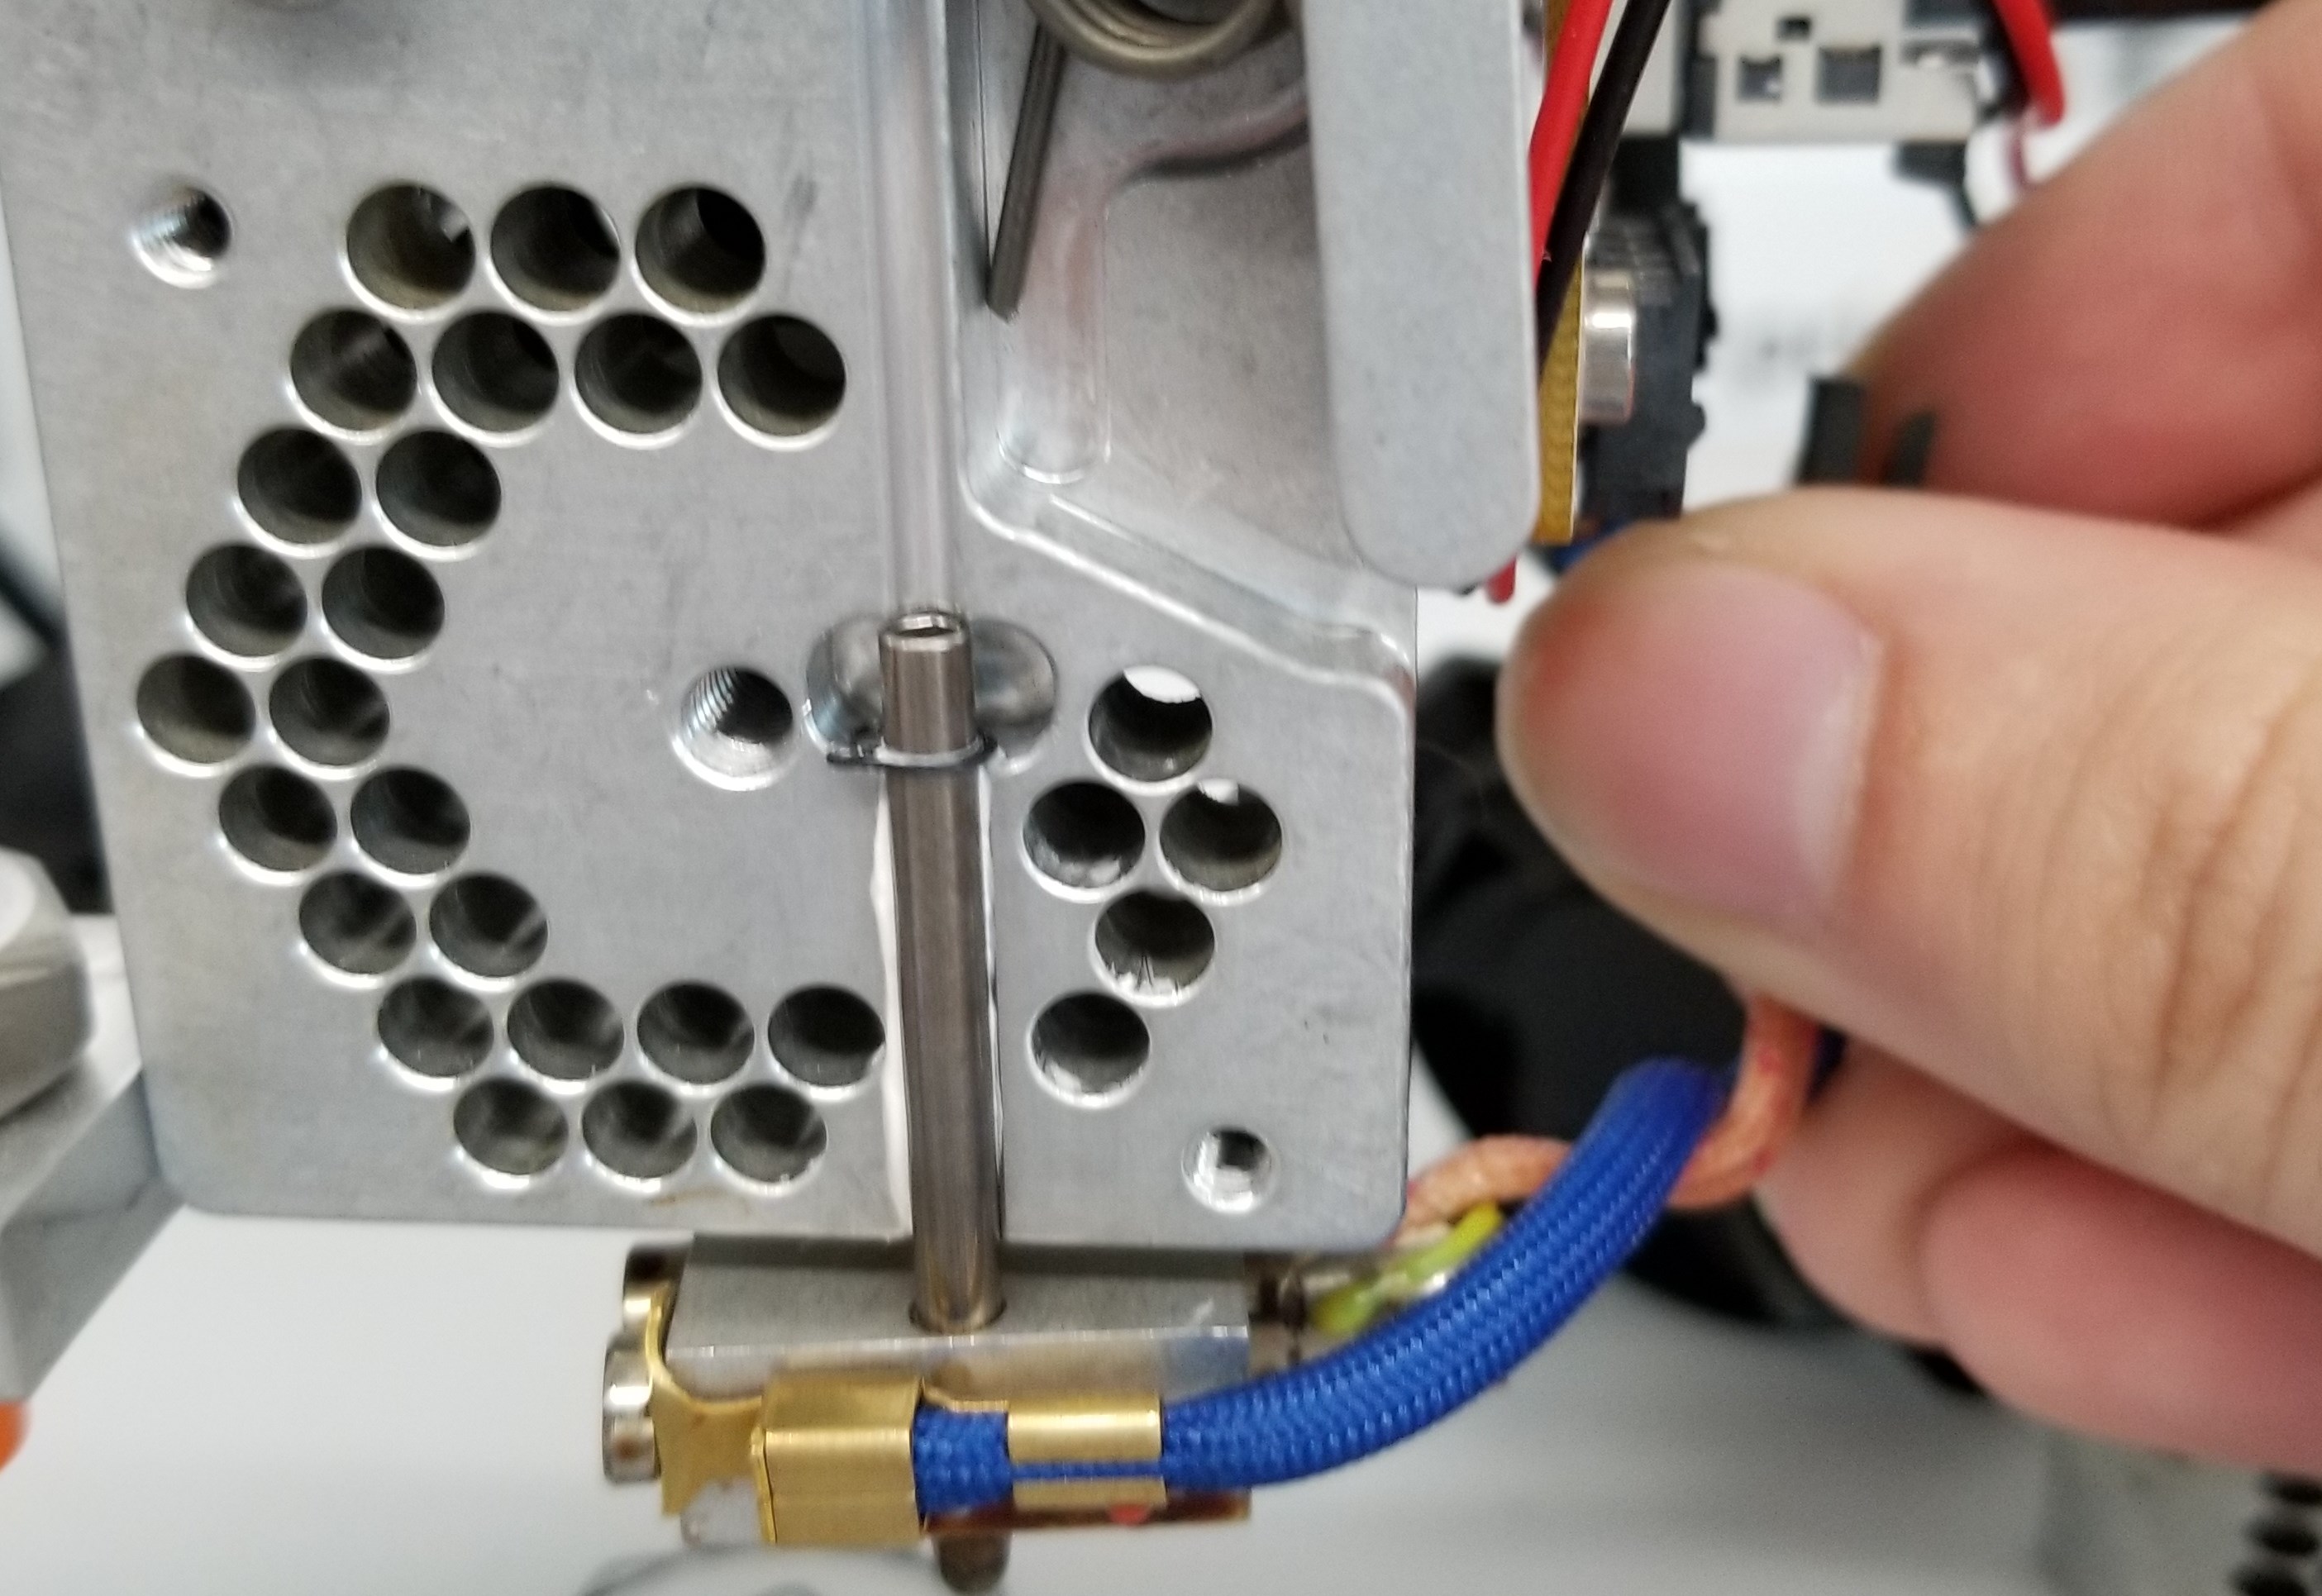
Now the hardest part, removing the two 3mx20 bolts holding the back fan and z-axis sensor to the heat block. While the fan is removed, it is recommended to clean any PLA strings from it. [[File:Remove backfan.jpg|alt=|center|500x500px]]Unplug the nozzle from the circuit board on the side of the extruder and careful pull the nozzle away. Using a wipe, remove as much of the old thermal paste as possible.[[File:Dirty Hotend.jpg|alt=|center|500x500px]]How the heat block should look once it is fully cleaned.[[File:Clean hotend.jpg|alt=|center|500x500px]]Add new thermal paste to the groove below the small inset. DO NOT GET ANY IN THE UPPER GROOVE, it will cause clogging of the PLA filament.[[File:Add new heatcompund.jpg|alt=|center|500x500px]]An example of how the thermal paste should look after adding it[[File:Correct Amount.jpg|alt=|center|500x500px]]Reseat the new nozzle, it will have a small ring attached to it. The ring will fit inside the small inset of the heater block. Making sure that the end of the nozzle is flush with the upper groove.[[File:Correct Seating of hot end.jpg|alt=|center|500x500px]]Reattach the second piece of the heater block and check for any oozing. If you see any, just open it up again and wipe away the extra carefully.[[File:Too much compund.jpg|alt=|center|500x500px]]Reassemble the hot end in the reverse order that it was taken apart. Stop once the filament guide is reattached. Take the smallest allen wrench and drop it carefully into the guide hole with the guide arm open. If everything is assembled correctly, it will effortlessly fall all the way in. Remove it and continue to rest of the reassembly. If the allen wrench does not [[File:Alignment test.jpg|alt=|center|500x500px]]How the extruder should look once it is fully reassembled with the new nozzle.[[File:Fully Reassembled.jpg|alt=|center|500x500px]] | Now the hardest part, removing the two 3mx20 bolts holding the back fan and z-axis sensor to the heat block. While the fan is removed, it is recommended to clean any PLA strings from it. [[File:Remove backfan.jpg|alt=|center|500x500px]]Unplug the nozzle from the circuit board on the side of the extruder and careful pull the nozzle away. Using a wipe, remove as much of the old thermal paste as possible.[[File:Dirty Hotend.jpg|alt=|center|500x500px]]How the heat block should look once it is fully cleaned.[[File:Clean hotend.jpg|alt=|center|500x500px]]Add new thermal paste to the groove below the small inset. DO NOT GET ANY IN THE UPPER GROOVE, it will cause clogging of the PLA filament.[[File:Add new heatcompund.jpg|alt=|center|500x500px]]An example of how the thermal paste should look after adding it[[File:Correct Amount.jpg|alt=|center|500x500px]]Reseat the new nozzle, it will have a small ring attached to it. The ring will fit inside the small inset of the heater block. Making sure that the end of the nozzle is flush with the upper groove.[[File:Correct Seating of hot end.jpg|alt=|center|500x500px]]Reattach the second piece of the heater block and check for any oozing. If you see any, just open it up again and wipe away the extra carefully.[[File:Too much compund.jpg|alt=|center|500x500px]]Reassemble the hot end in the reverse order that it was taken apart. Stop once the filament guide is reattached. Take the smallest allen wrench and drop it carefully into the guide hole with the guide arm open. If everything is assembled correctly, it will effortlessly fall all the way in. Remove it and continue to rest of the reassembly. If the allen wrench does not [[File:Alignment test.jpg|alt=|center|500x500px]]How the extruder should look once it is fully reassembled with the new nozzle.[[File:Fully Reassembled.jpg|alt=|center|500x500px]] | ||
| − | * '''Plug in''' and '''turn on''' the machine | + | *'''Plug in''' and '''turn on''' the machine |
| − | * '''Re-'Z'''' the machine | + | *'''Re-'Z'''' the machine |
| − | * '''Print out''' the calibration cube | + | *'''Print out''' the calibration cube |
Revision as of 18:27, 8 April 2019
Note: this page is provided as a reference for the CaTS only. If you are not a CaTS, do not attempt anything on this page.
Contents
Cleaning
Daily Cleaning
Monthly Cleaning
- Dust the Machine
Maintenance
Daily Maintenance
- Print out a calibration cube
- Adjust Z-Axis if required
Changing the Hotend
- Remove all filament
- Turn off, unplug, and let cool before starting work
- Not doing so may cause burns and burning out the electrical systems
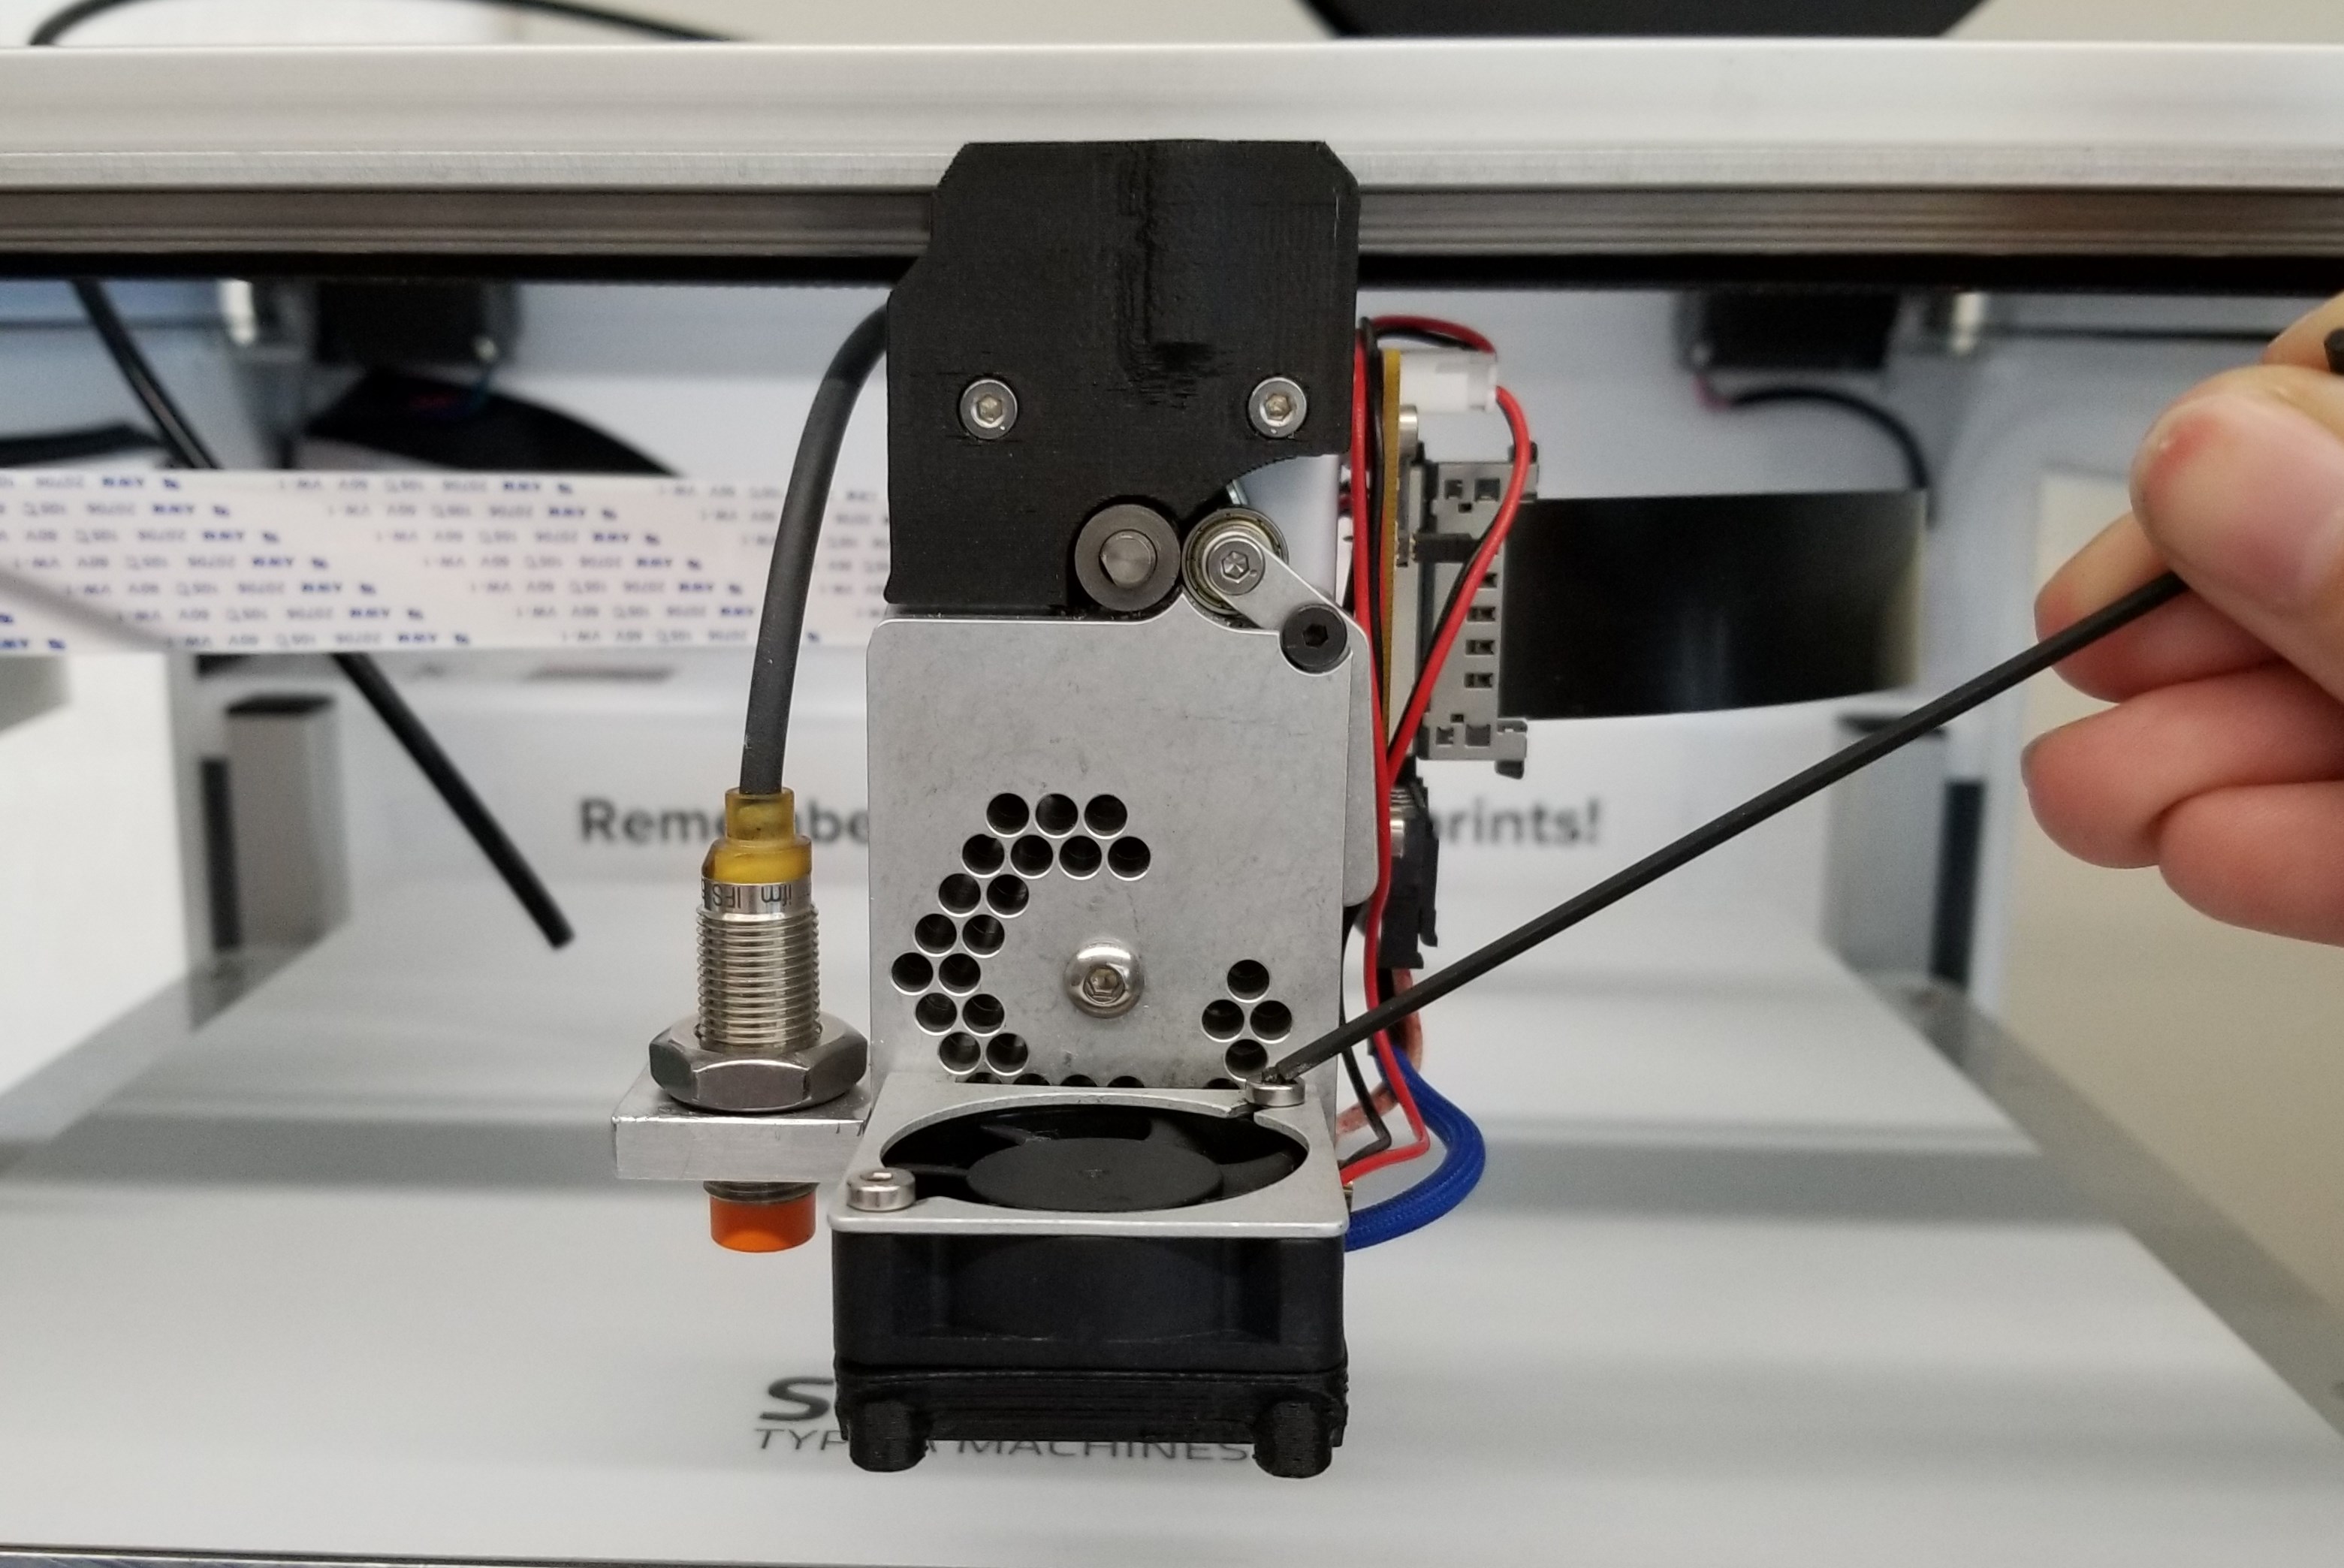
Start by removing the two 3mx20 bolts holding together the fan guard, fan, and holder.
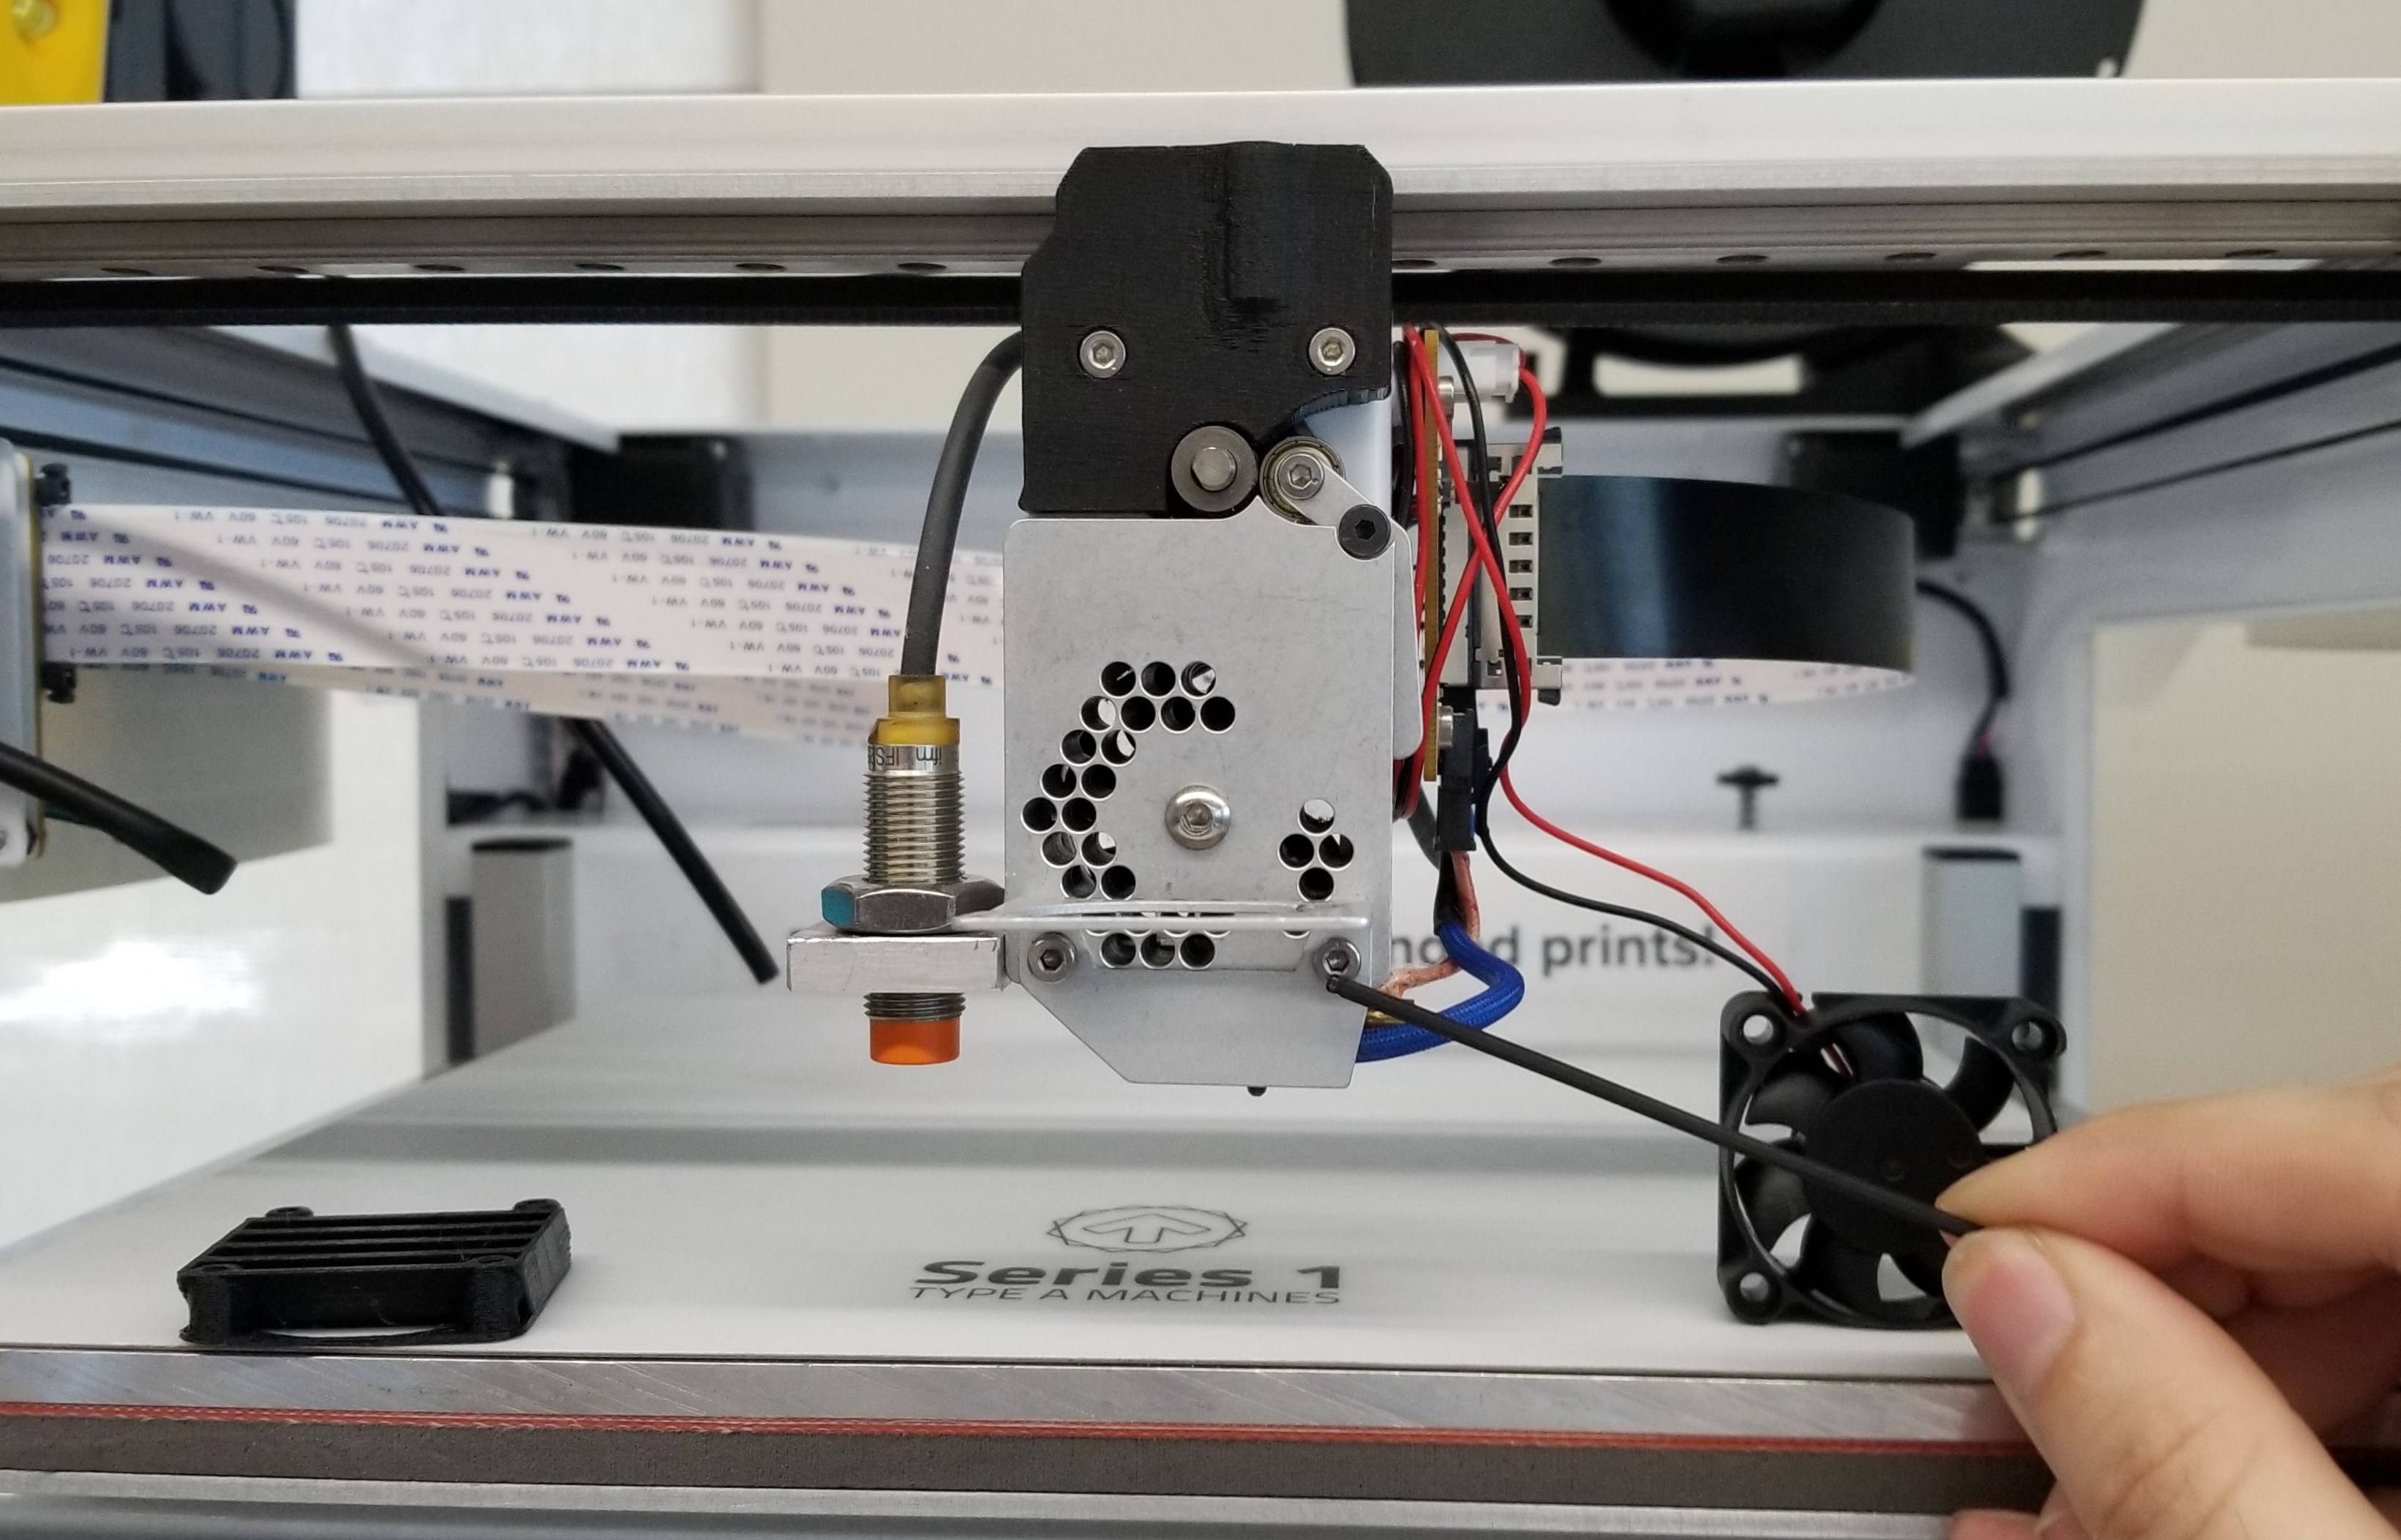
Next, remove the two 3mx10 bolts holding the fan guard to the heater block
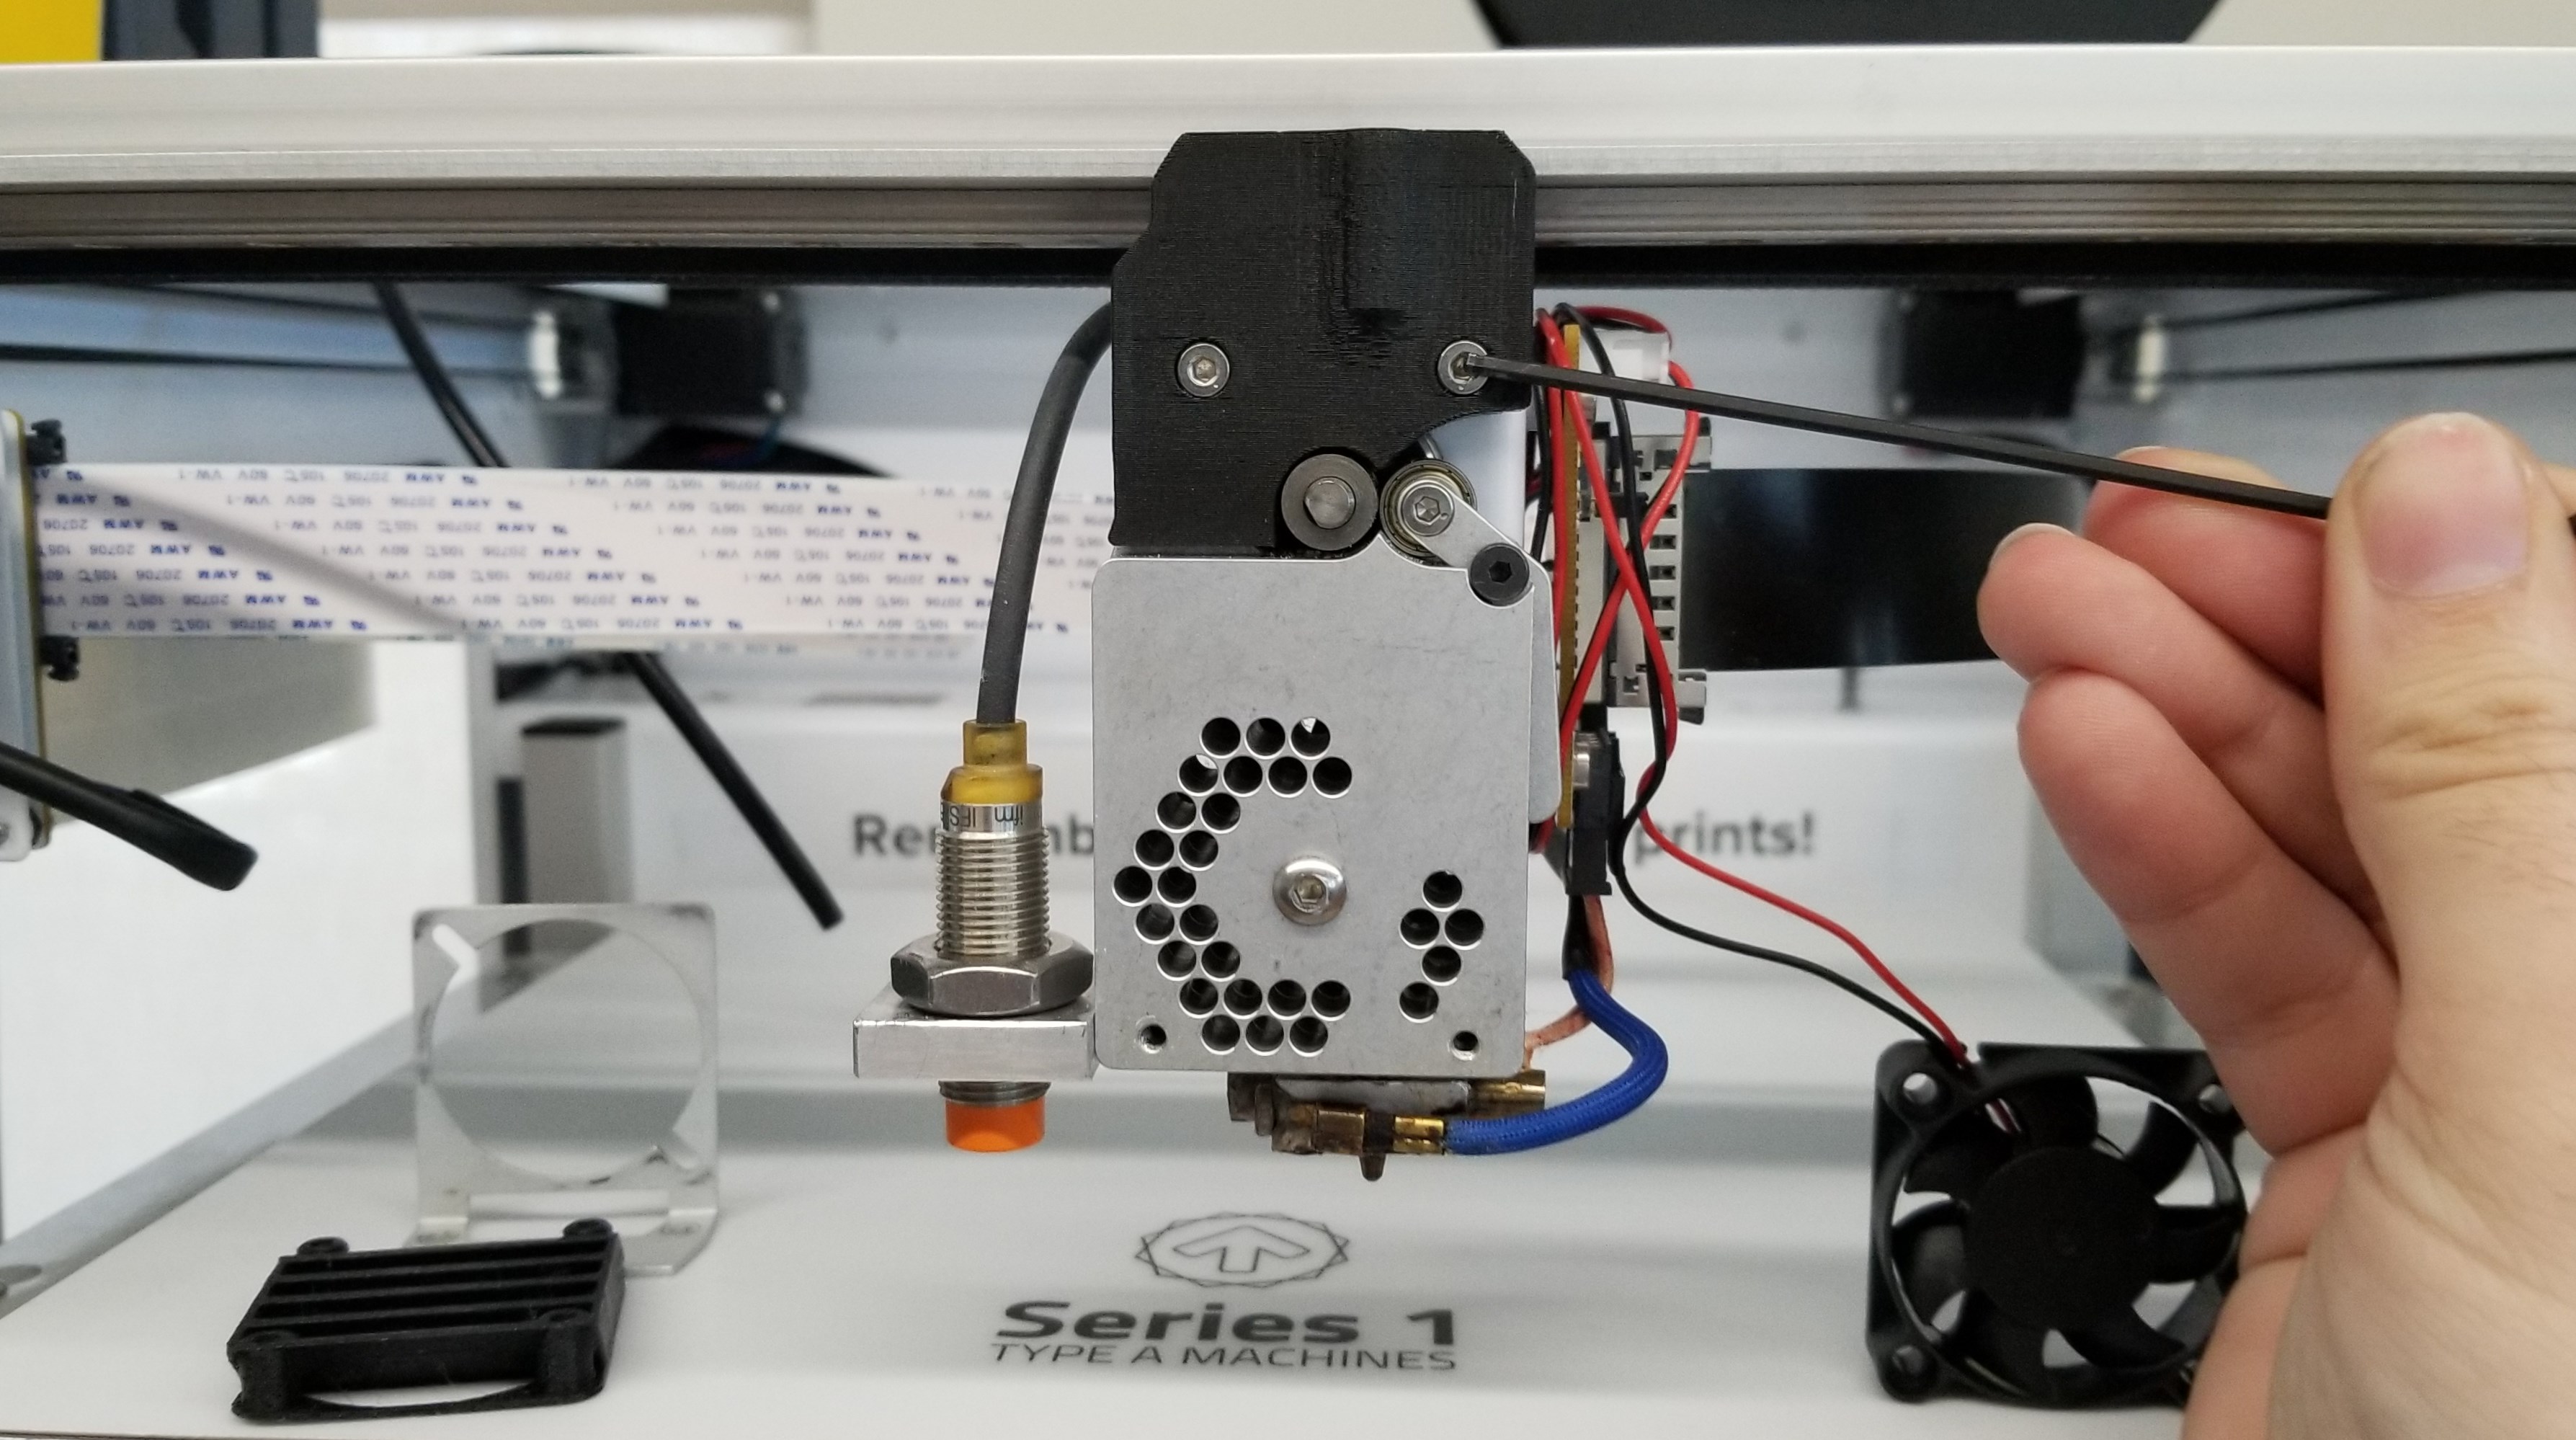
Remove the two 3mx20 bolts holding the black filament guide to the extruder head.
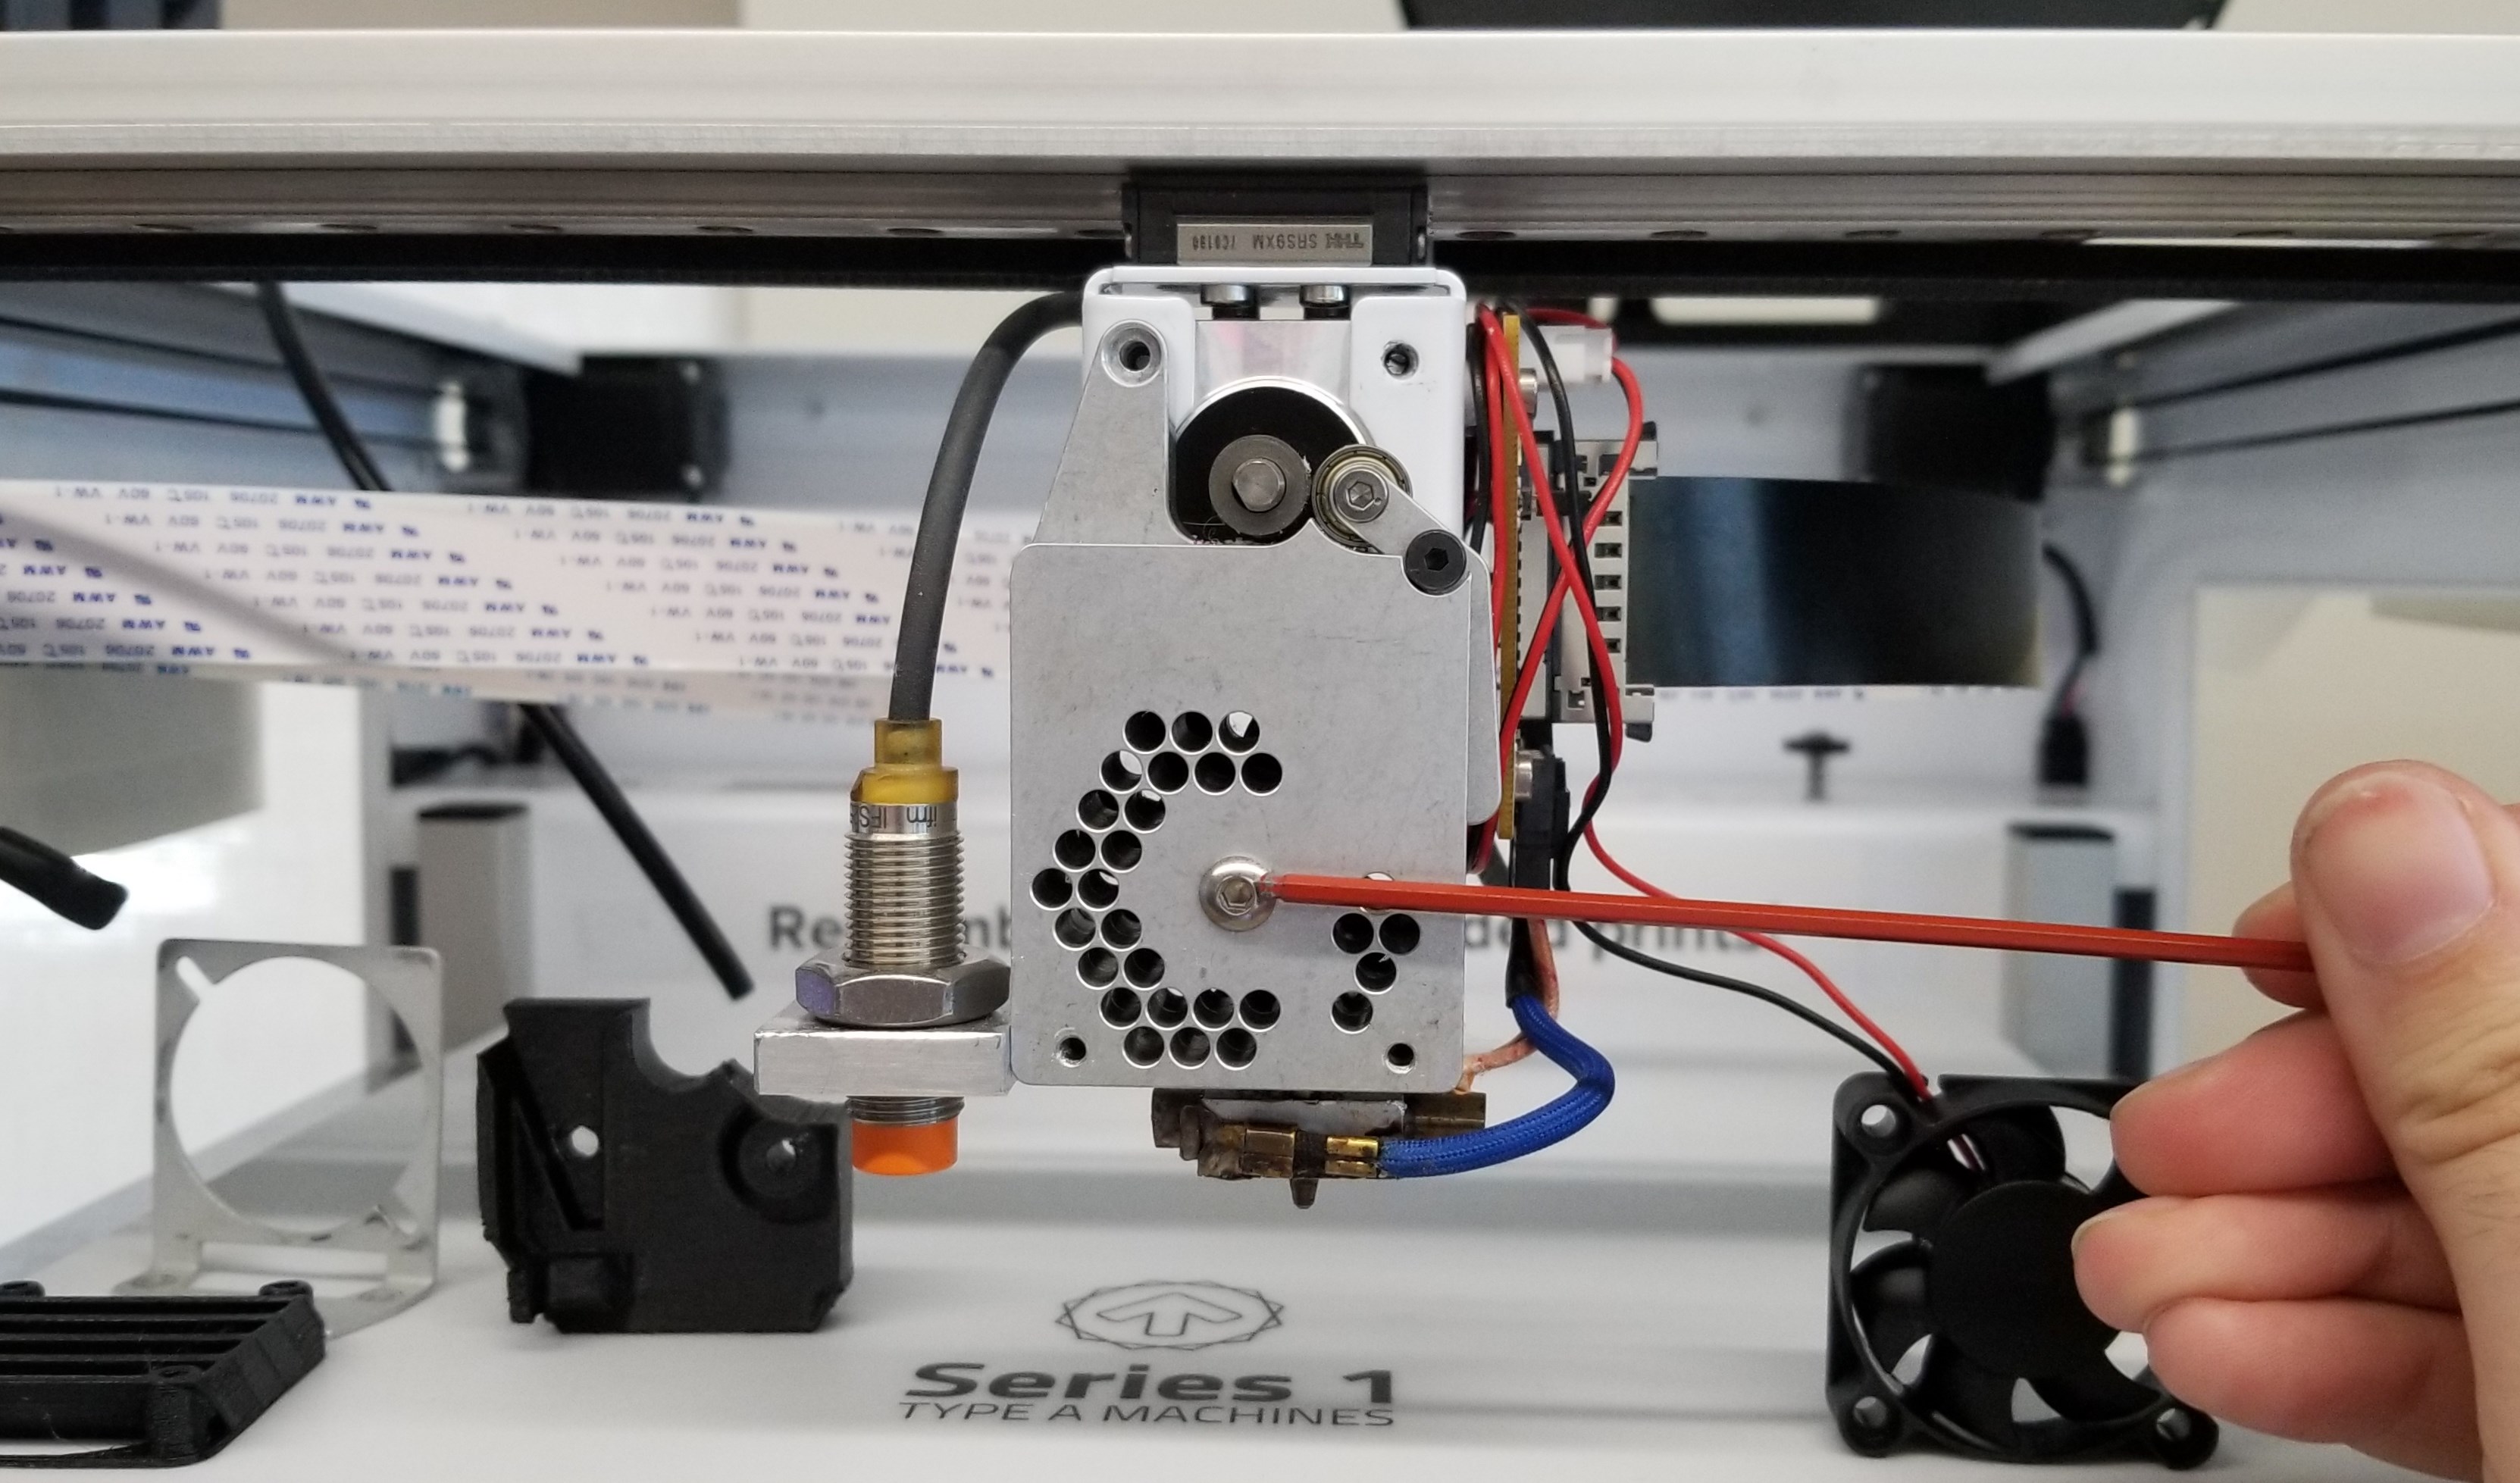
Remove the single 4mx12 bolt from the center of the heater block, this will cause the two half to release. Be careful as the nozzle may fall out on you.
Once the two halves are removed, you will notice a white cream like substance. That is the thermal compound that helps seal the nozzle and heat block together. Try to not touch it! It is bad for your health and is very messy.
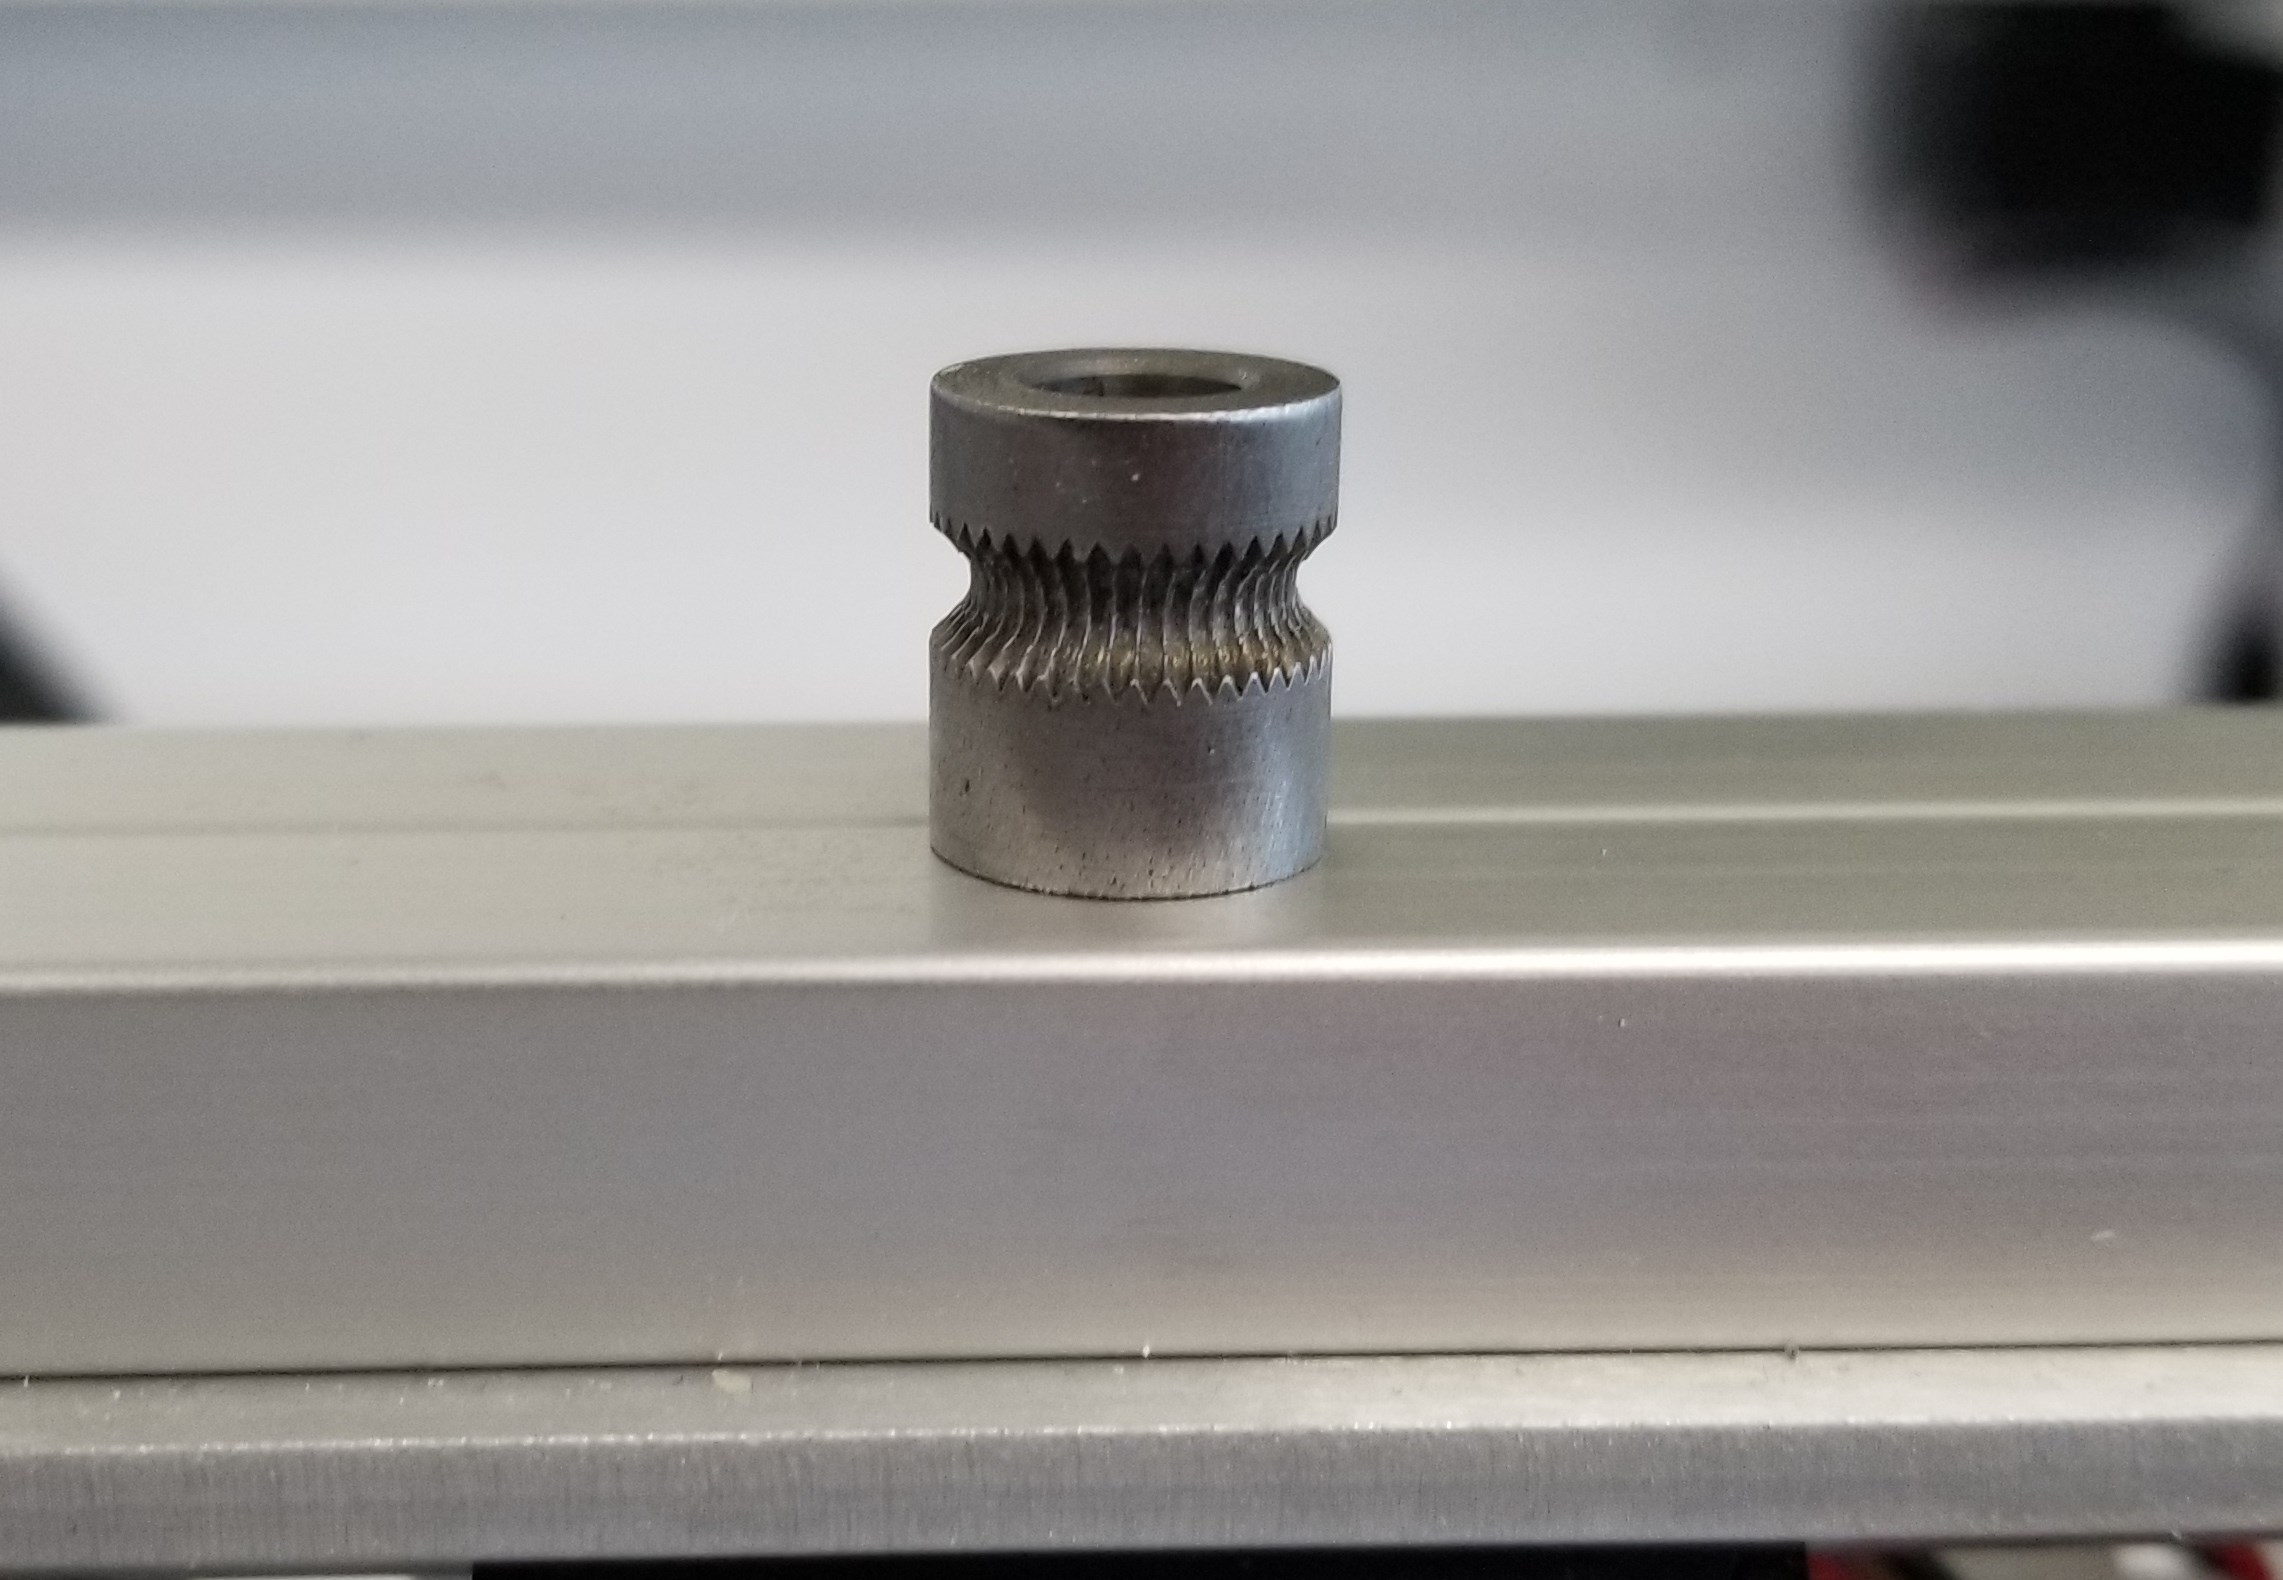
Before removing the nozzle, check the extruder gear for any filament. An excess of filament grinds will cause under extrusion issues.
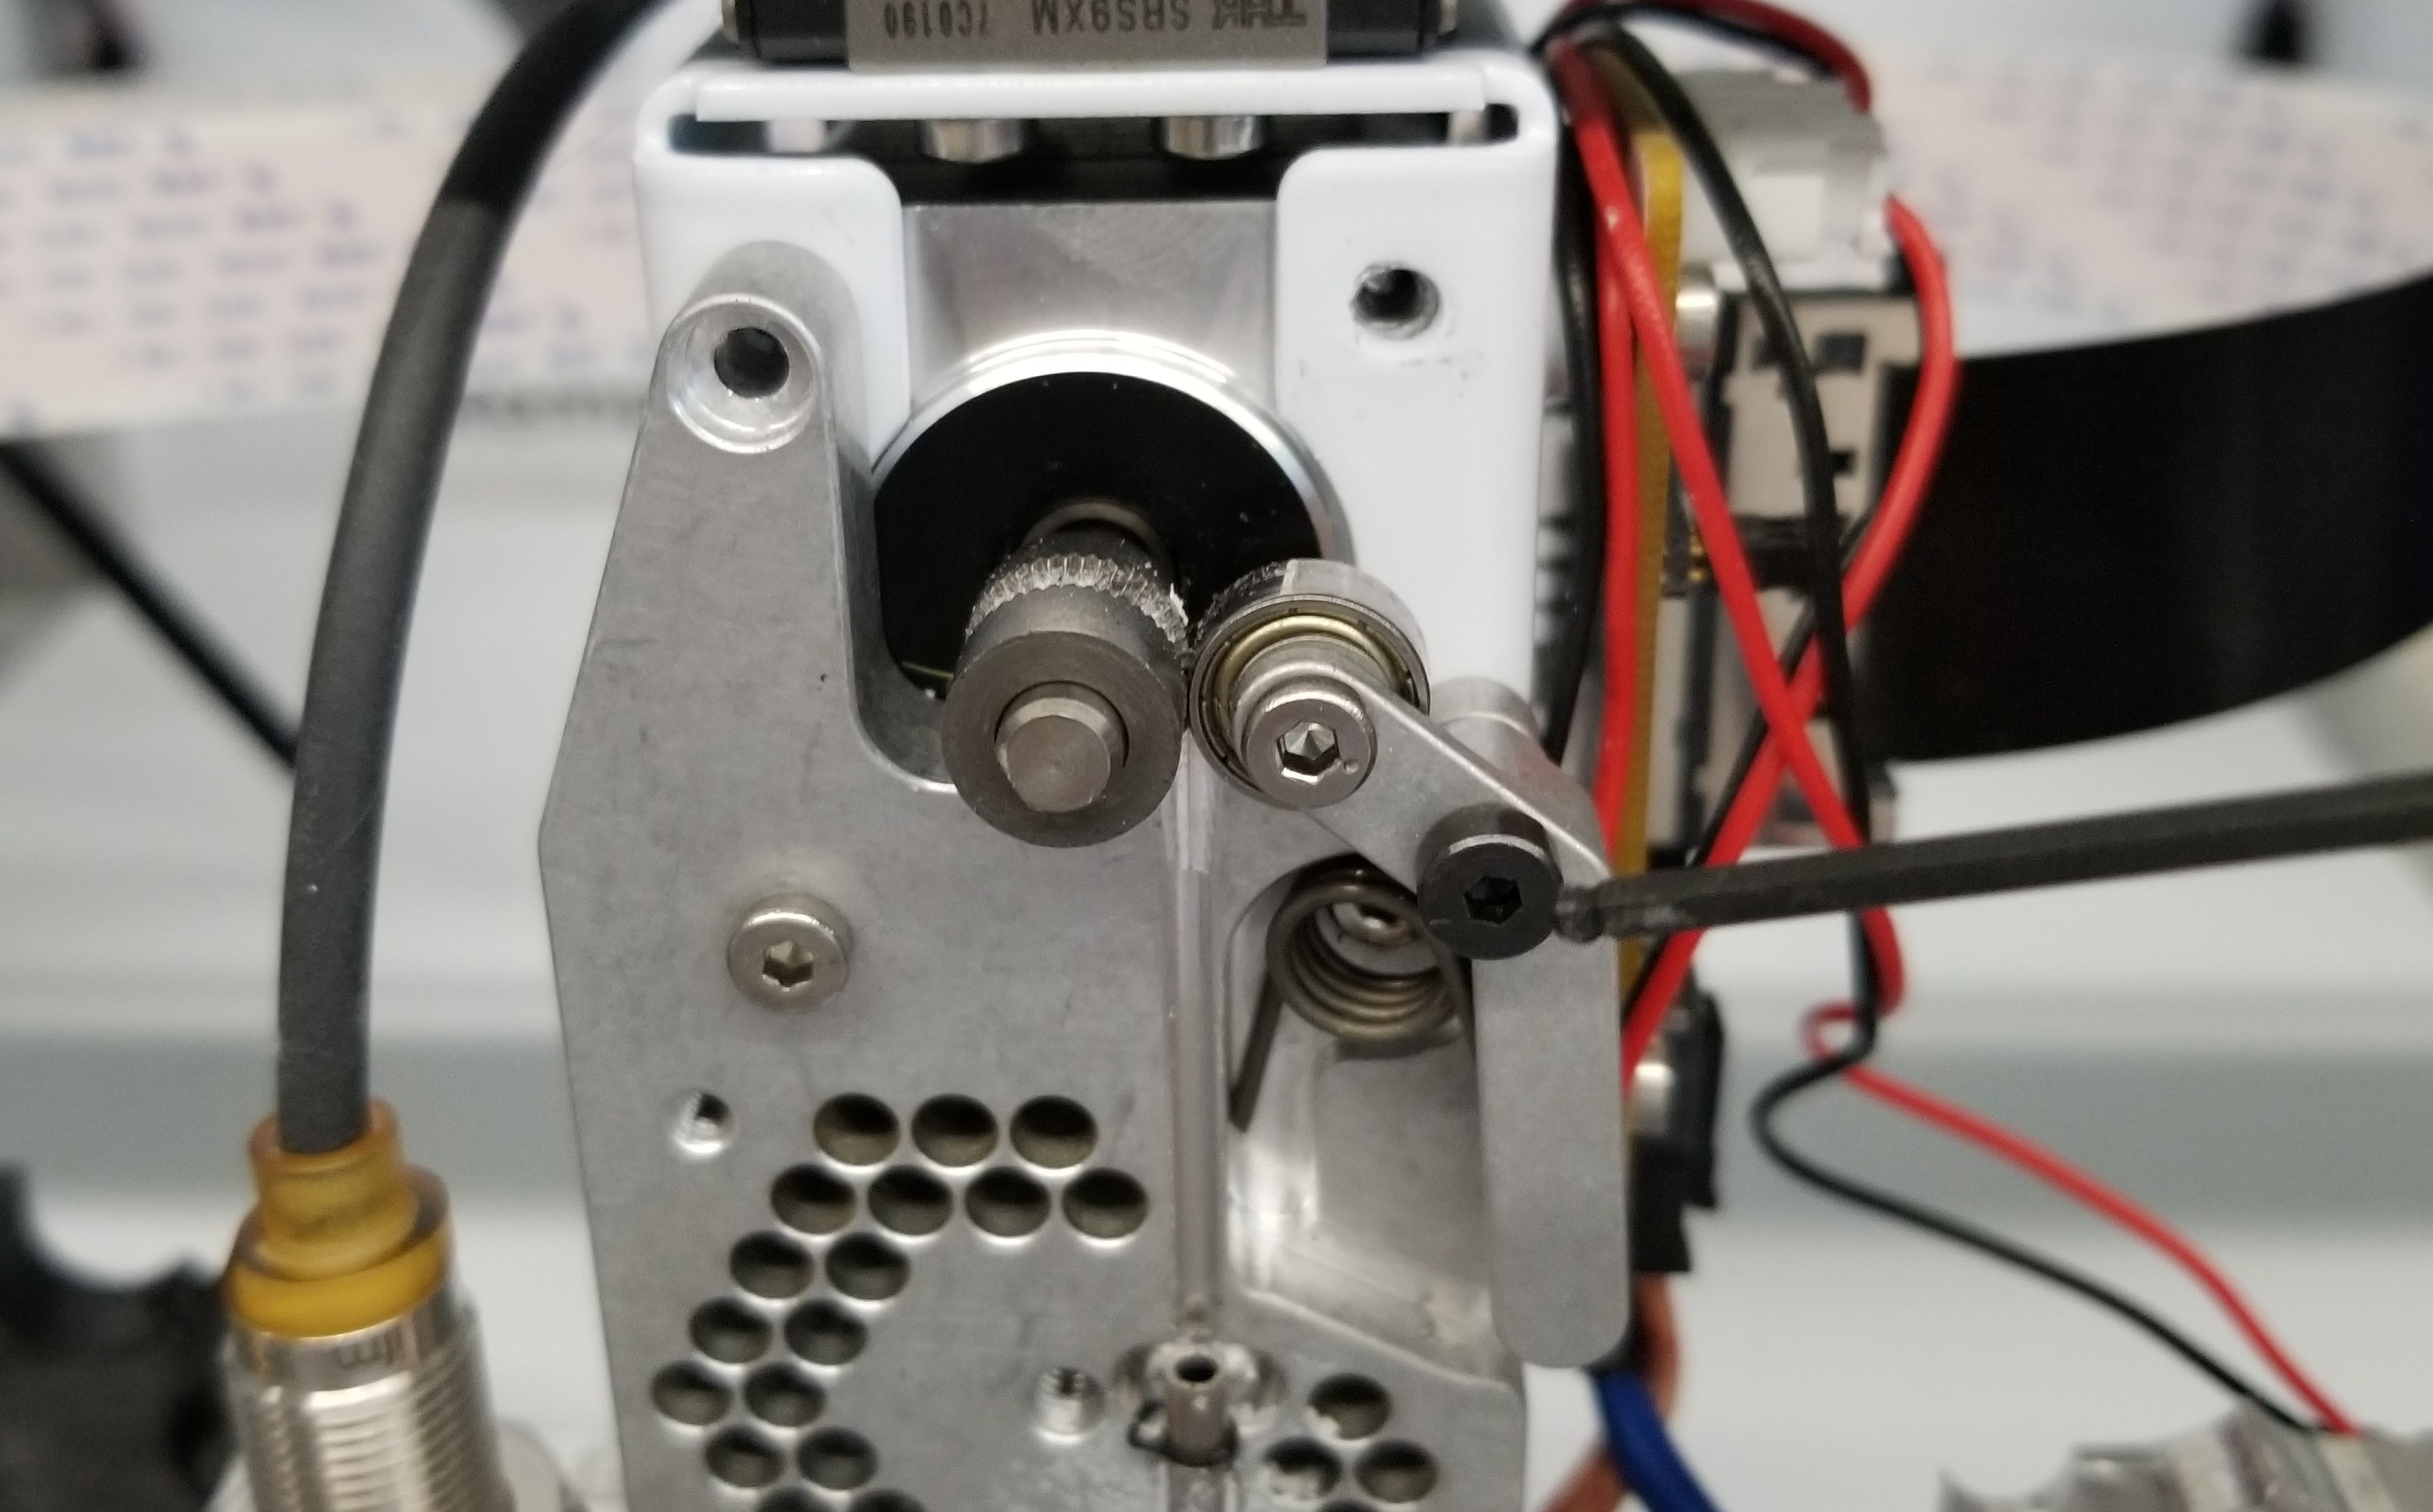
DO NOT REMOVE THIS SCREW! The guide arm is under extreme tension and removing it will make your life hell to put it back!
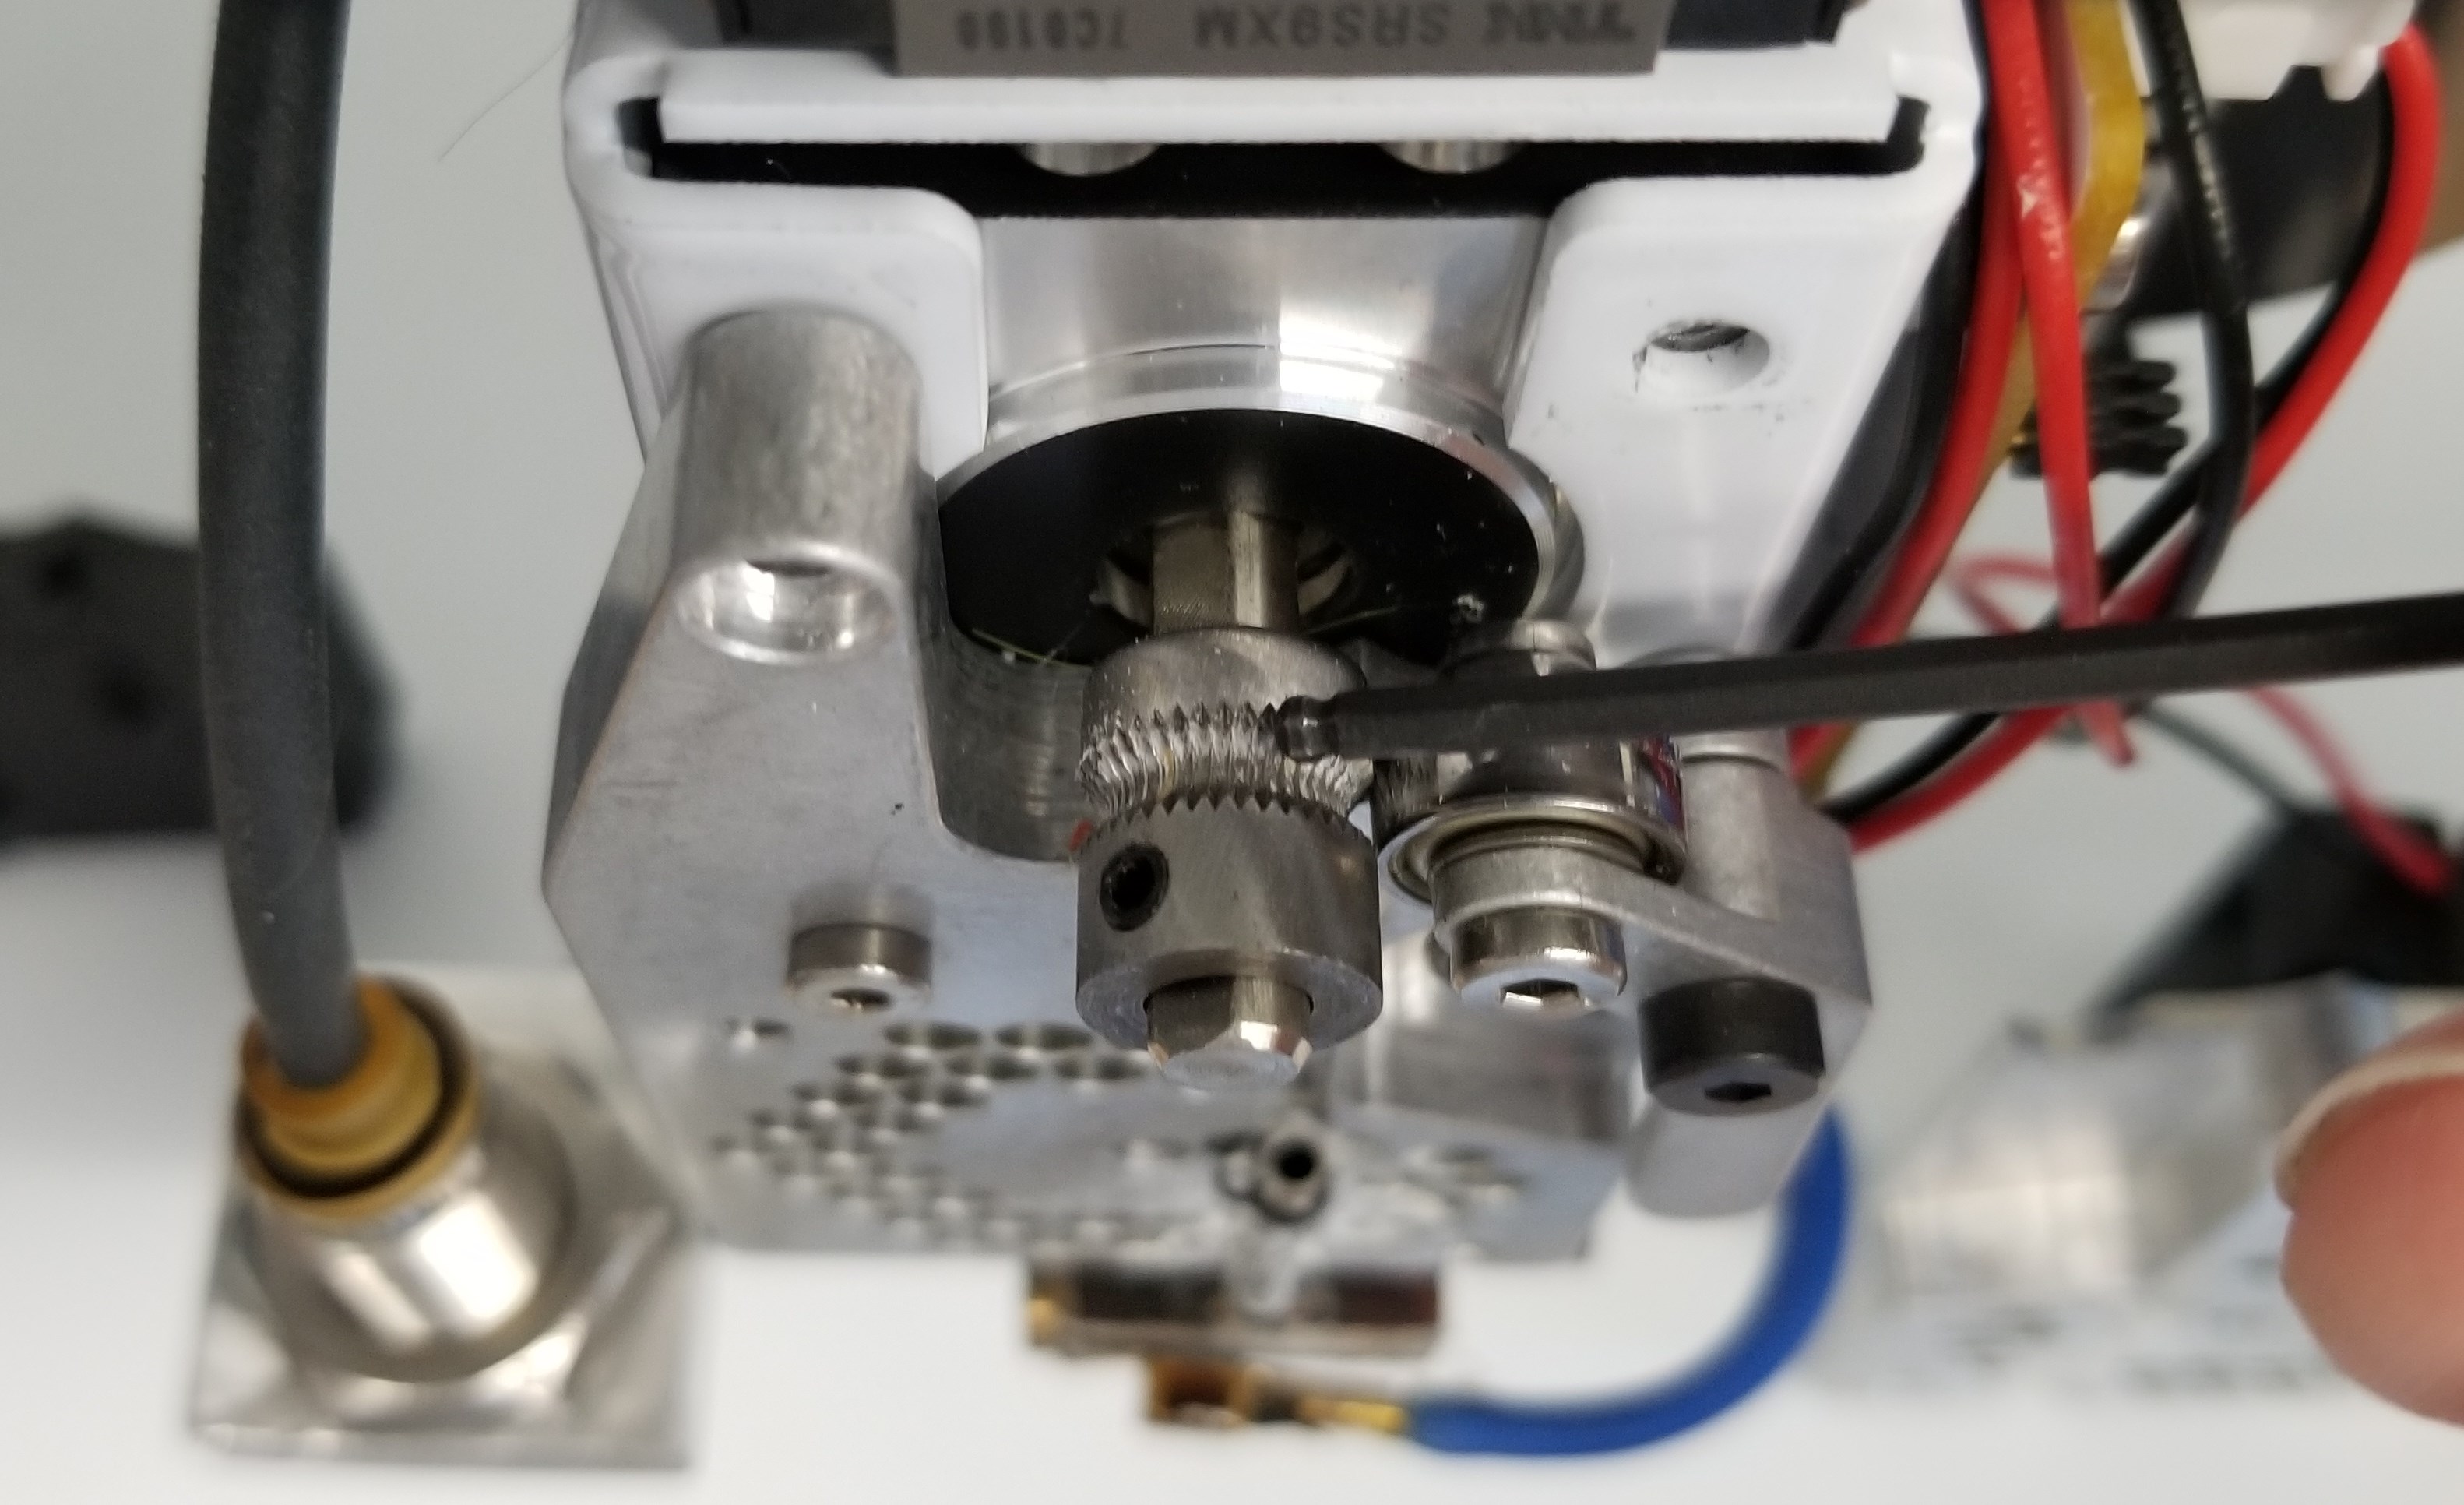
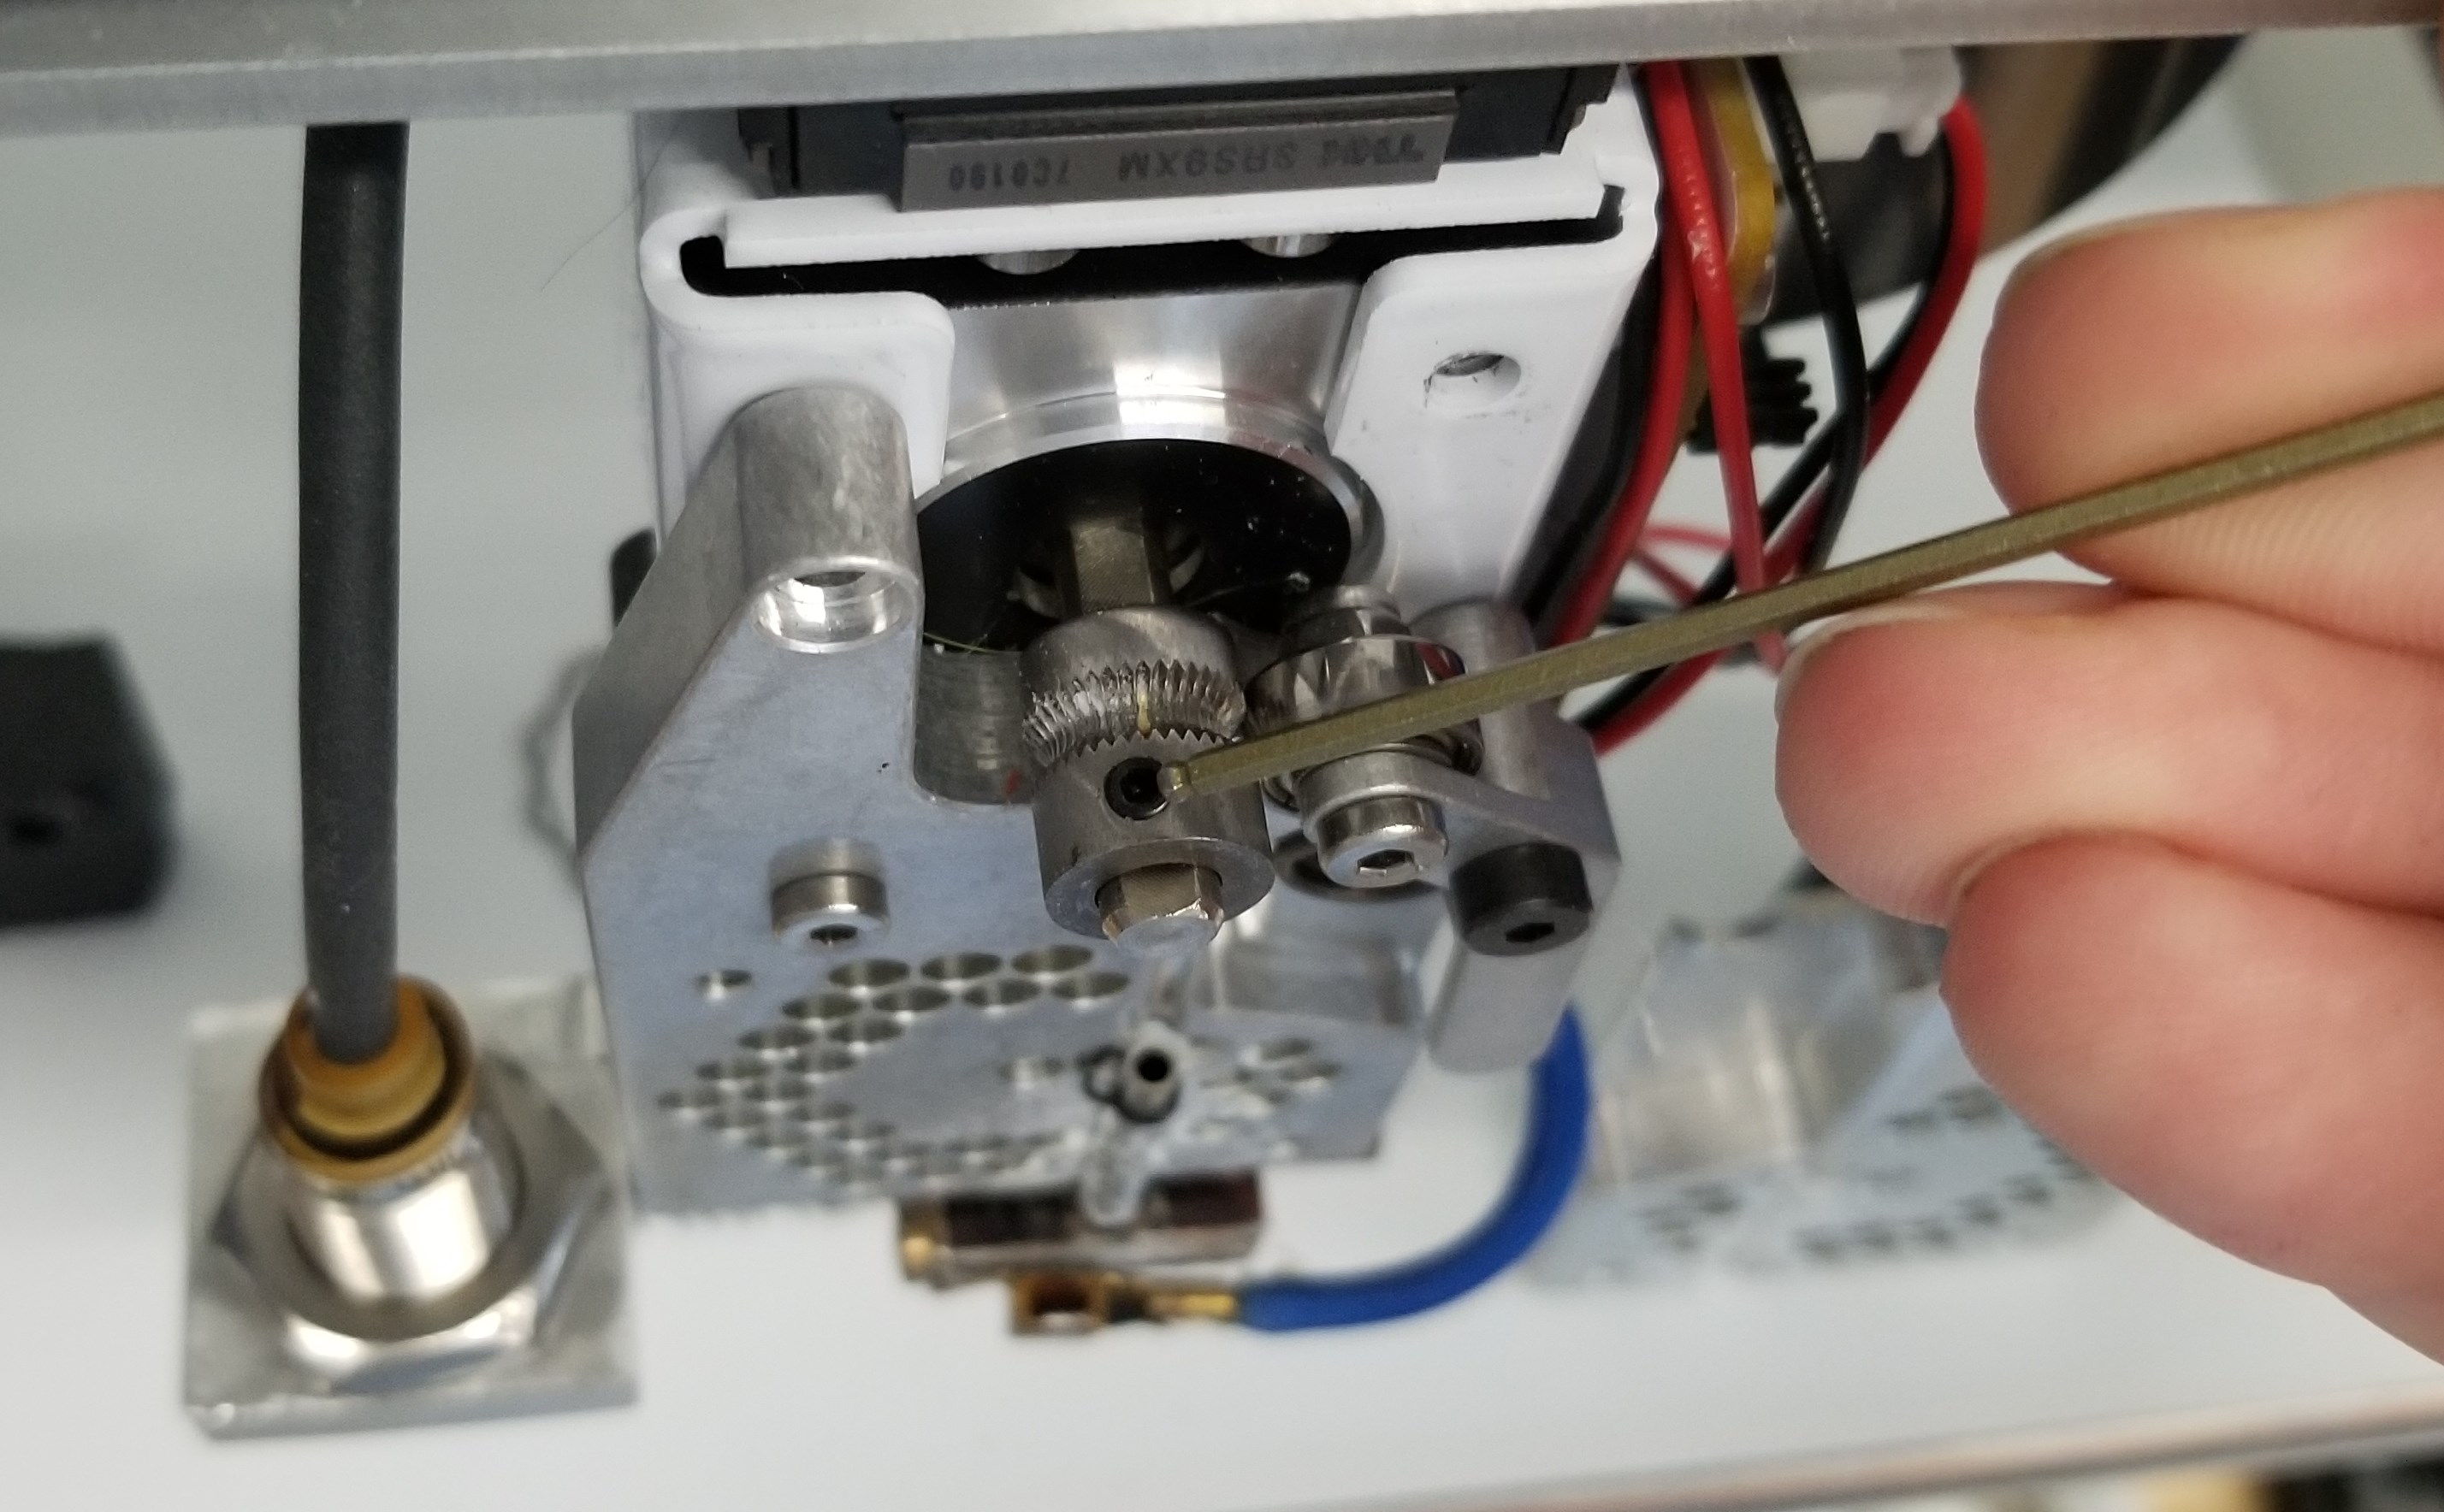
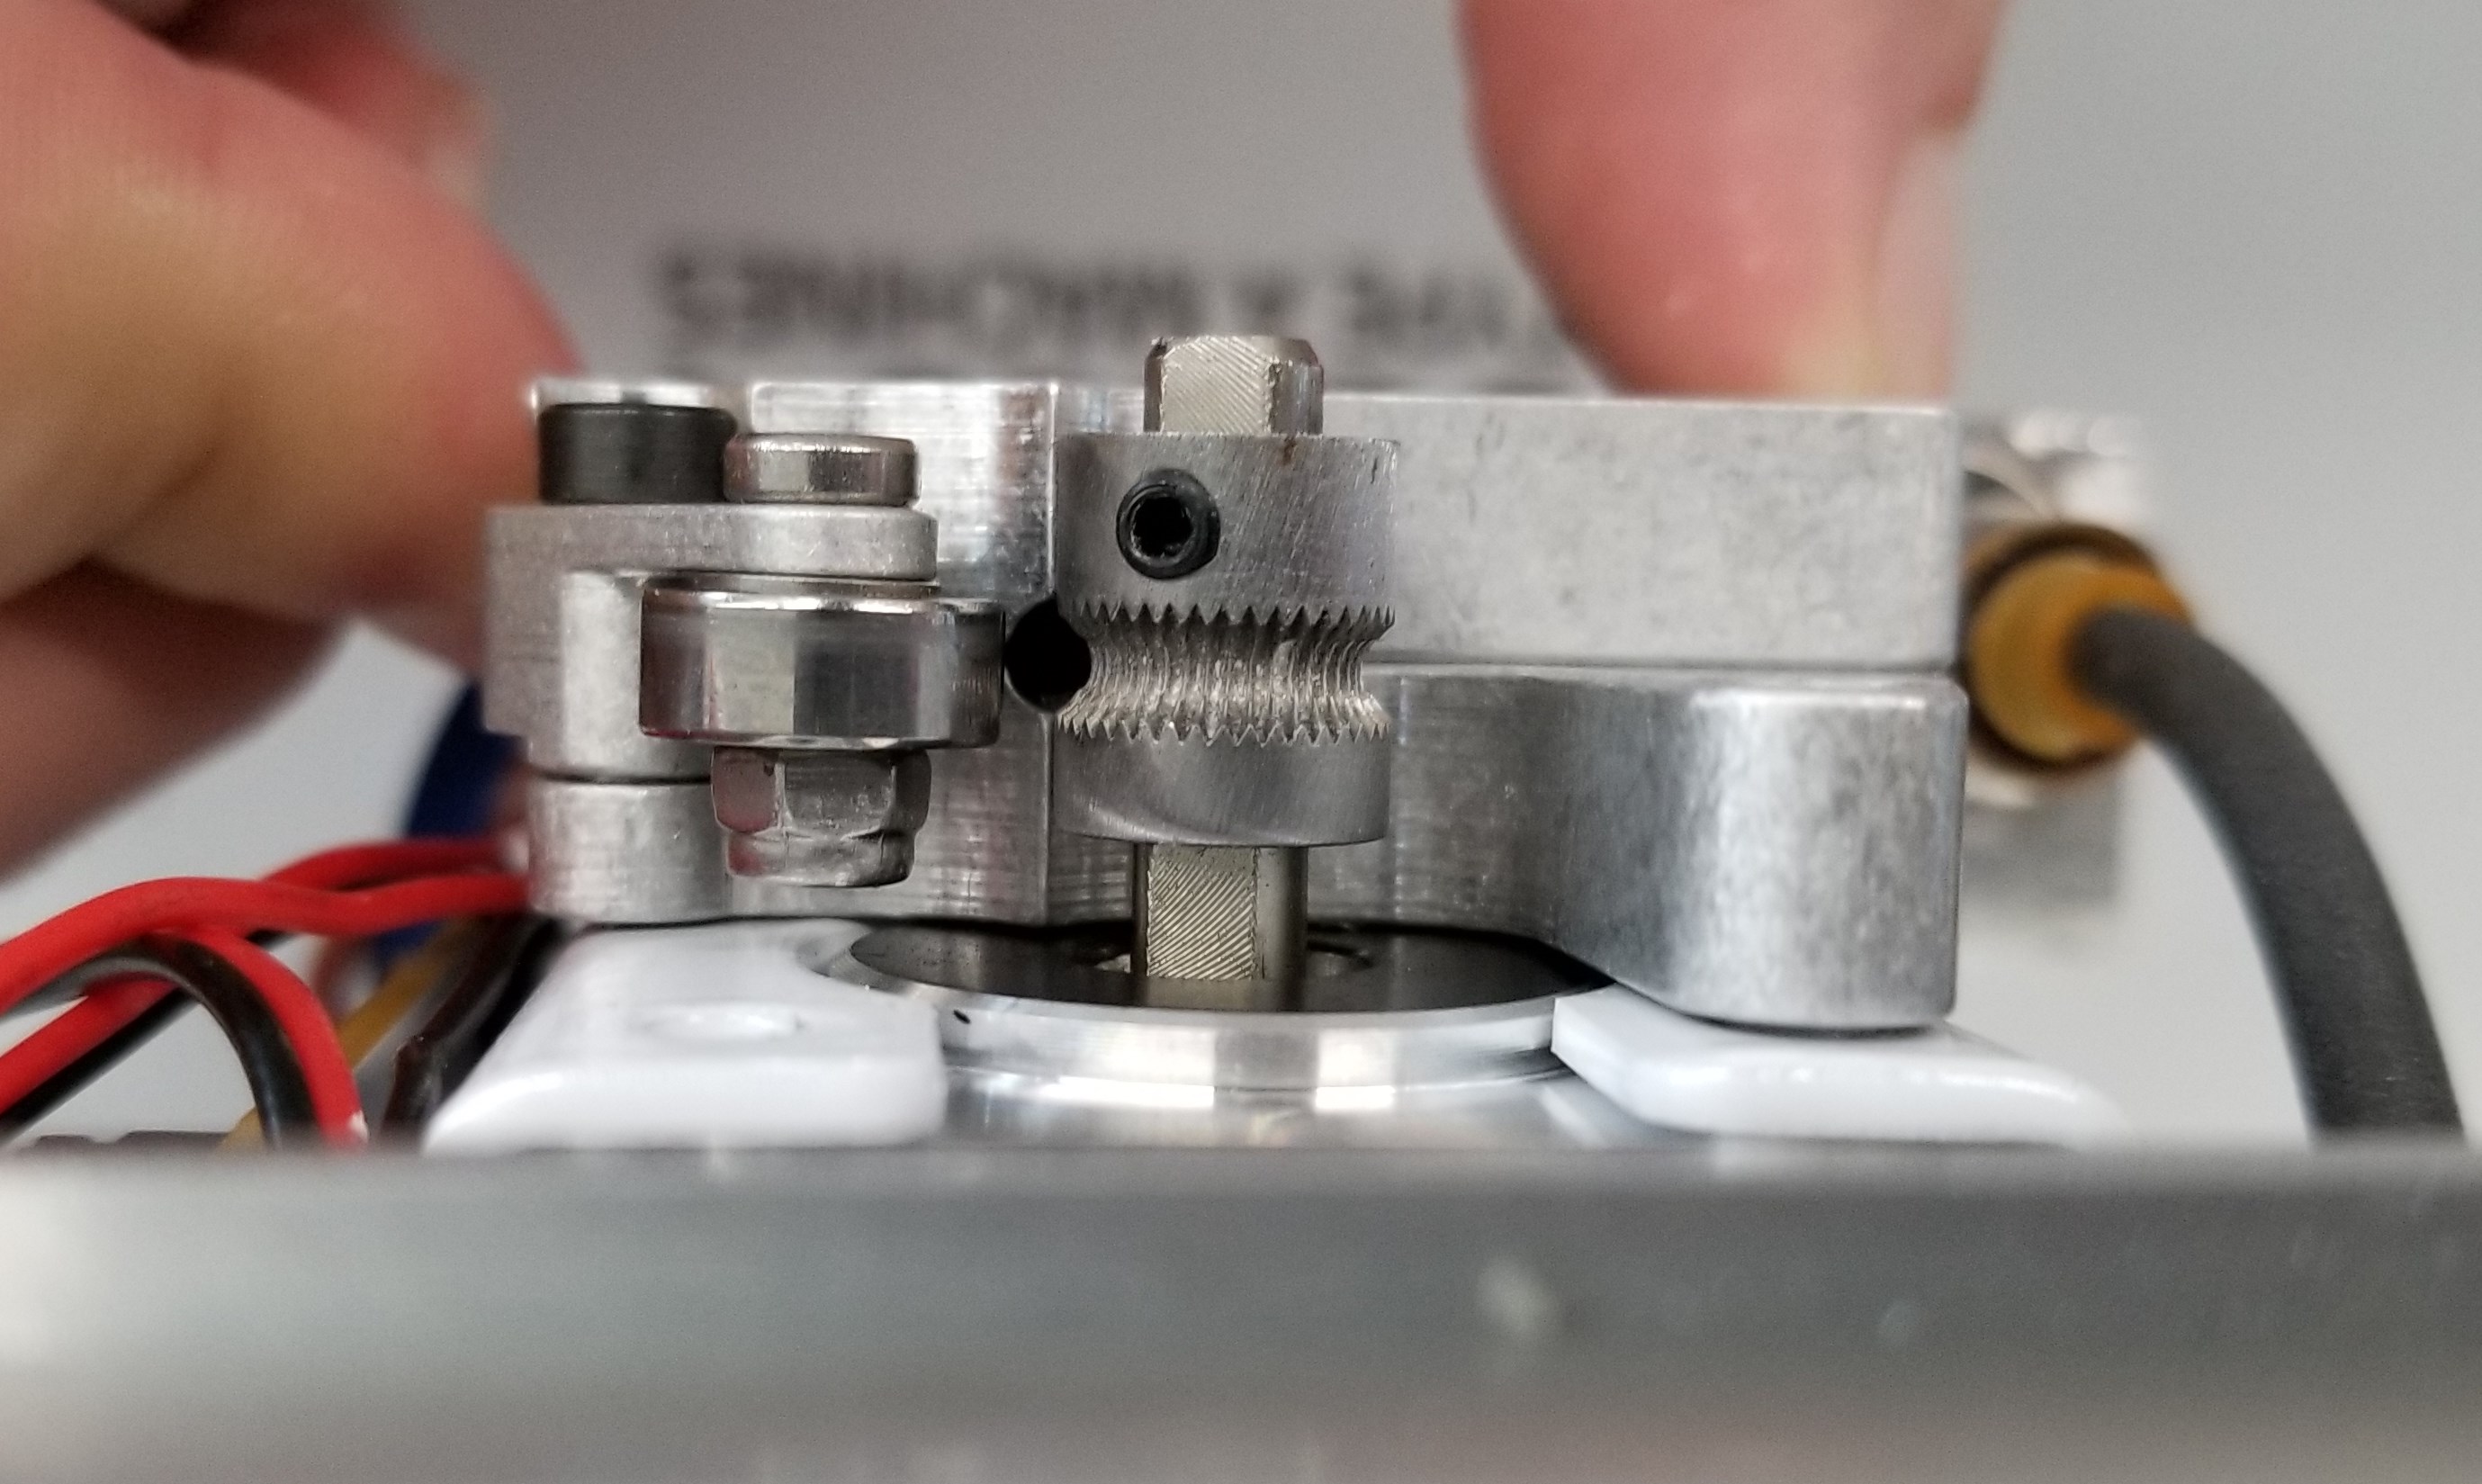
To remove the extruder gear, find the small set screw on the side of the gear. Be very careful in removing it, the threads can strip very easily. Also note how the setscrew is aligned with the flat edge of the motors axis.
Once removed, it can be easily cleaned with a plastic or copper brush. Do not brush to hard to avoid damaging the teeth.
When reinstalling the extruder gear, look from above and you should see a perfectly symmetrical hole between the gear and the heater block.
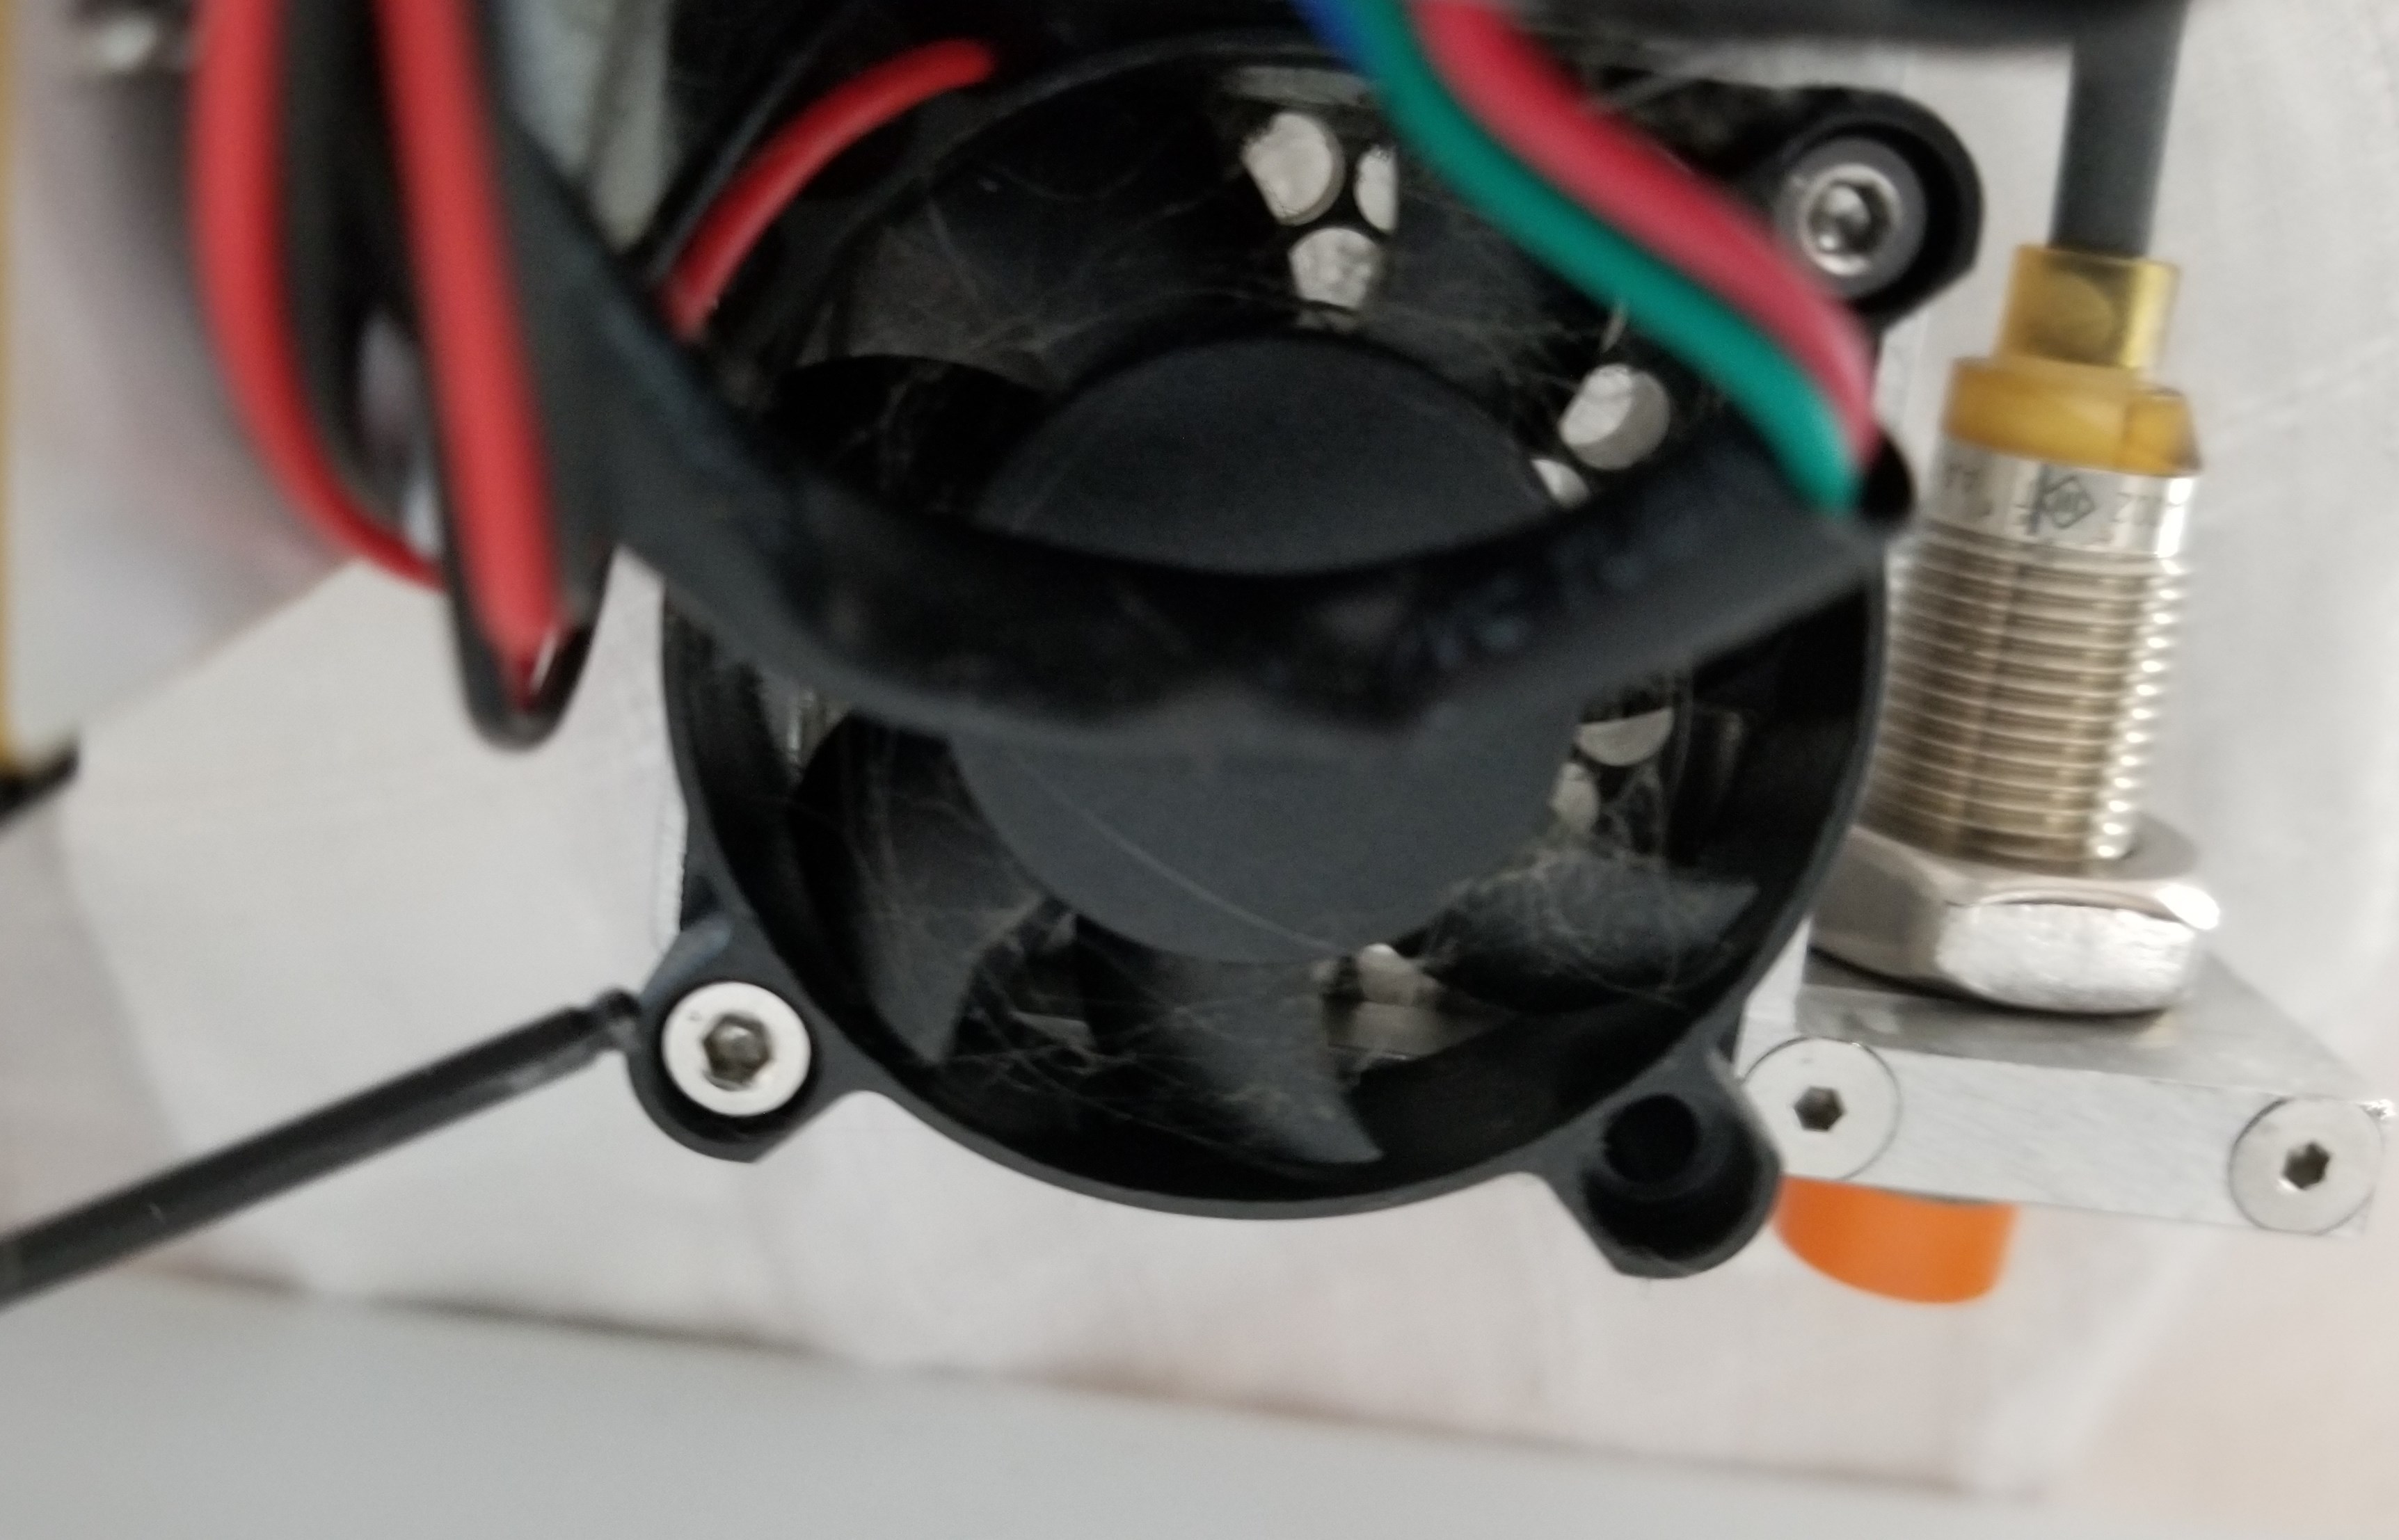
Now the hardest part, removing the two 3mx20 bolts holding the back fan and z-axis sensor to the heat block. While the fan is removed, it is recommended to clean any PLA strings from it.
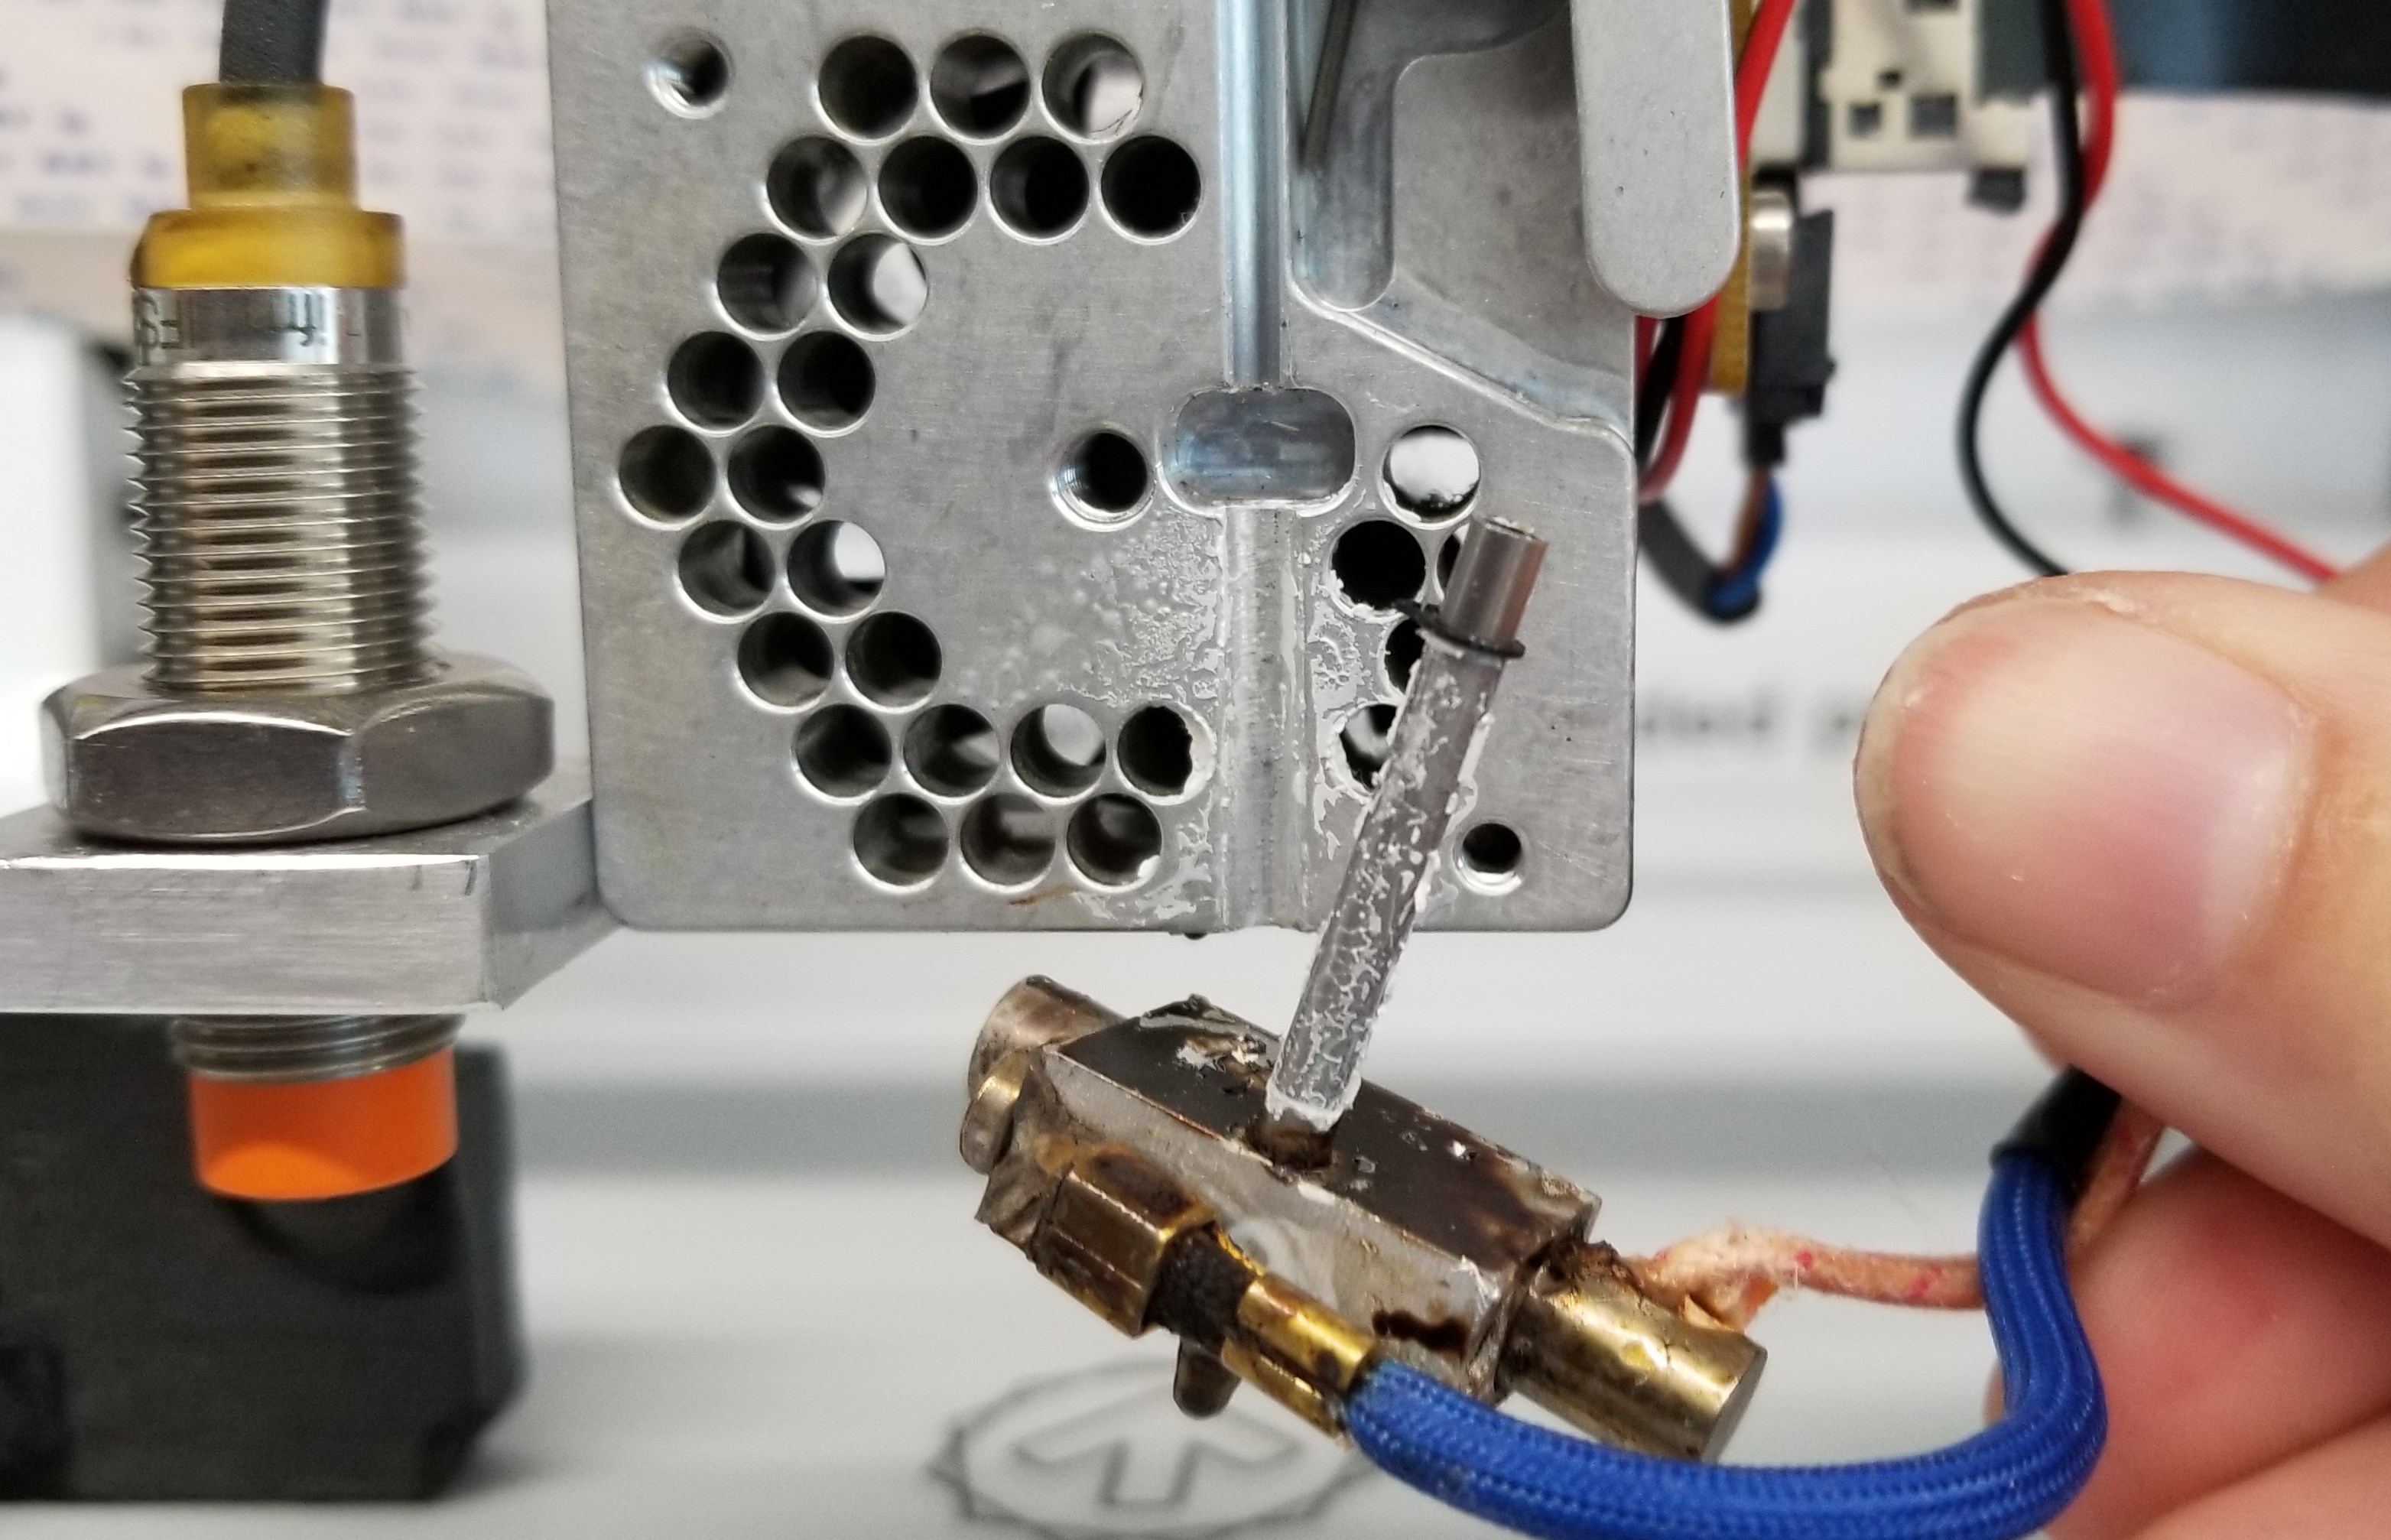
Unplug the nozzle from the circuit board on the side of the extruder and careful pull the nozzle away. Using a wipe, remove as much of the old thermal paste as possible.
How the heat block should look once it is fully cleaned.
Add new thermal paste to the groove below the small inset. DO NOT GET ANY IN THE UPPER GROOVE, it will cause clogging of the PLA filament.
An example of how the thermal paste should look after adding it
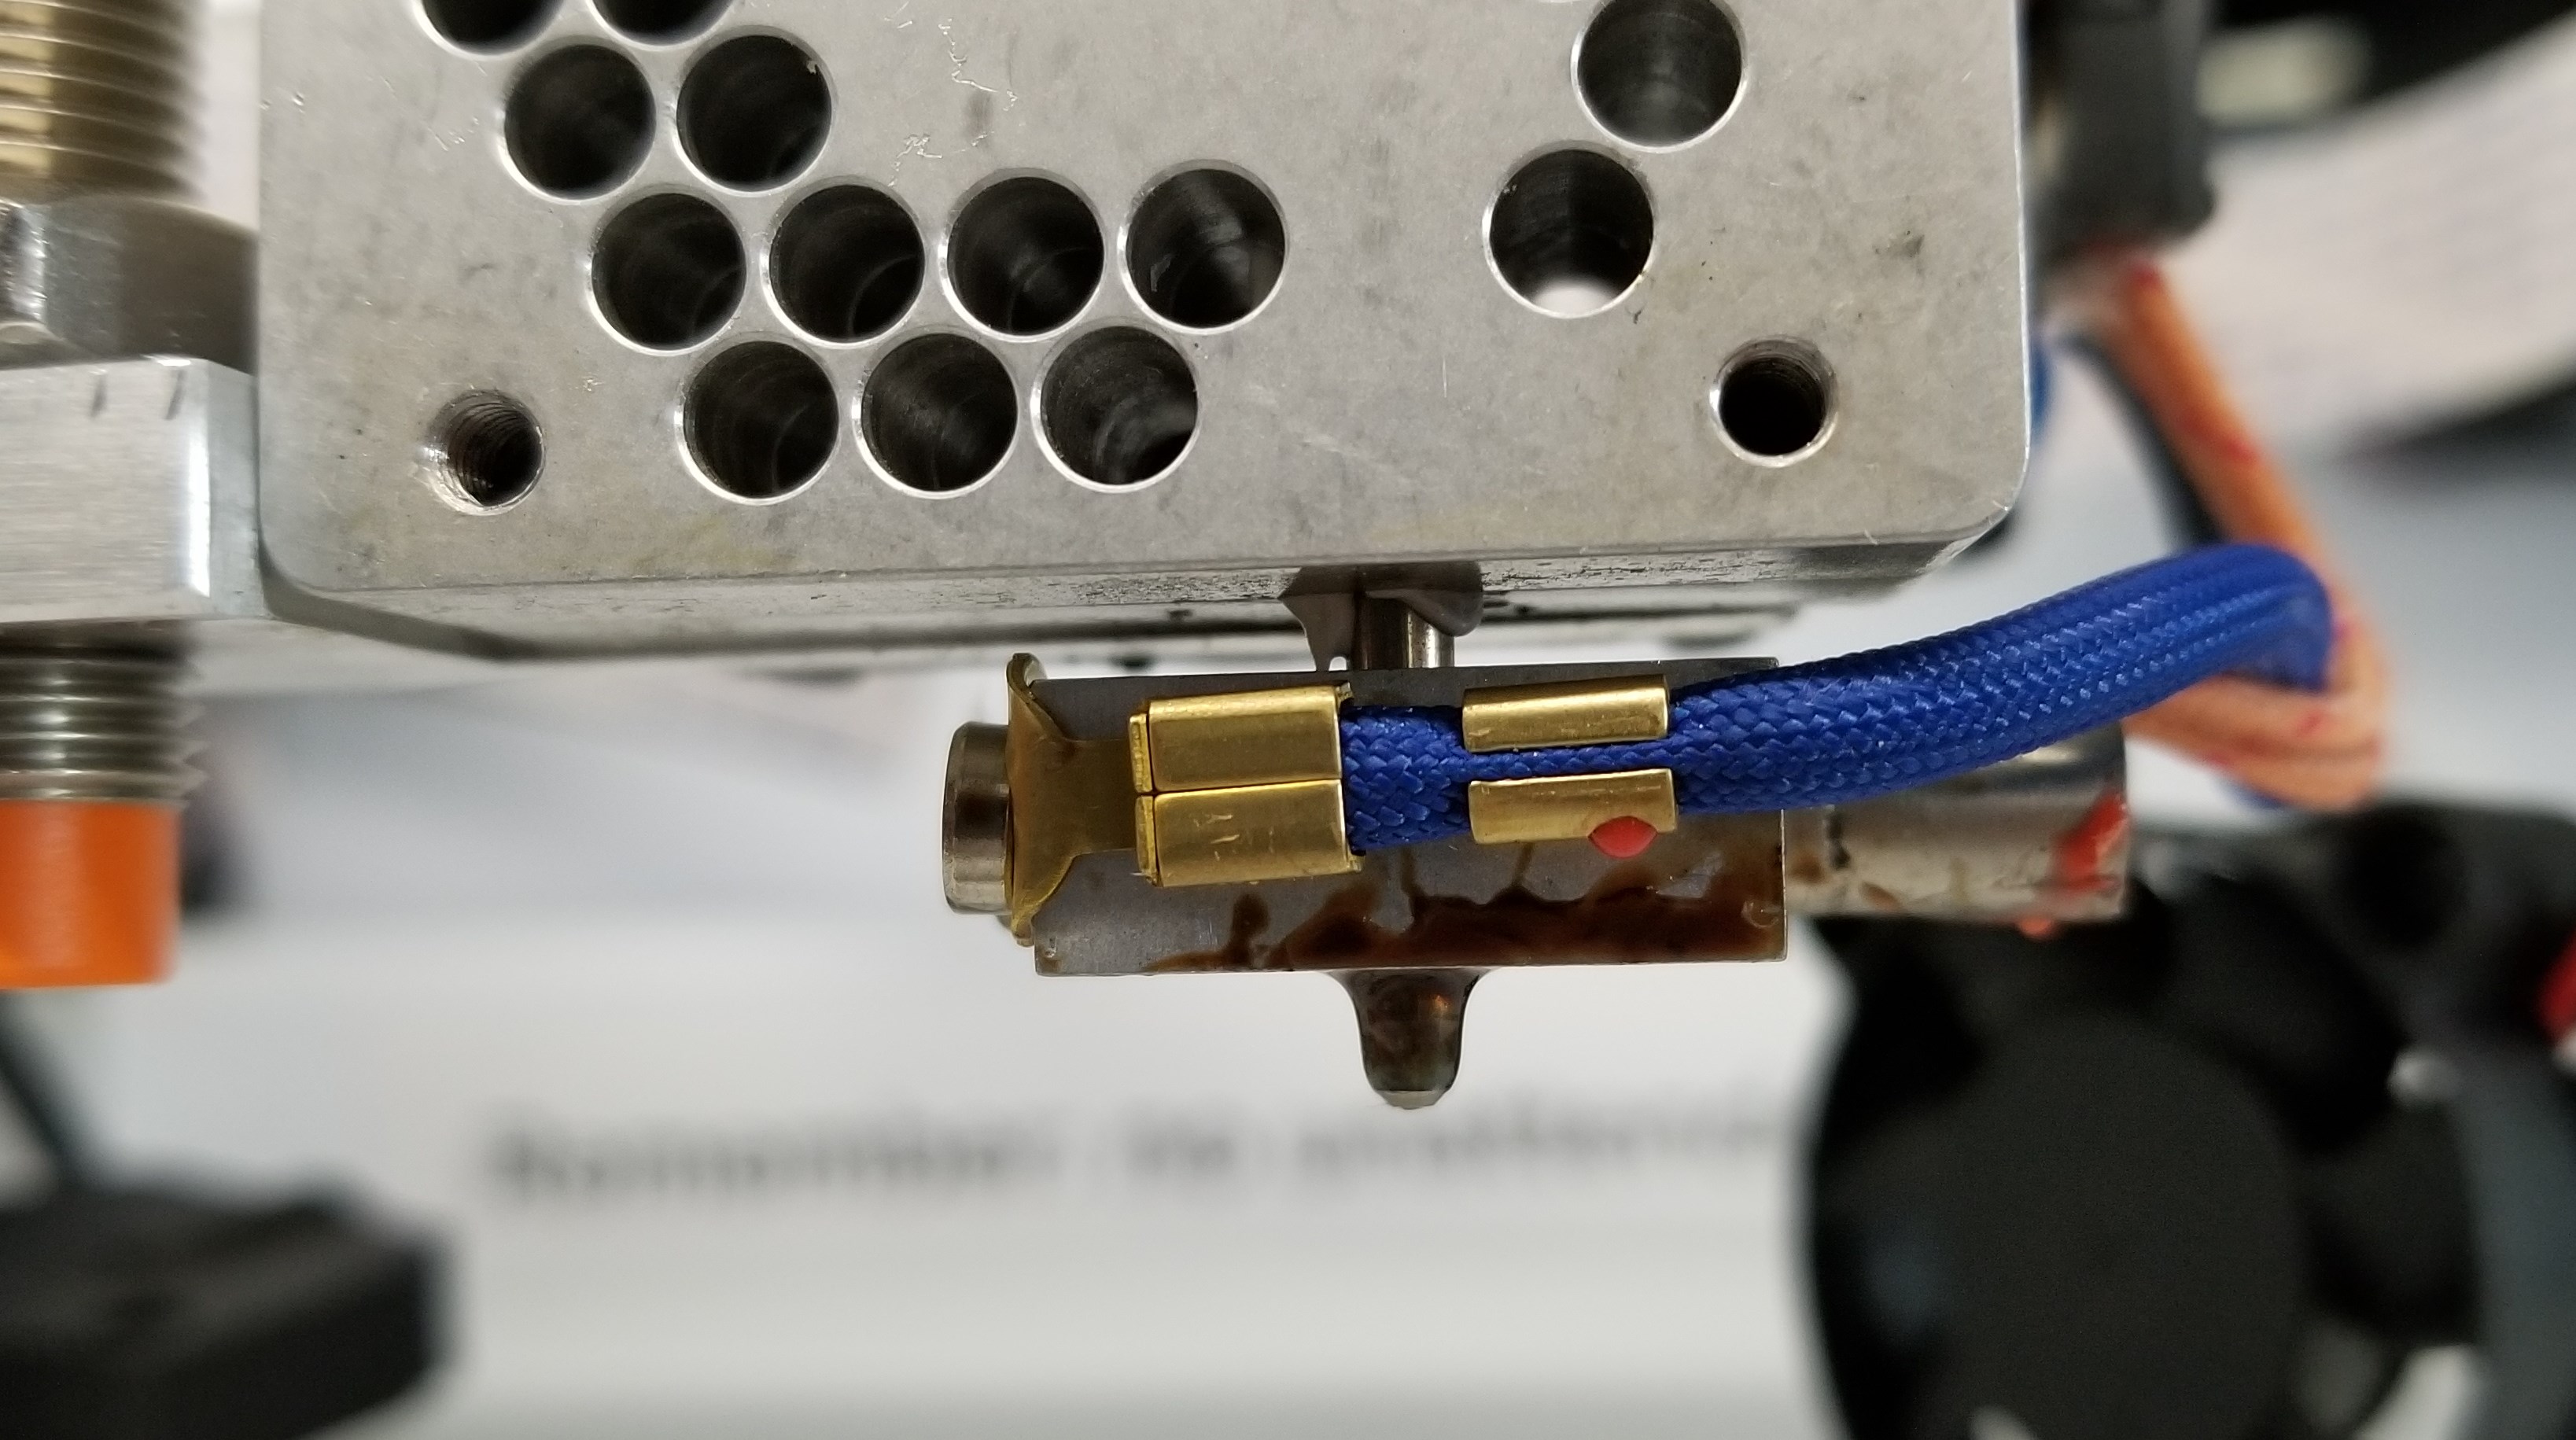
Reseat the new nozzle, it will have a small ring attached to it. The ring will fit inside the small inset of the heater block. Making sure that the end of the nozzle is flush with the upper groove.
Reattach the second piece of the heater block and check for any oozing. If you see any, just open it up again and wipe away the extra carefully.
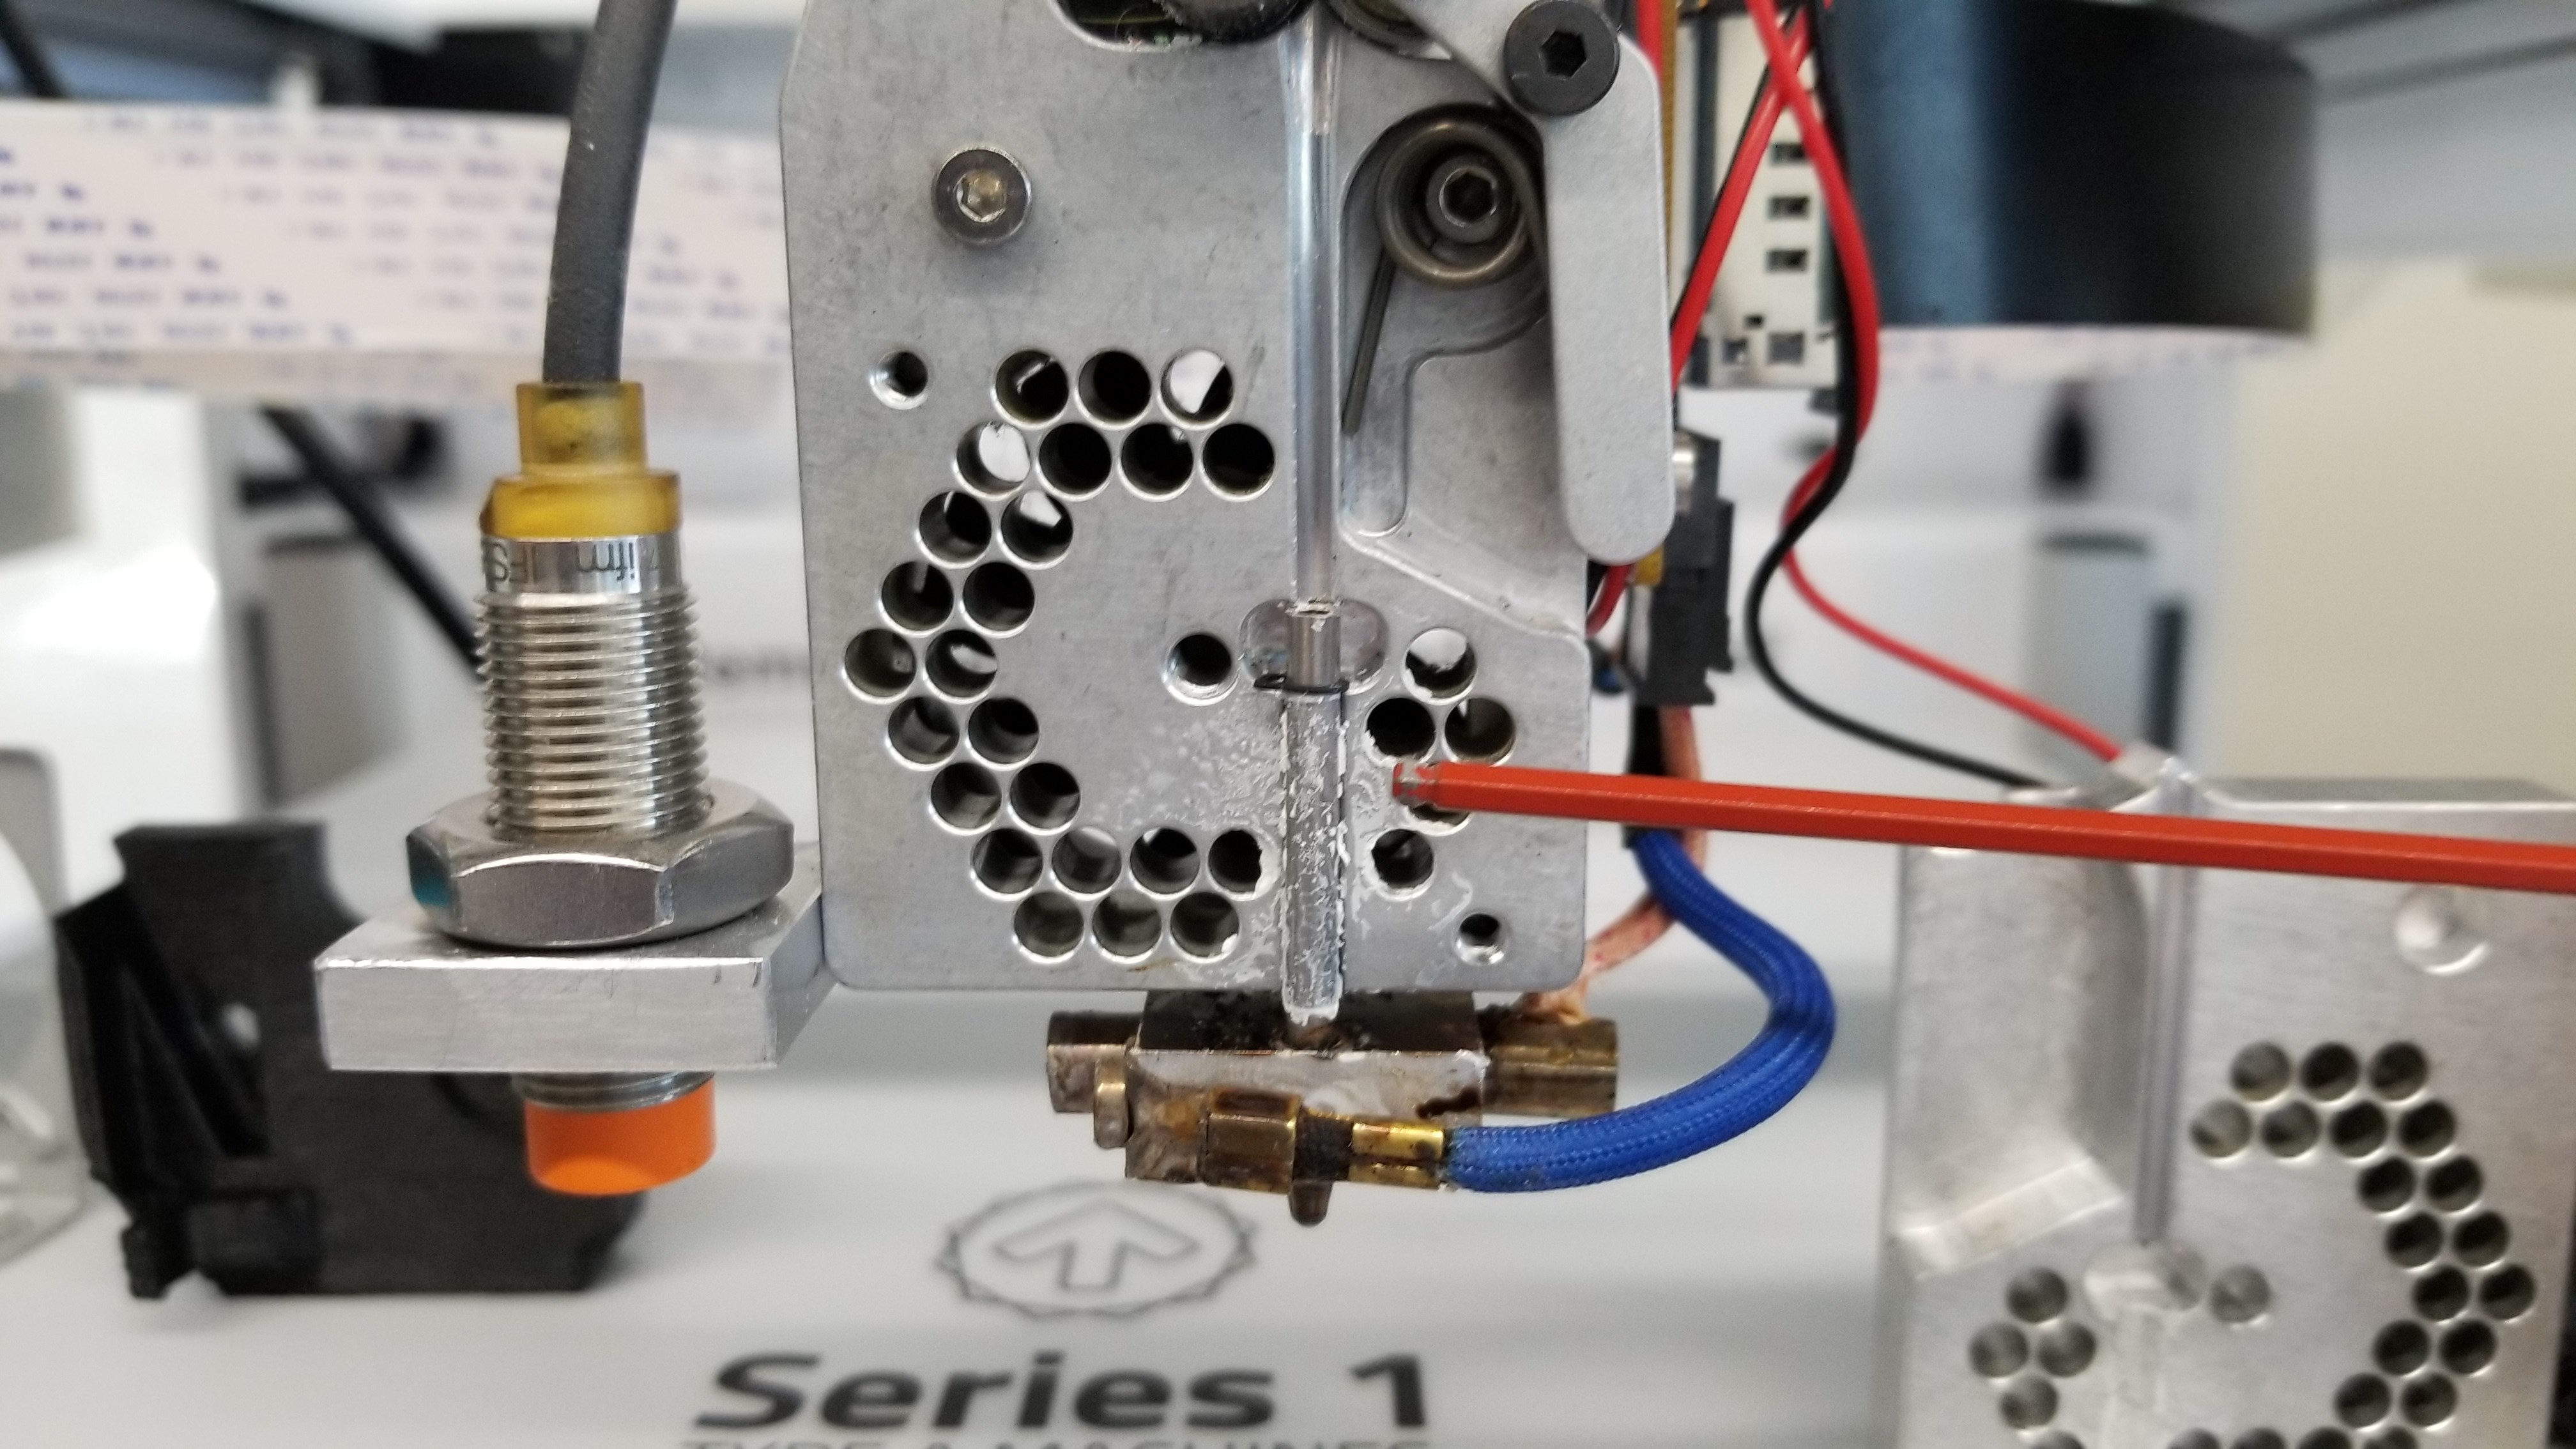
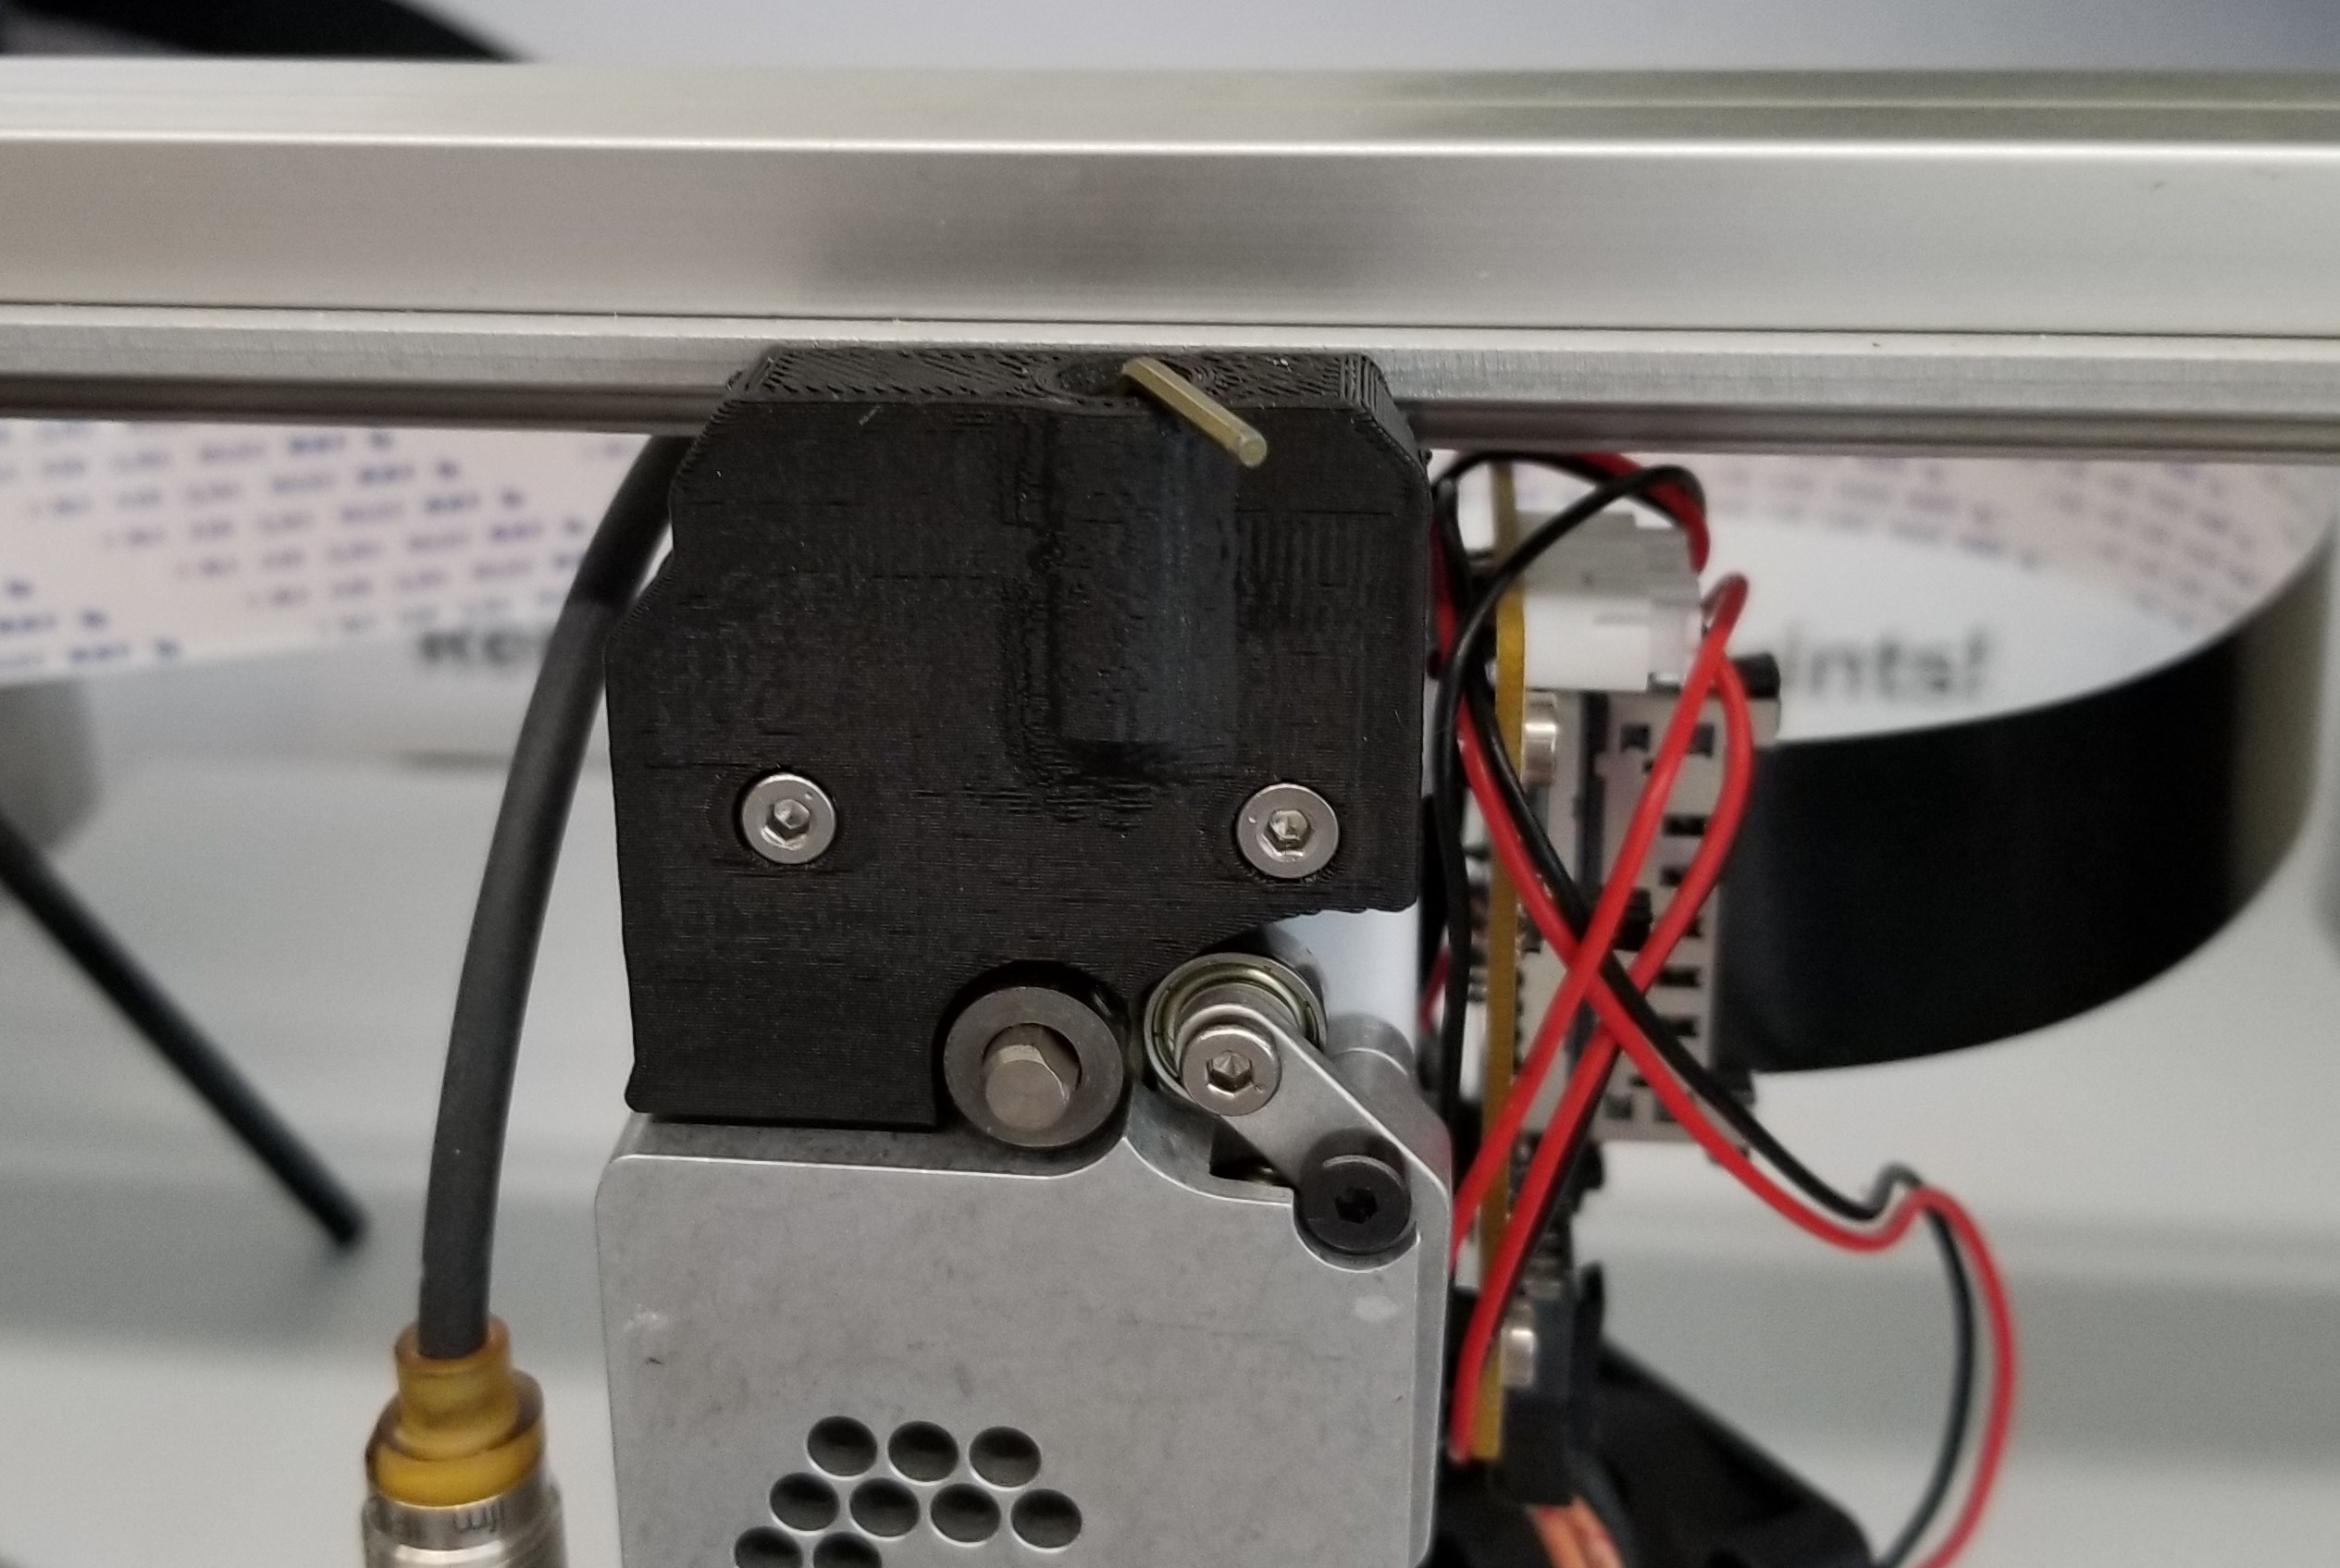
Reassemble the hot end in the reverse order that it was taken apart. Stop once the filament guide is reattached. Take the smallest allen wrench and drop it carefully into the guide hole with the guide arm open. If everything is assembled correctly, it will effortlessly fall all the way in. Remove it and continue to rest of the reassembly. If the allen wrench does not
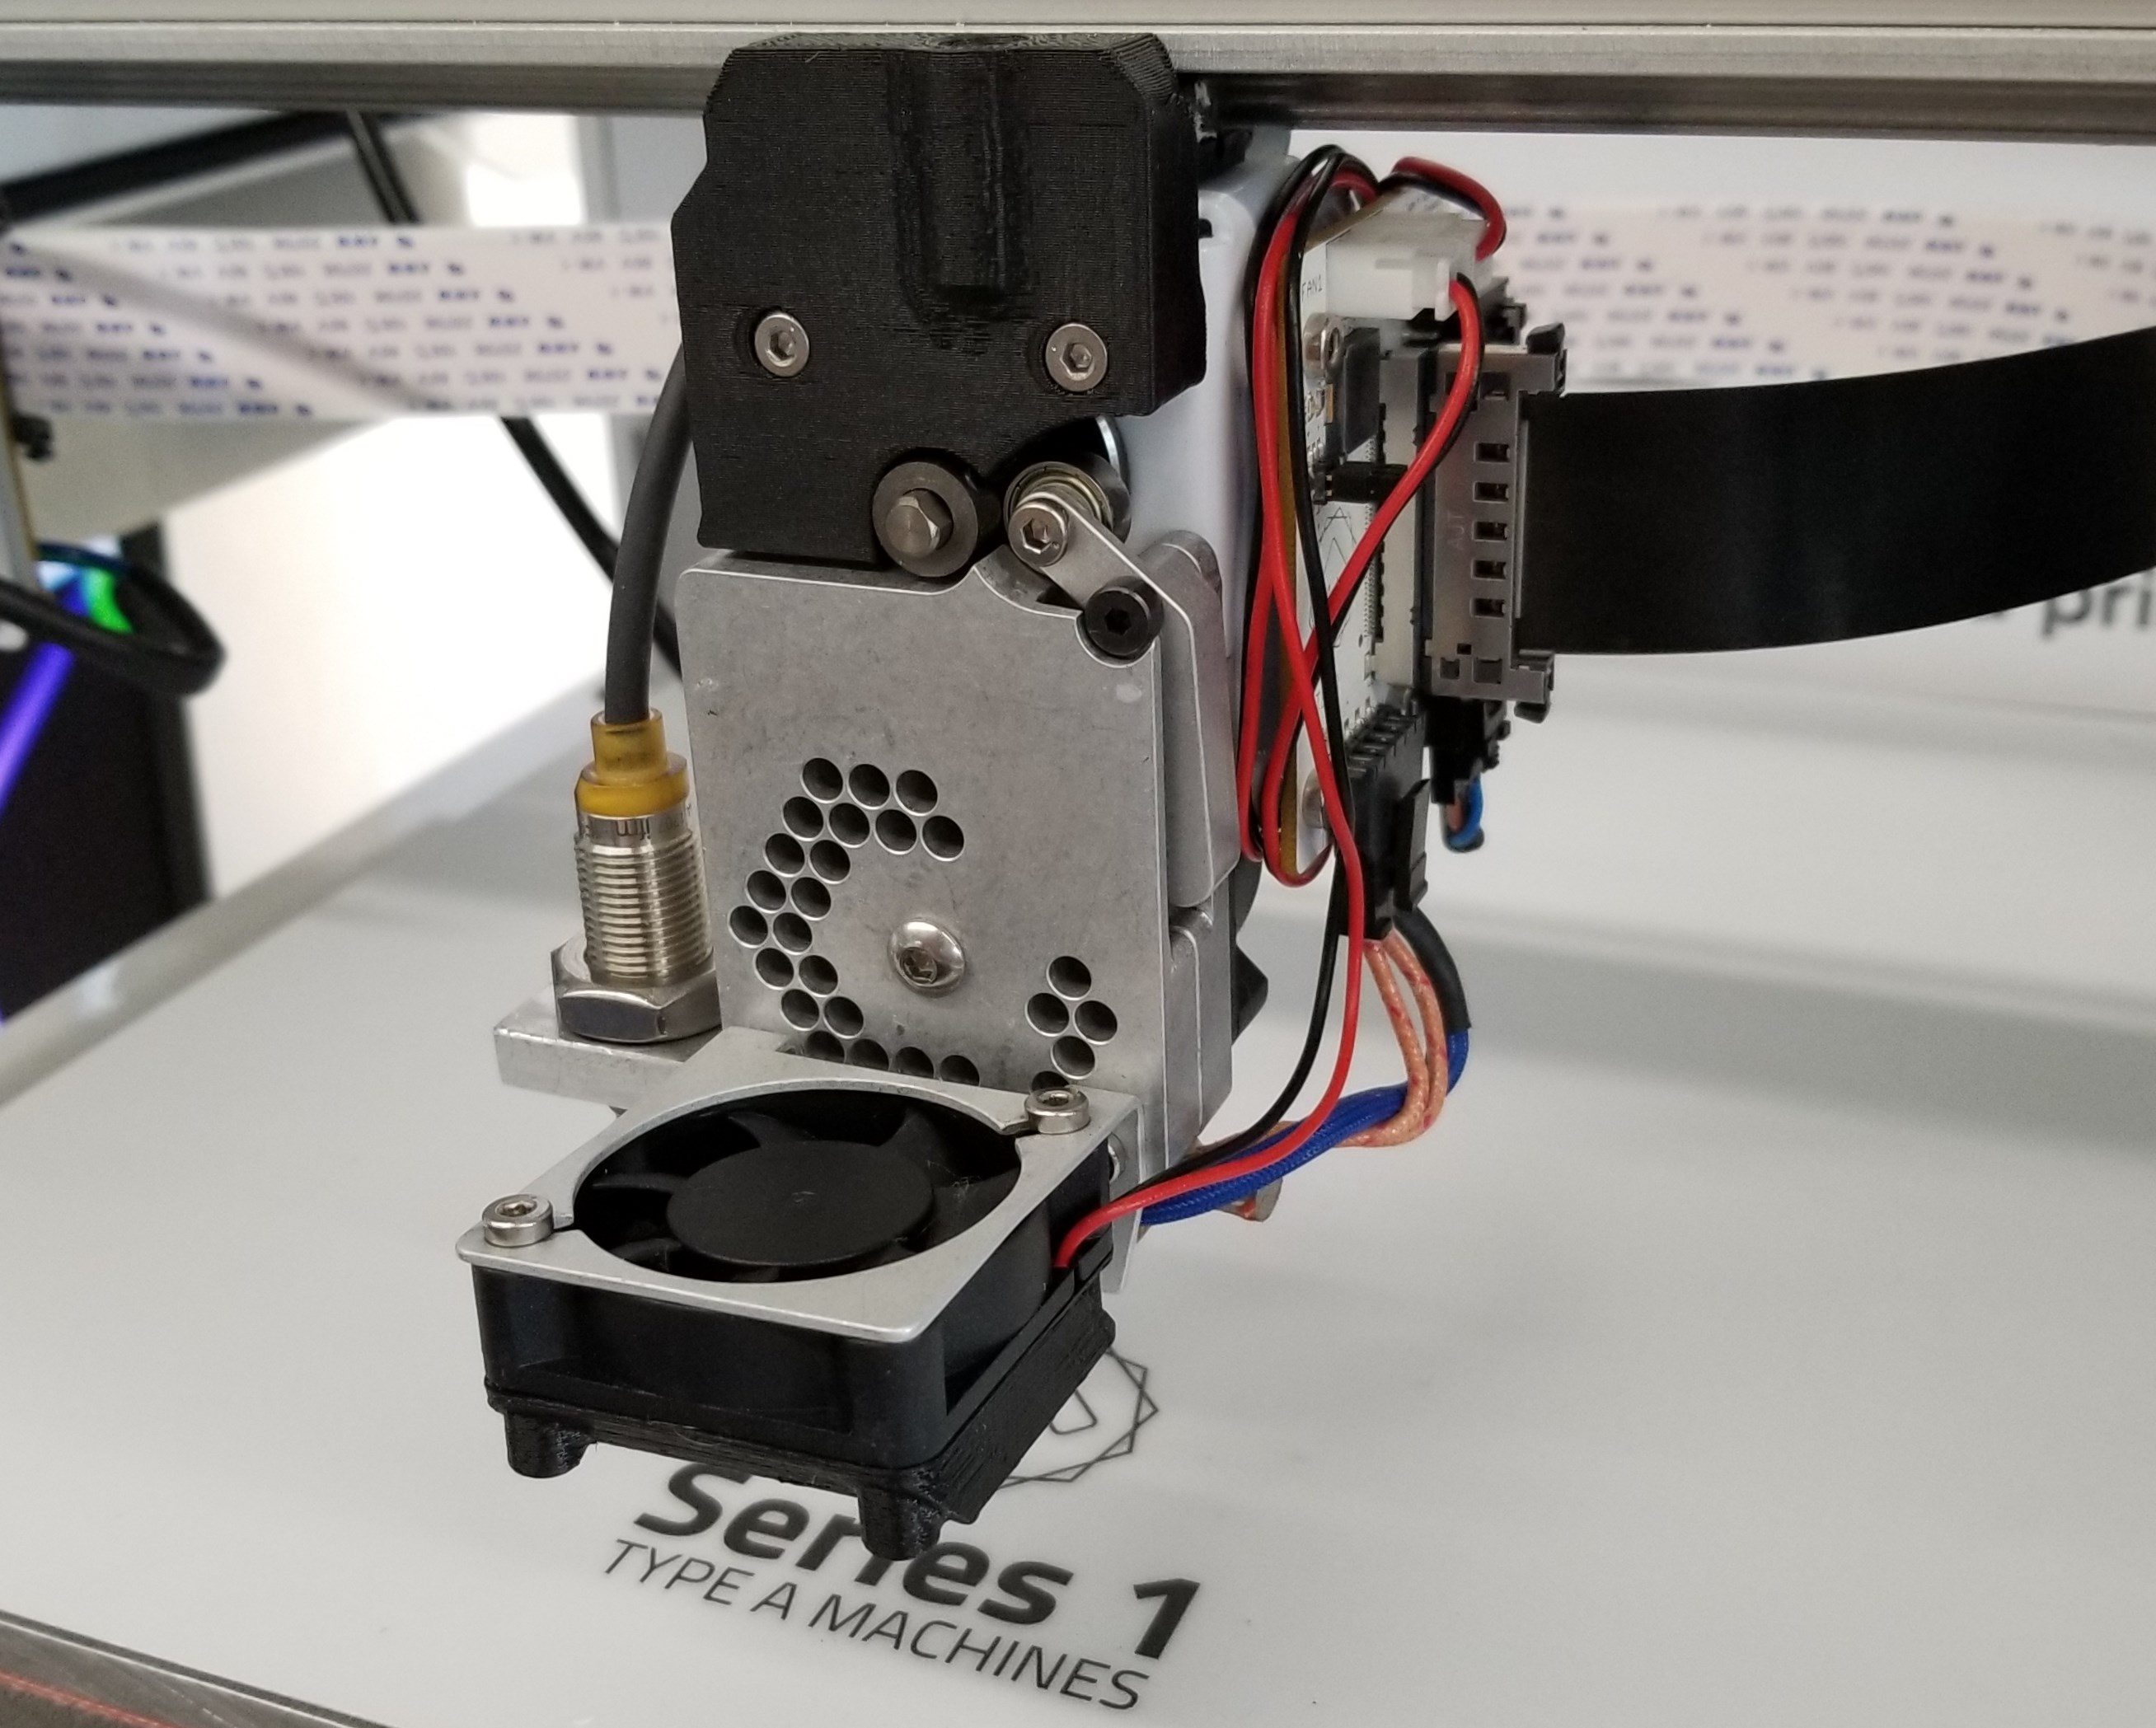
How the extruder should look once it is fully reassembled with the new nozzle.
- Plug in and turn on the machine
- Re-'Z' the machine
- Print out the calibration cube
