Difference between revisions of "Workshop: Advanced Computation (with Python)"
(→Useful NumPy Commands) (Tag: Visual edit) |
(Added numpy.concatenate and numpy.stack) (Tag: Visual edit) |
||
| Line 62: | Line 62: | ||
| − | === '''Building / Appending to Arrays''' === | + | ==='''Building / Appending to Arrays'''=== |
| − | ==== numpy.append ==== | + | ====numpy.append==== |
We can append a new row or column to our matrix using the “append” method. Referring to the documentation you can see that the append method takes 3 arguments. 2 ‘array-like’ variables and an integer. The first variable is the original matrix that you want to add to. The second variable is the row or column of information to append. Finally, the last variable refers to the axis in which the row should be added to the end of. Numpy differentiates between axes like this: | We can append a new row or column to our matrix using the “append” method. Referring to the documentation you can see that the append method takes 3 arguments. 2 ‘array-like’ variables and an integer. The first variable is the original matrix that you want to add to. The second variable is the row or column of information to append. Finally, the last variable refers to the axis in which the row should be added to the end of. Numpy differentiates between axes like this: | ||
| − | * 0 refers to X | + | *0 refers to X |
| − | * 1 refers to Y | + | *1 refers to Y |
| − | * 2 refers to Z | + | *2 refers to Z |
| − | * 3+ refers to additional arbitrary axes | + | *3+ refers to additional arbitrary axes |
| + | |||
| + | ==== numpy.concatenate ==== | ||
| + | Maybe instead of appending data to your array line-by-line you want to take data from multiple arrays and add them to the end of an existing axis. In this case you should use the concatenate method. It takes 2 main arguments; a list of arrays to concatenate and an integer to differentiate which axis it should be appended to. '''It is important to note that this command only works if the arrays are the same size EXCEPT in the axis which they are being concatenated to.''' | ||
==== numpy.stack ==== | ==== numpy.stack ==== | ||
''(See also: [https://docs.scipy.org/doc/numpy/reference/generated/numpy.dstack.html?highlight=dstack#numpy.dstack numpy.dstack], [https://docs.scipy.org/doc/numpy/reference/generated/numpy.hstack.html?highlight=hstack#numpy.hstack numpy.hstack], [https://docs.scipy.org/doc/numpy/reference/generated/numpy.vstack.html?highlight=vstack#numpy.vstack numpy.vstack])'' | ''(See also: [https://docs.scipy.org/doc/numpy/reference/generated/numpy.dstack.html?highlight=dstack#numpy.dstack numpy.dstack], [https://docs.scipy.org/doc/numpy/reference/generated/numpy.hstack.html?highlight=hstack#numpy.hstack numpy.hstack], [https://docs.scipy.org/doc/numpy/reference/generated/numpy.vstack.html?highlight=vstack#numpy.vstack numpy.vstack])'' | ||
| − | + | Let’s imagine you have many arrays of data and you want to stack them onto of each other. (Example: You have x,y arrays of light intensity on different materials like plastic, wood and glass. You want to create a new matrix with size x,y,z where z represents different materials.) This is the perfect use for numpy.stack. The command takes two main arguments; a list of arrays to stack ('''It is important to note that the stack command only works for array with the same shape''') and an integer representing the new axis where the stacked arrays will grow. <br /> | |
Revision as of 22:28, 3 October 2019
Contents
Modules and Packages
Modules and packages are a feature of Python wherein, you can import subtasks (or modules) into your code. Using modules and packages leads to cleaner code because the files you create are less verbose.
Modules
Suppose you write an algorithm called sort.py which sorts a given dataset alphanumerically. Anytime you write a python script where you want to utilize this alphanumeric sorting function you can import the sort.py script into your existing code as a module with the following line:
import sort
Packages
Some coders write large modules and publish them for public use. We call these open source modules “packages”. SciPy, NumPy and matplotlib are all examples of popular python packages. We import them into our code with the same syntax as with modules. We can create a nickname for each package, simply “import [packagename] as [nickname]”.
import numpy as np
import scipy
import matplotlib as plt
Install Some Packages
For this tutorial we will be installing three packages. Please follow along.
- For Windows - Open command prompt (go to the search bar, type “cmd” then enter).
- For Mac - Open terminal
Now that you are in either command prompt or terminal, we are going to install NumPy, SciPy, and Matplotlib. Type in the following commands one-by-one, waiting for them to execute completely before entering the next one.
python -m pip install numpy
python -m pip install scipy
python -m pip install matplotlib
So what are these packages?
- NumPy - This package gives you methods allow you to make arrays/matrices. It makes representing, analyzing and computing data easy.
- SciPy - This package gives you further scientific computational resources including functions for optimization, linear algebra, FFT, signal and image processing and much more.
- Matplotlib - This is a plotting library which gives you an easy way to visually represent data sets.
Using Packages
When you decide that you want to implement a package it is important to refer to the package’s official documentation. The documentation is a guide which can show you the capabilities, limitations and implementation of the package. The documentation for SciPy, NumPy and Matplotlib can be found under “Other Educational Resources for Python” at the end of this workshop.
All methods and functions which come along with the package can be called by their nickname (or the package name if no nickname was assigned in the import command).
Useful NumPy Commands
Creating Arrays
numpy.zeros
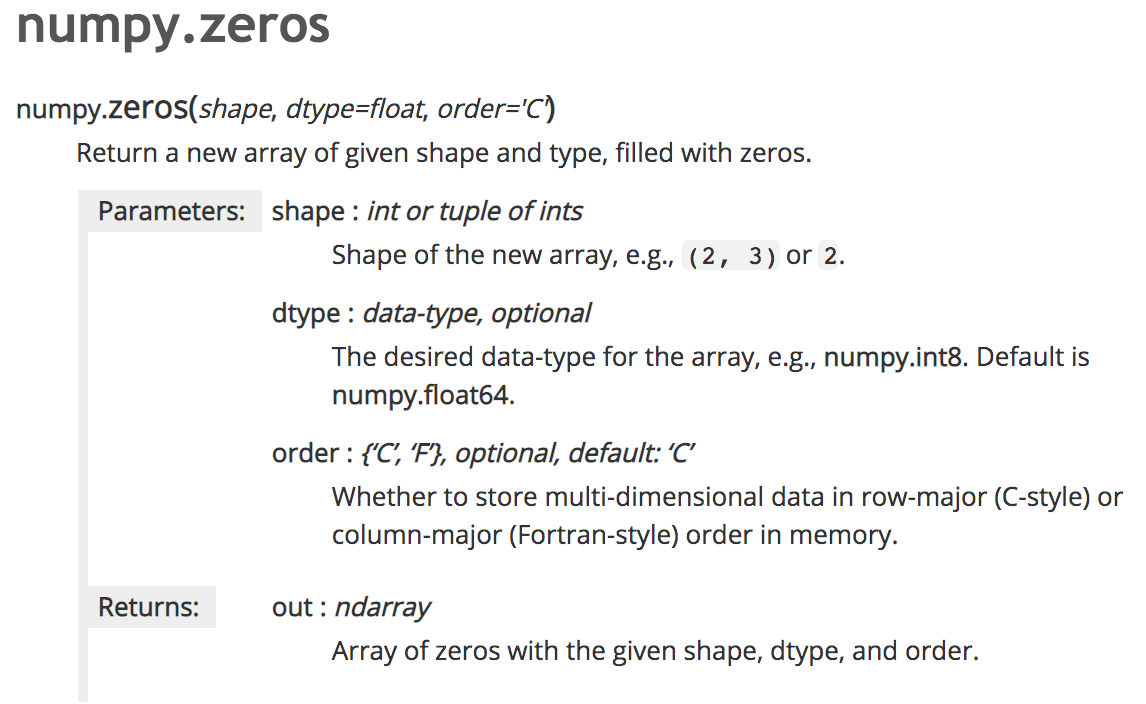
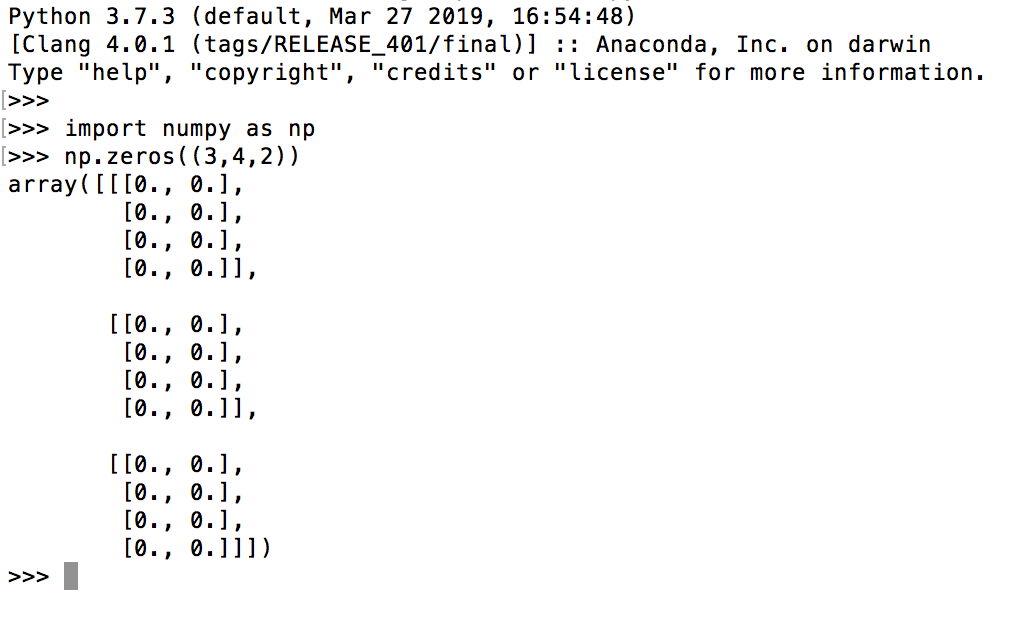
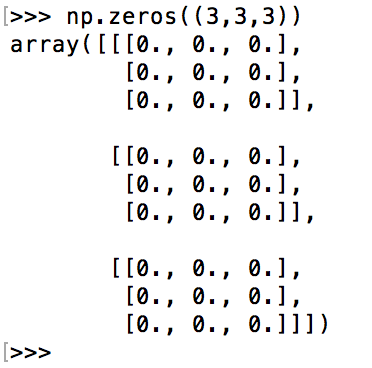
In numpy we can create an array in many different ways. Firstly I will show you how to create a matrix to any shape with every value set to 0. For this case where we want a blank array we can use the zeros method. Referring to the NumPy documentation, we find that the syntax is simply numpy.zeros((shape)) where shape is a shape enclosed by parentheses with each axis separated by a comma.
numpy.matrix
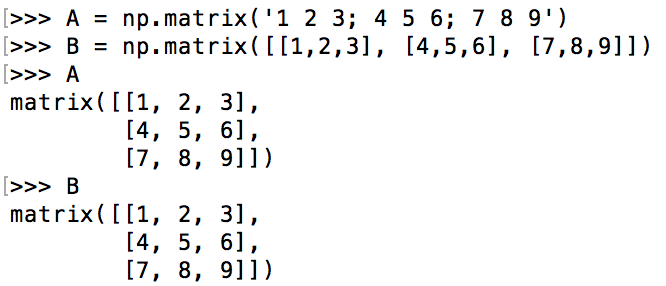
We can also use numpy.matrix if we know the values we want in our array. Again, referring to the NumPy documentation, we see that there are actually two different ways we can represent arrays in NumPy. One syntax uses spaces and semicolons to separate elements. Another syntax uses commas and square brackets to separate elements.
Building / Appending to Arrays
numpy.append
We can append a new row or column to our matrix using the “append” method. Referring to the documentation you can see that the append method takes 3 arguments. 2 ‘array-like’ variables and an integer. The first variable is the original matrix that you want to add to. The second variable is the row or column of information to append. Finally, the last variable refers to the axis in which the row should be added to the end of. Numpy differentiates between axes like this:
- 0 refers to X
- 1 refers to Y
- 2 refers to Z
- 3+ refers to additional arbitrary axes
numpy.concatenate
Maybe instead of appending data to your array line-by-line you want to take data from multiple arrays and add them to the end of an existing axis. In this case you should use the concatenate method. It takes 2 main arguments; a list of arrays to concatenate and an integer to differentiate which axis it should be appended to. It is important to note that this command only works if the arrays are the same size EXCEPT in the axis which they are being concatenated to.
numpy.stack
(See also: numpy.dstack, numpy.hstack, numpy.vstack)
Let’s imagine you have many arrays of data and you want to stack them onto of each other. (Example: You have x,y arrays of light intensity on different materials like plastic, wood and glass. You want to create a new matrix with size x,y,z where z represents different materials.) This is the perfect use for numpy.stack. The command takes two main arguments; a list of arrays to stack (It is important to note that the stack command only works for array with the same shape) and an integer representing the new axis where the stacked arrays will grow.


